 So, what even are all of these?
 | Support on Patreon | GitHub | Discord | Changeslog | Experimental
Paketti is a workflow expansion layer for Renoise. It closes the gap between the idea you have and the sound that comes out. Built by a musician making electronic music in trackers since 1994, releasing it as Lackluster since 1997 — every feature exists because something slowed me down while I was making a record, and I couldn't keep working until I'd fixed it. The design principle is one sentence: Paketti is about saving clicks.
Paketti is the Renoise Enhancement Suite (RES) y'all been looking for.
It touches on every single area of Renoise.
If you've used any single area of Renoise, at all, you'll find something new added by Paketti into the mix for that layer, frame or view.
This means Paketti modifies the Pattern Editor, Mixer, Pattern Matrix, Pattern Sequencer, Phrase Editor, Sample Editor, Instrument Box, Sample FX Chains, Sample Modulation Chains, Automation, Instrument Settings, Sample Settings, Device & Sample Management, Theme Management, Plugin Instruments, Plugin Devices, Sample Navigator, Sample Mappings, MIDI Controls & MIDI Mappings.. And if that isn't enough, Paketti also introduces a multitude of file formats for importing from and exporting to.
Prior Art is a big deal (see Roadmap for an explanation as to what I mean by that) - There are features influenced and inspired by:
People often write me encouraging little snippets of text which I recycle into testimonials. Here are a few of them.
These features exist because of supporters who believe in making Renoise better. Join them →
Paketti is free. Always will be. But building it isn't.
Every feature you see here—thousands of shortcuts, hundreds of dialogs, daily updates—comes from hundreds of hours of development time.
When you become a Patreon supporter:
Join Patreon to keep Paketti growing →
Where is Paketti going? Multiple directions. Very quickly.
But here's the honest truth: I can only work on Paketti in the gaps between paying work. Some months that's 40 hours. Some months it's 4.
Patreon supporters directly buy me time. More supporters = more hours on Paketti = faster features for everyone.
Right now, there are features blocked by API limitations and dozens of user-requested features waiting in the queue. The pace they get done depends on whether I'm doing Paketti or client work this month.
But, ultimately, what does that even mean?
It means, that every time I'm using Renoise, I'm thinking of how the workflow could be made faster. When I make a remix, or a track for a compilation, or just experiment, or play a live gig, or anything else, I'm constantly thinking, is this as fast as it could be? Could it be made faster, could it be made to work in a more intuitive way, a better way, could I save on some clicks, or manual repetition, and instead have the scripts in Paketti do some of the work for me.
You figure largely into this. When I do Paketti 1-on-1 calls with people over Google Meet or Discord , or just talk the features out on Twitch, I'm always discovering something. Just describing a new feature, might elicit a question, or a "what if..?" - or simply a realization, that helps one understand what the next step might be.
That's why you posting tickets to GitHub (*), asking me questions on Discord, or posting on the Renoise Forum - is a great way of getting the ol' noodle ticking. When you come in with an idea, a question, a problem, or a "does Paketti have..?" type thing, it really helps me. If you show me a video of how you use Paketti / Renoise, or an age-old old-school method that you've used for decades - I can try and wrap my mind around it and then work out how it could be improved or tweaked or, Pakettified, let's put it like that.
(*) You know, Paketti was pretty much lying dormant from 2014 onwards to around 2024 - it had helped me do what I wanted to do with Renoise - and I never got around to creating the valid and fully functional Renoise v3.0 version of Paketti - despite multiple promises and tries at it - up until I suddenly noticed that there were tickets created to my GitHub! Needless to say, I was absolutely shocked. Paketti wasn't a userbase of 1. There was a japanese chap who had written tickets, and I took a look at them and decided to start doing them. It felt almost unreal to be getting feedback from another person - suggestions for features, and I started implementing them, fixing all the non-v3.0-supported functions in Paketti and just tuning it up. In or around March-April-May 2024, I got a lot of suggestions for features from an American chap and the Japanese chap and it got me kickstarted. So thanks for that!
So, it's been a year and a half since I downloaded all the 2002-2024 threads from the Renoise forum (Beginner Questions, Ideas & Suggestions, Bugs etc) - all 7000+ of them, and went through them over the course of about half a year. This process of going through the questions and suggestions that people had, was eye-opening.
In a way, I could describe it in three layers.
The first layer was confirmation that I was on the right track. A bunch of the questions + suggestions were things I had already done into Paketti.
The second layer, of course, were the undeliverables - things I could see couldn't be scripted without either 1) the Renoise Developers making more API functions available 2) changing/rewriting the whole platform. Things like "Better scopes!" "More buttons!" "Direct-X plugin support!" etc.
The third layer, was the "but of course!" ones. Features that made total sense to be scripted into Renoise. Those were the ones that I could either deliver immediately in about 5-10 minutes, or would take a bit longer to do. Of course, there was a second stream there, that was the "Maybe I'll get to those later" -- i.e. enabled either by new API functions, or just by applying a lot of time. Some of those I can only really tackle when I've done all the other, low hanging fruit type stuff, and have a lot of time on my hands.
I'll give examples.
A "shortcut for setting Selected Sample Pitch to +1 from current one" takes about a minute or maybe two. I have to make it work properly, not error out when it reaches the maximum or the minimum, etc. That's a low hanging fruit. The more I do these, the easier it is to make more, because there's already enough information of similar added features - so can just go "oh, well, this feature here already exists, but a similar feature can be added" and then go ahead and add it.
A "Perfect MIDI file export of selection" is something that I guess would take weeks or even multiple months to perfect, or even start. That's an undeliverable - until I somehow consider it worth it to not do anything fun, but instead focus on a huge feature with a lot of edgecases and places where it might fully break. I do like easy wins, but can appreciate harder, more complex issues. I'm also sidequesting quite a bit, so if I find something starts becoming a drag (looking at you multiple AKAI format import), I might go do something else that actually lets me make music easier and have a bit of fun with that instead.
Now, all of this is made possible by Taktik and the Renoise developers making so many API functions available to the likes of, well, tool developers. It's amazing. I'm constantly finding new ways of doing things and, again, any feedback, bouncing around ideas, rubberducking with people (basically taking their time as I describe features and then show them how it works (or, as I'm often lucky, how it doesn't work) - will lead to something new.
Also, I'm embracing Prior Art as much as I can. What's Prior Art? Well, there have been trackers before Renoise. There have been trackers created and released, after Renoise, too. That means I'm constantly on the hunt for obscure trackers, and have been very lucky to meet people who have used trackers on the C64, Amiga, PC/DOS, Windows, macOS, and been described features (or even shown as a video) that are just mad-powerful.
I myself come from the ST3/IT2 world (so ScreamTracker3, ImpulseTracker2), so dropping in as many keyboard shortcuts as possible into Renoise has been how I even got Renoise to work for me, instead of riling against me. So here we are. I think, when it comes to Prior Art - I've done the most to make Renoise have as many Impulse Tracker shortcuts + features as I can.
One additional thing that I'm doing, is, when there's a new version of Renoise, I try to hit the API function documentation to see if there are tickets on the Paketti GitHub that I've labeled as BlockedByAPI that are now achievable. BlockedByAPI link.
Over the course of hitting multiple Discords and asking questions on Pouet, Reddit, Renoise Forum etc, I've also been pointed to unfinished, abandoned, buggy tools, that I sometimes either tweak closer to perfection, or just nuke and start from scratch and do them the Paketti way.
I think one of the biggest benefits of the Beginners Questions forum on the Renoise Forum, is that a Beginner's Mind is a beautiful thing. They don't know what Renoise has, and what Renoise doesn't have. They come in expecting something to be there, and it might be something I can bring into Paketti. Something that should be there, but simply isn't. I can figure out if it can be done, or if it's just hard to do, and maybe try and tackle it later.
I'm drowning in todo-lists and lists of tools to look at, little snippets of "maybe do this?" or suggestions. It's a heady soup.
It feels like I'll be here for multiple years, studying Prior Art - talking to people, trying to reach Renoise-using producers, rouse up some oldschoolers and have them describe what they liked about, say, OctaMED, or just flat out develop features from other sequencers.
Want to see what's next get built faster? Join 18 Patreon supporters →
Be seeing you.
Yours, Esa Ruoho.
Paketti works on Renoise 3.1 and newer. Features scale up with your Renoise version — you'll never see buttons or menus for things your version can't do.
Paketti ships two builds with every release, both available on the Releases page, where each one is a direct download link at the top of the release notes:
org.lackluster.Paketti_V3.54_TIMESTAMP.xrnx — for Renoise 3.2, 3.3, 3.4, and 3.5+org.lackluster.Paketti31_V3.1_Renoise3.1_TIMESTAMP.xrnx — for Renoise 3.1.x onlyDownload the one that matches your Renoise version. Do not run the Renoise 3.1 build on Renoise 3.2 or newer. It will load and look like it works, but anything relying on the newer scripting API misbehaves, which looks exactly like Paketti being buggy. If you do install it on a newer Renoise, Paketti now notices and tells you so on startup, with a button that opens the downloads page — uninstall the 3.1 build in Tools > Tool Browser before installing v3.54. You can re-check at any time via Main Menu > Tools > Paketti > !Preferences > Check Renoise Version Compatibility.
The two builds use different tool Ids, so they can sit in the Tools folder at the same time — which also means installing v3.54 does not remove an old 3.1 install. Uninstall it explicitly.
Renoise 3.5.0+ — Full Experience
Everything. All 90+ modules including Canvas visual editors (Device Parameter Editor with live automation sync, 30-band drawable EQ, Chebyshev Waveshaper, HyperEdit, PCM Writer, Waveform Viewer, Equation Calculator), Phrase Generator/Grid/Transport Recording, note preview while editing, and all DSP devices including Notepad and Splitter.
Renoise 3.3.0-3.4.x — Full Toolkit, No Canvas
All pattern editor tools, sample slicing, every import/export format (Polyend Tracker projects, RX2, SF2, IFF), MIDI controller support (AKAI, Digitakt, Polyend), automation curves, themes, CCizer, MetaSynth/eSpeak/yt-dlp integration, Image to Sample Converter, Slice Step Sequencer, and all "v2" DSP devices (Chorus 2, Digital Filter, mpReverb 2, etc.). Canvas visual editors and Phrase tools require 3.5.
Renoise 3.2.0 — Full Toolkit, No Canvas, No v2 Devices
Same as above minus the "v2" DSP devices (Chorus 2, Digital Filter, Distortion 2, Flanger 2, Gate 2, LofiMat 2, mpReverb 2, Phaser 2, RingMod 2, Comb Filter 2). The original v1 versions are used as fallbacks.
Renoise 3.1.x — Legacy Build
The Renoise 3.1 build includes all core Paketti features — pattern editor tools, shortcuts, sample slicing, Polyend/AKAI/Digitakt import and export, MIDI controller support, automation curves, theme management, and hundreds of workflow enhancements. Features that require newer Renoise versions (Canvas visual editors, v2 DSP devices, Phrase tools) are automatically hidden.
Renoise 3.0.x and older — Not Supported
Renoise 3.0 and earlier use a scripting API that Paketti no longer targets, and neither build will install on them. Upgrading Renoise is the only path.
Download the newest version from the Releases page - there's pretty much daily updates. Auto-updates would be neat, right? I've not yet set them up - it's not a case of just pushing to GitHub and rolling a new build - instead I'd need to do a bit more script magic to push them directly to the Renoise Tools page. This is a TODO.
Pick the build that matches your Renoise. Every release has two, and the release notes put a direct download link for each one right at the top:
| Your Renoise | Download |
|---|---|
| 3.2, 3.3, 3.4, 3.5 and newer | org.lackluster.Paketti_V3.54_TIMESTAMP.xrnx |
| 3.1.x only | org.lackluster.Paketti31_V3.1_Renoise3.1_TIMESTAMP.xrnx |
Getting this wrong is the single most common cause of "Paketti is broken" reports. See VersionCompatibility above.
Drag the tool to your Renoise, or, if you already have Renoise installed, try double-clicking on the Paketti XRNX file that you got from the Releases page.
After a while, Paketti will finish installing.
Now, here's where the complexity lies. You now have hundreds upon hundreds, thousands upon thousands of new Shortcuts, MIDI Mappings, brand new dialogs and Menu Entries. Also a handful of supported file formats (.SF2, .REX, .RX2, .PTI, .OT, .WT, .ITI and more coming soon).
Since you can easily grasp that this is very much like grasping the dragon's tail and trying to hang on for dear life, we'll start from a specific area of interest first and then travel elsewhere.
You'll find the Menu Entries by right-clicking on any area on the Pattern Sequencer, Pattern Matrix, Pattern Editor, Phrase Editor, Mixer, Instrument Box, Track DSP, Automation, Sample Editor, Sample FX Chain, Sample Navigator, Sample Mappings, Sample Modulation Matrix, Main Menu -> Tools, Main Menu -> Options and the Disk Browser to begin with.
It's been an ongoing process of making sure the relevant Menu Entries are available in the most intuitive places, and I can always add more Menu Entries to more places - just let me know.
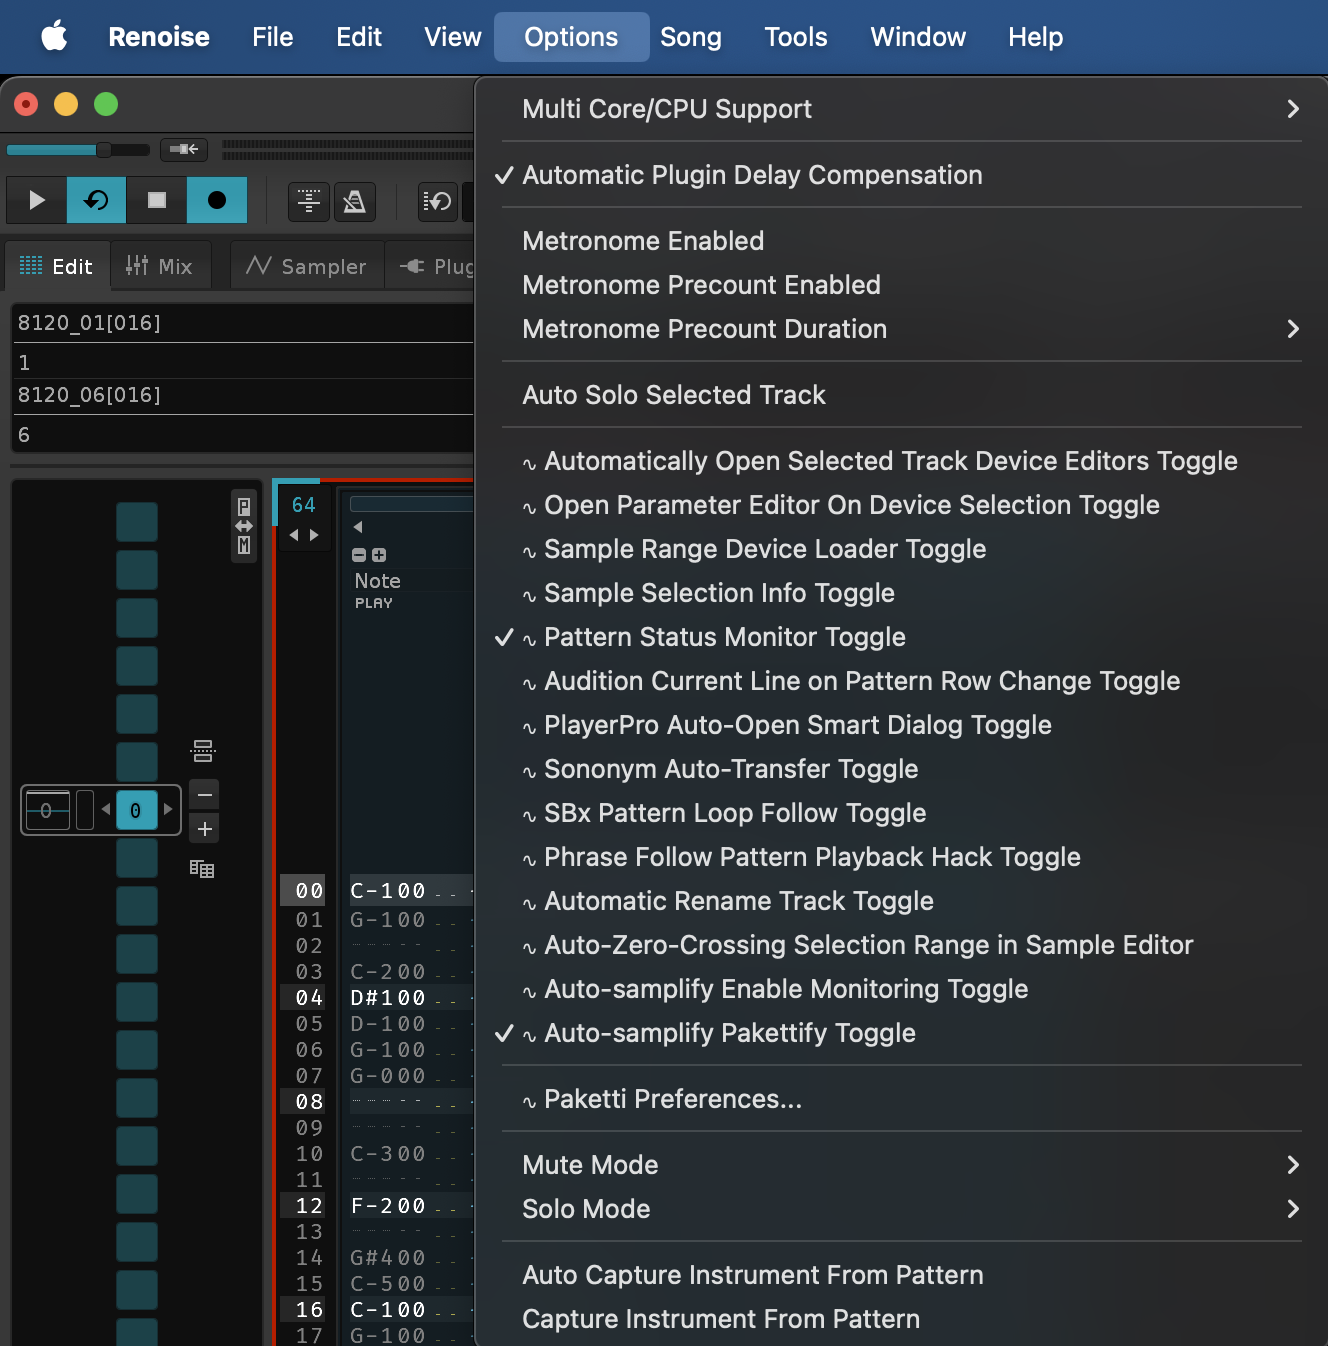
As an example, the Main Menu -> Options context menu has multiple togglable features for better discoverability. The idea here is that you can quickly see if some feature is on, or off, without needing to check the Paketti Preferences. I've also added checkmarks to depict whether a feature is on or off.
NOTE: This screenshot, like many others in this manual, are here only for the purposes of showing that something like this, exists, in this area - by the time you install the newest version of Paketti - there might be 2-5-10-20 more Options in the menu.
So, what even are all of these?
When this is enabled, every Track DSP device on the selected track that has an external editor (VST/AU plugins) has that editor opened automatically as soon as you select the track - and the editors belonging to the track you just left are closed. Handy if you work plugin-first and want the windows to follow the cursor instead of opening them one by one.
The state is remembered across Renoise restarts and Paketti reloads. Turning it off stays off.
Main Menu:Options:Automatically Open Selected Track Device Editors ToggleMain Menu:Tools:Paketti:!Preferences:Toggle Automatically Open Selected Track Device Editors On/OffMixer:Paketti:Toggle Automatically Open Selected Track Device Editors On/OffPattern Matrix:Paketti:Toggle Automatically Open Selected Track Device Editors On/OffGlobal:Paketti:Toggle Automatically Open Selected Track Device Editors On/OffPaketti:Toggle Auto-Open Track DevicesPaketti Preferences -> Always Open Track DSPsThere is a Sample FX Chain counterpart that does the same for the devices in the selected sample's FX chain:
Main Menu:Tools:Paketti:Instruments:Toggle Automatically Open Selected Sample FX Chain Device Editors On/OffSample FX Mixer:Paketti:Toggle Automatically Open Selected Sample FX Chain Device Editors On/OffGlobal:Paketti:Toggle Automatically Open Selected Sample FX Chain Device Editors On/OffPaketti:Toggle Auto-Open Sample FX Chain DevicesPaketti Preferences -> Always Open Sample FX Chain DevicesWhen this is enabled, the Paketti specific Parameter Editor is always opened, when you select a new Device on the Mixer or Track DSP view (such as on the Pattern Editor). Here's an example of what the Parameter Editor can look like.
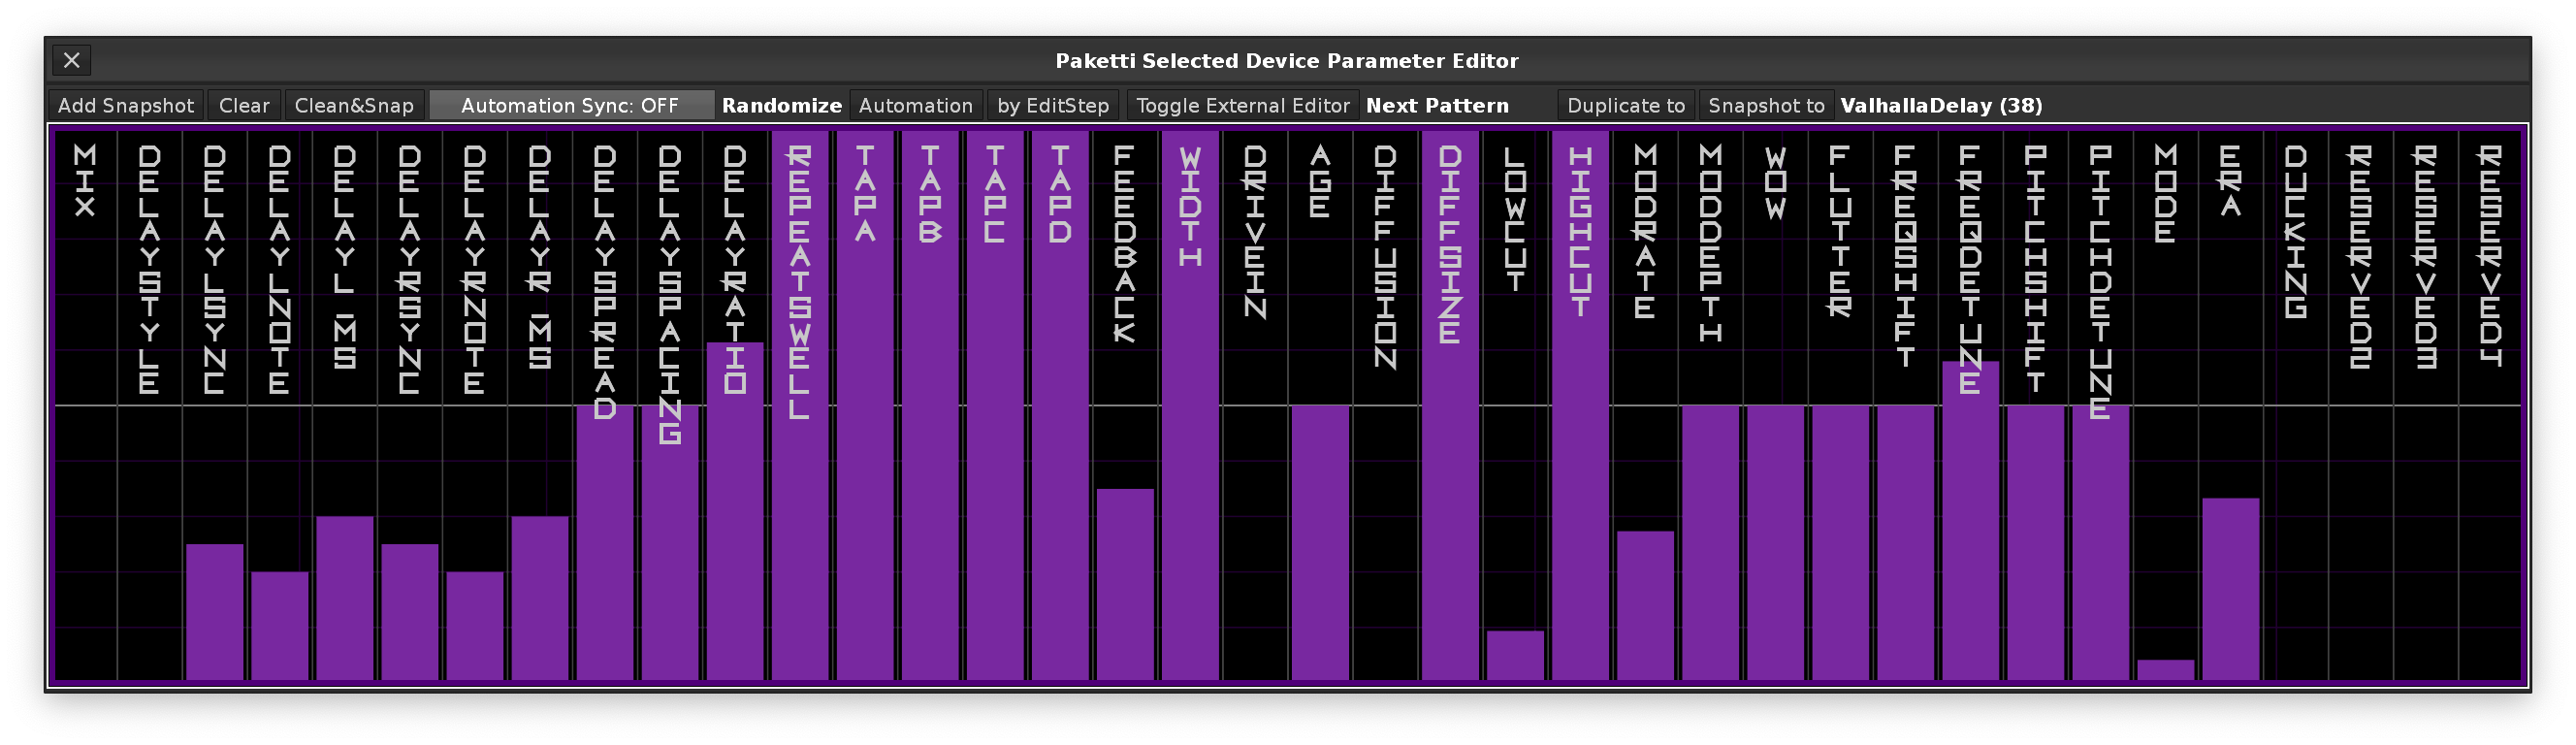 To find out more about the Parameter Editor, look here ParameterEditor
This feature was born in Alicante, Spain, on the 25th of October 2025 - when I attended a masterclass by AZ-Rotator. He showed some of his workflows with Cubase - one of which was the "select a region of sound, paste it to a channel with effects" (such as play a segment of an audio region via a Reverb). I took a look at that, and thought, wait, what if I just flipped the script a little bit, and instead offered a way for the user to highlight a Sample Range in the Sample Editor, then use the Shortcuts that Paketti provides for loading a DSP Device - what happens then is that the Sample Range is copied to a new Instrument, Pakettified, and the Sample FX Chain for the Pakettified Instrument automatically has the Reverb or any other DSP Device you wanted to load. It's pretty neat. This means that you could for instance, highlight a snare of a break, then press a Reverb shortcut, and a new Instrument appears with just the Snare range, and whenever you trigger the Snare Instrument, it is played through a Reverb.
This was requested by a person looking to move from OpenMPT/ModPlugTracker to Renoise - apparently this specific Prior Art tracker has a method of showing exactly what the cursor is on, i.e., if you're on top of a Pattern Row which has notes, volume/delay/panning/samplefx settings and Effect Column settings. If you're on a row such as this, you immediately see which effect is used, what the number is in both hex and non-hex, and the value data.
Some quick examples:


When enabled, moving the cursor into a volume / panning / delay / sample-fx subcolumn automatically opens the PlayerPro effect dialog for that subcolumn. This mirrors the "Smart SubColumn" checkbox inside the PlayerPro dialog, so you can turn it on or off from the menu and see its current state via the checkmark. Menu: Main Menu:Options:PlayerPro Smart SubColumn Toggle.
A while back, I was notified of a semi-abandoned tool that was left in an Alpha state - a tool by Danoise, aka Bjørn Nesby - the maker of Sononym. He wrote a tool called Sononymph, which was integrated Renoise with Sononym. I took a heavily slanted Paketti "look" at the tool, and decided to modify, rewrite, simplify, organize, optimize and troubleshoot it. Without delving deeper into the features and improvements I added - suffice to say - it now does exactly what it says on the tin. And the Sononym Auto-Transfer Toggle is so that when you select a sample in Sononym, hey presto, it is automatically transferred to Renoise.
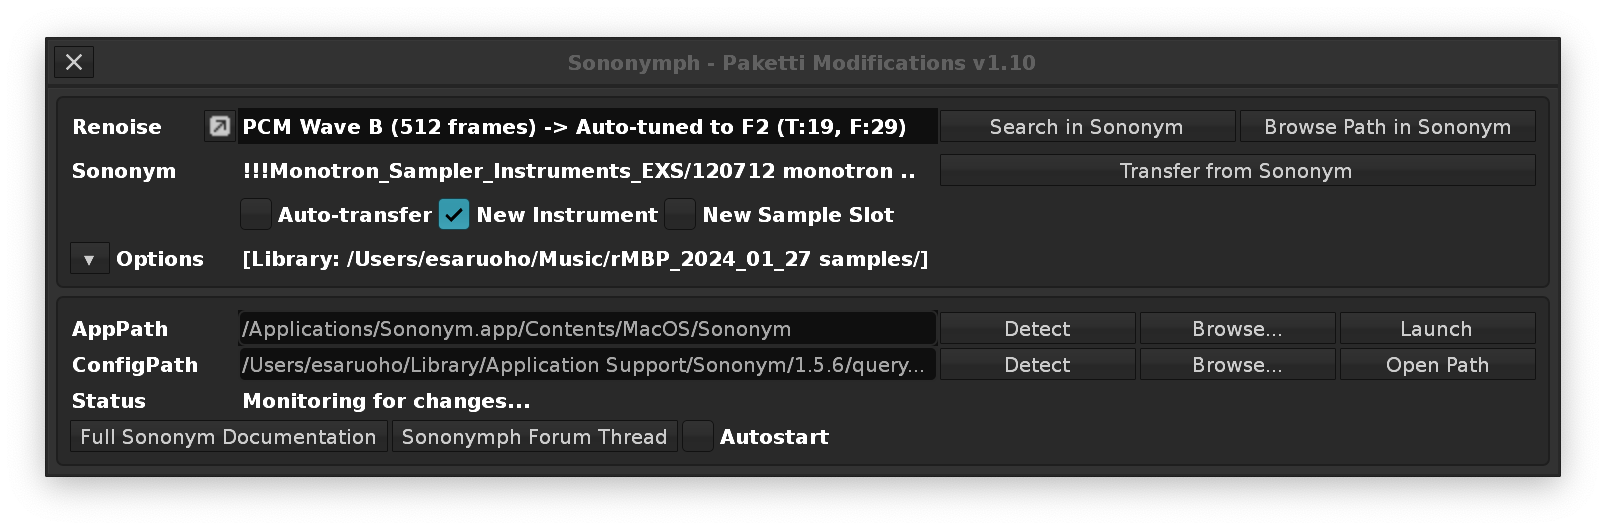
The Sononymph dialog's persisted "automatic" preferences are now also togglable straight from the Options menu, each with a checkmark showing its current state — no need to open the Sononymph dialog to change them:
Main Menu:Options:Sononymph Autostart Toggle.Main Menu:Options:Sononymph Auto-Transfer New Instrument Toggle.Main Menu:Options:Sononymph Auto-Transfer New Sample Slot Toggle.Normally the "Sononym Auto-Transfer Toggle" (live transfer) is armed by hand and resets each session — on purpose, because in its default mode a transfer overwrites the currently selected sample in place, and a persisted armed-overwrite could silently clobber a sample while you're just browsing Sononym. This toggle lets live transfer arm itself automatically when a song loads, so Sononym→Renoise transfer works with no dialog and no per-session click. It is guarded to non-overwrite modes: it only auto-arms when Auto-Transfer New Instrument or Auto-Transfer New Sample Slot is enabled (both of which add rather than overwrite). Enable it with neither create-mode on and it stays dormant, telling you so in the status bar — it will never auto-arm an overwrite. Menu: Main Menu:Options:Sononymph Auto-Arm Live Transfer on Load Toggle.
This is a separate set of Menu Entries - the concept is that if it is a Dialog - i.e. a LUA-scripted GUI, custom-made for Paketti, then they are available from the Paketti Gadgets context menu. These are also grouped from the point of view of intuitive access - such as, those Paketti Gadgets that modify the Sample, are accessible from the Sample Editor, Sample Navigator and Sample Mappings, additionally from the Instrument Box.
Yes, there's a learning curve. Paketti introduces hundreds of new features and thousands of tweaks.
I've often been told, there's too much! I'm only gonna use this or that.
Well, good news!
Just use the ones you feel you need to use. You can study the rest later. Or, never study at all, ask questions on the Discord, and I'll answer them to the best of my abilities.
Now, I'd absolutely love to be able to "list the top 5 features of Paketti", but the way Paketti has been built is that most features will bleed into other features.
It seems that the best way would be to split this into smaller pieces by categories.
Format notes, for anyone writing their own converter: ableton-live-format.txt documents Live's preset XML — the inverted pad notes, IsSimpler, positional Ids, FileRef roots, and the fields whose wrong values make Live silently misdraw or refuse a preset.
Ableton Live preset import: .adv (Simpler), .adg (Drum Rack), .als (Live Set) and .alc (Live Clip). Drag one onto Renoise, or use the menu.
Main Menu:Tools:Paketti:Instruments:File Formats:Ableton:Import Live Preset (.adv/.adg/.als)...Main Menu:File:Paketti Import:Ableton Live Preset (.adv/.adg/.als)...Global:Paketti:Import Ableton Live PresetA Drum Rack built by Live's Slice to New MIDI Track is a set of pads that all point at one file, each playing one region. Paketti collapses that into a single Renoise sample carrying a slice marker per region, rather than loading one full-length copy per pad. A Drum Rack of distinct one-shots instead becomes a multi-sample instrument with each pad on its own key. A Simpler in Slicing mode brings its slice points across.
Samples that have moved. A Live preset stores only a path, so Paketti searches the preset's own folder, its Live Pack parent folders, and the sample library roots you configure — the same shared setting the Octatrack and EXS24 importers use. Add one with Main Menu:Tools:Paketti:Instruments:File Formats:Ableton:Add Sample Library Root (for missing samples)....
Live Pack audio cannot be imported. Samples inside a commercial Live Pack are stored as AIFF-C with Ableton's encrypted able codec, which nothing outside Live decodes. Paketti detects these and tells you in one sentence. To use them, export the audio from Live first.
The four formats Paketti used to export and never read back. Each one rebuilds a sliced instrument with the slice markers in place.
Main Menu:File:Paketti Import:Akai MPC Program (.xpm)... — reads the WAV sitting beside the program; each pad's start and end becomes a sliceMain Menu:File:Paketti Import:OP-XY Preset (.preset.zip)... — an OP-XY kit keeps one WAV per region, so the regions are joined back into one sample and sliced at the joinsMain Menu:File:Paketti Import:Digitakt II Preset (.dt2pst)... — the WAV and the slice table come out of the preset's ZIPMain Menu:File:Paketti Import:Apple Loop (.caf)... — beat markers become slices and the loop's tempo is printedMain Menu:Tools:Paketti:Instruments:File Formats and Instrument Box:Paketti:LoadGlobal:Paketti:Import Akai MPC Program, Global:Paketti:Import OP-XY Preset, Global:Paketti:Import Digitakt II Preset, Global:Paketti:Import Apple LoopWAV cue markers already went in and out of Paketti. AIFF's MARK chunk now does too.
Main Menu:File:Paketti Import:AIFF with Markers (.aif)...Main Menu:File:Paketti Export:AIFF with Slice Markers (.aif)... (also Sample Editor:Paketti:Save)Global:Paketti:Import AIFF with Markers, Global:Paketti:Export AIFF with Slice MarkersRenoise writes the audio; Paketti adds the markers to what it wrote, so the sound is byte-for-byte what Renoise would have saved on its own.
Alongside the Simpler preset and the Drum Rack, Paketti writes a whole Live Set: one MIDI track with a Simpler on it, sliced and ready to play, so opening it in Live does not mean building the track yourself first.
Main Menu:File:Paketti Export:Ableton Live Set (.als)... (also Main Menu:Tools:Paketti:Instruments:File Formats and Instrument Box:Paketti:Save)Global:Paketti:Export Ableton Live SetPolyend Tracker Instrument Import support
Octatrack Instrument Import support
Two decoders are available. By default Paketti runs the external decoder — a native binary on macOS and Windows, the Windows build under Wine on Linux. Turning on RX2: decode in Lua in Paketti Preferences switches every .rx2 path to Paketti's own decoder, which needs nothing installed.
The built-in decoder is roughly forty times slower (about a second per two seconds of audio, on a progress dialog you can cancel), so it is not a speed choice. It is there for machines without the binary — Linux especially — and because it returns the file's own audio, so the slice markers land where the file says they do. The external decoder renders the loop time-stretched to a target tempo, so its audio and markers agree with each other but not with the frame numbers stored in the file.
Propellerheads ReCycle v1.0 (.REX) & Propellerheads ReCycle v2.0 (.RX2) Import support
The selected instrument goes out as a REX2 loop — slices, tempo and compressed audio — with no external tool involved. The files are byte-for-byte what ReCycle writes: 120 real commercial .rx2 files were decoded, re-encoded and compared against the originals, and all 120 matched. Encoding is slow, so it runs on a progress dialog you can cancel.
Mono is the one untested corner: every REX2 available for testing was stereo, so a mono export round-trips correctly through Paketti's own decoder but has not been checked against ReCycle's bytes.
Main Menu:File:Paketti Export:REX2 (.rx2)... (also Main Menu:Tools:Paketti:Instruments:File Formats, Sample Editor:Paketti:Save, Instrument Box:Paketti:Save)Global:Paketti:Export REX2Format notes: rex2-format.txt.
SoundFont V2.0 Import support
OctaMed / Protracker IFF / 8SVX / 16SV Import support
Main Menu:File:Paketti Import:Import DWVW Sample (.C01)... (also under Main Menu:Tools:Paketti:Instruments:File Formats, Sample Editor:Paketti:Load, Sample Navigator:Paketti:Load, Sample Mappings:Paketti:Load, Instrument Box:Paketti:Load and Disk Browser Files:Paketti:Import/Export; keybinding Global:Paketti:Import DWVW Sample (.C01)...).
DWVW is the lossless codec Typhoon OS uses for the Yamaha TX16W sampler, and that the Cyclone emulator reads. The files are AIFF-C containers and are normally named .C01 through .C12.
The sample is loaded into a new instrument with your Paketti default instrument settings applied, at whatever sample rate, bit depth and channel count the file specifies (12-bit TX16W material comes in as 16-bit, usually at 50000 Hz or 33333 Hz). The file's root note is applied, and its loop points and loop mode when it has them. Dropping a .C01 or .dwvw file straight onto Renoise works too - that goes through an import hook covering .C01 through .C99 in either letter case, which can be switched off under Import Hooks Settings if another tool needs those extensions.
Progress is shown in a dialog with a Cancel button, and Renoise stays usable while it runs.
Three related Korg hardware-sampler formats. Drop any of them onto Renoise, or use the menu.
.ksf - a single Korg sample. The 16-bit PCM (stored big-endian in the file) is byte-swapped and imported at its own sample rate, with its loop points and loop mode. Loaded like any other sample..kmp - a Korg multisample: a keymap plus a list of .ksf files. Paketti loads every referenced sample into one instrument, sets each one's key range, base note and fine-tune, and shows a progress status while it works. Samples the keymap marks as internal ROM sounds are reported as missing (they do not exist on disk)..ksc - a Korg performance script that just lists .kmp files; Paketti loads each one it can find.Main Menu:Tools:Paketti:Instruments:Import:Load Korg Triton KMP Multisample...Main Menu:Tools:Paketti:Instruments:Import:Load Korg Triton KSC Script...When a patch's samples are not sitting next to the file, Paketti checks the usual sibling folders (samples/, <name>-samples/, etc.) and, failing that, asks you where they are. Each format has its own toggle in Import Hooks Settings.
Propellerhead Reason NN-XT patch import (partial). Paketti reads the patch's sample references and, for each, its key range, base note and velocity range, and builds a mapped instrument. The synth/modulation parameters in the patch are not translated - this brings in the samples and their keyzones. Background-loaded with a progress status.
Main Menu:Tools:Paketti:Instruments:Import:Load Reason NN-XT Patch...Reason NN-XT (.sxt) under Import Hooks Settings.Roland MV-8000/8800 patch import (samples only). Paketti extracts the WAVE audio embedded in the .mv0 file (44.1 kHz / 16-bit / stereo) into instrument sample slots. Keymaps are not translated.
Main Menu:Tools:Paketti:Instruments:Import:Load Roland MV-8000 Patch...Roland MV (.mv0) under Import Hooks Settings.These three importers (Korg, Reason, Roland) are ported and modernised from Martin Bealby's 2011 "Additional File Formats" tool, with the keyzone mapping rewritten to the current Renoise API and the sample-rate handling corrected.
Paketti imports the classic Akai sampler formats. Drop a file onto Renoise, or use the menu.
.s samples (S900/S950, S1000, S1100, S3000). All three generations use the .s extension, so Paketti reads the file's header and auto-detects which one it is, then routes to the matching parser. If you want to force a specific parser, the menu has separate Akai S900/S950 Sample (.s)... and Akai S1000/S3000 Sample (.s)... entries..snd samples..p (S1000) and .pgm (MPC1000/MPC2000) - keygroups / pad assignments / sample mappings..akp programs (S5000/S6000/Z4/Z8).Two convenience actions: Import Any Akai Sample detects the format for you, and Import Akai Folder (Batch) loads every Akai file in a folder in one go. There is also export back to each Akai format via Export Sample as Akai Format..., and an Akai Formats Info... dialog describing every supported format.
Main Menu:Tools:Paketti:Instruments:Import:Import Any Akai Sample...Main Menu:Tools:Paketti:Instruments:Import:Import Akai Folder (Batch)...Main Menu:Tools:Paketti:Instruments:Import:Akai S900/S950 Sample (.s)...Main Menu:Tools:Paketti:Instruments:Import:Akai S1000/S3000 Sample (.s)...Main Menu:Tools:Paketti:Instruments:Import:Akai MPC2000 SND Sample (.snd)...Main Menu:Tools:Paketti:Instruments:Import:Akai Program (.p/.pgm)...Main Menu:Tools:Paketti:Instruments:Import:Akai AKP Program (.akp)...Main Menu:Tools:Paketti:Instruments:Export:Export Sample as Akai Format...Global:Paketti:Import Any Akai Sample..., Global:Paketti:Import Akai Folder (Batch)..., plus per-format import/export shortcuts for S900/S950, S1000, S3000, MPC2000 SND, Programs and AKP.Akai (.s/.snd/.akp/.p/.pgm) toggle under Import Hooks Settings.Both as separate instruments, and as "wavetable instrument" == all samples in one instrument, aka "sample chain".
Main Menu:Tools:Paketti:Instruments:File Formats:Batch Convert .MOD to .WAV... (also under Main Menu:File:Paketti Import, Instrument Box:Paketti:Load, Sample Editor:Paketti:Export and Disk Browser Files:Paketti:Import/Export; keybinding Global:Paketti:Batch Convert .MOD to .WAV).
Rips every sample out of a whole folder of modules at once. Each sample is written as modulename-NN-samplename.wav, so a folder of 500 modules gives you 500 x samples-per-module WAV files in one run.
Include subfolders walks the whole tree.Same folder as .MOD puts each WAV beside the module it came from (keeping your folder structure), Separate folder collects everything into one folder.Amiga 8363 Hz (apply finetune) is the default and gives you the pitch the module intended; there are also flat 8363 Hz, 16726 Hz, 22050 Hz and 44100 Hz.Progress is shown in a dialog with a Cancel button, and Renoise stays usable while it runs. 15-sample Soundtracker modules and the multi-channel tags (6CHN, 8CHN, 10CH-32CH, OKTA, CD81, StarTrekker FA0x, and more) are all handled, not just 4-channel M.K..
Main Menu:Tools:Paketti:Instruments:File Formats:Batch Convert .MOD to .XRNI... (also under Main Menu:File:Paketti Import, Instrument Box:Paketti:Load, Sample Editor:Paketti:Export and Disk Browser Files:Paketti:Import/Export; keybinding Global:Paketti:Batch Convert .MOD to .XRNI).
Turns a whole folder of modules into Renoise instruments, with the Paketti default instrument, your loader preferences and the module's loop points applied.
One .XRNI per sample writes modulename-NN-samplename.xrni; One .XRNI per module writes modulename.xrni with every sample of the module inside it.Include subfolders walks the whole tree..mod, or all into one folder.Each instrument is built in a temporary instrument slot which is removed again, so your own instruments and your selected instrument are left as they were. Progress is shown with a Cancel button.
Main Menu:Tools:Paketti:Instruments:File Formats:Batch Convert .XRNI to .WAV... (also under Main Menu:File:Paketti Import, Instrument Box:Paketti:Load, Sample Editor:Paketti:Export and Disk Browser Files:Paketti:Import/Export; keybinding Global:Paketti:Batch Convert .XRNI to .WAV).
The same converter for Renoise's own instruments. Every sample of every .xrni in a folder is written out as instrumentname-NN-samplename.wav, keeping the sample's own rate and bit depth.
Include subfolders walks the whole tree..xrni, or all into one folder.Each instrument is loaded into a temporary instrument slot and removed again, so your own instruments and your selected instrument are left as they were. Progress is shown with a Cancel button.
Main Menu:File:Paketti Import:Batch Convert WAV/AIFF to DWVW (.C01)... (also under Main Menu:Tools:Paketti:Instruments:File Formats, Sample Editor:Paketti:Save, Instrument Box:Paketti:Load, Disk Browser:Paketti and Disk Browser Files:Paketti:Import/Export; keybinding Global:Paketti:Batch Convert WAV/AIFF to DWVW (.C01)).
There is a no-dialog version alongside it, Batch Convert Folder to DWVW (.C01) with Saved Settings..., which asks only for a folder and converts it with whatever rate, bit depth and mono setting you last chose in the dialog below (keybinding Global:Paketti:Batch Convert Folder to DWVW with Saved Settings).
Turns a whole folder of samples into TX16W-ready .C01 files in one run. Anything Renoise can read is accepted as source - WAV, AIFF, AIFC, FLAC, OGG - and each one is written out as samplename.C01.
Include subfolders walks the whole tree..C01 files go. Defaults to the source folder.33333 Hz (TX16W standard) is the default. The TX16W samples at four rates only, all divisions of one 50 kHz clock, and all four are offered: 50000 Hz, 33333 Hz, 25000 Hz and 16666 Hz (the Typhoon manual calls them 50k, 33k, 25k and 16k). 44100 Hz, 22050 Hz and 8000 Hz are there as well, along with Keep each sample's own rate (no resampling).12-bit is the TX16W's native resolution and the default. 8-bit and 16-bit are also available.Your chosen rate, bit depth and mono setting are saved as preferences and become the defaults for single-sample export as well. Each file is converted in a temporary instrument slot which is removed again, so your own instruments and your selected instrument are left as they were. Progress is shown with a Cancel button.
Send the selected instrument to Ableton Live, verified loading in Live 12.
Main Menu:Tools:Paketti:Instruments:File Formats:Ableton:Export Instrument as Simpler (.adv)...Main Menu:Tools:Paketti:Instruments:File Formats:Ableton:Export Instrument as Drum Rack (.adg)...Sample Editor:Paketti:Ableton:Export Instrument as Simpler (.adv)...Sample Editor:Paketti:Ableton:Export Instrument as Drum Rack (.adg)...Global:Paketti:Export Instrument as Ableton SimplerGlobal:Paketti:Export Instrument as Ableton Drum RackUse Simpler (.adv) for melodic material and Drum Rack (.adg) for slices and kits. A melodic instrument exported to a Drum Rack lands on one pad and is only playable from that key.
Simpler (.adv) writes the instrument's first sample, keeping its note range, its root note (base_note less any transpose) and its fine tune. If it has slice markers, the preset opens in Slicing mode with the markers carried across as slice points.
Drum Rack (.adg) writes a sliced instrument as one WAV with a pad per slice — the exact shape Live's own slicing produces — and writes a multi-sample instrument as one WAV and one pad per sample, laid out from C1 upward.
Both write the audio into a Samples/Imported/ folder beside the preset, which is the layout Live uses for imported media. Keep the preset and that folder together when you move them.
A Drum Rack pad's key is stored inverted in Live's XML — ReceivingNote holds 128 minus the MIDI note, so C1 (36) is written as 92 — and Paketti converts in both directions. Exported racks start their pads at C1, the same place Live's own slicing puts them.
A Drum Rack pad receives its own note but passes note 60 down its own chain, so the sampler inside every pad is keyed across the full range and rooted at C3 — the pad's identity lives in the rack, not in the sampler. Writing the pad's note into the sampler instead makes the pad load, show its waveform, and stay silent.
Several samples on one key. Renoise lets samples share a key, and the export keeps that: one pad per Renoise note, laid out from C1 upward. Eight kicks on C-0 and eight snares on C#0 become two pads of eight, not sixteen pads. A pad with one sample is a Simpler; a pad with several is a Sampler with one zone per sample, velocity ranges included.
Sample loops. A looping sample is written as a Sampler rather than a Simpler, since that is the only Live device that accepts a written loop — its loop start, end and mode travel with it. A non-looping sample stays a Simpler with the familiar waveform view. Renoise's forward loop becomes Sampler mode 1 and ping-pong mode 2; reverse has no Live equivalent and arrives as forward.
Slice loops. Slice loops travel in both directions. On export, a pad whose slice loops is written as a Sampler — Live only accepts a written loop on that device — so it shows Live's Sampler panel rather than the Simpler waveform. Pads whose slices do not loop stay Simplers, so slicing without looping keeps the waveform view.
Importing a Live preset brings its loops across — a looping Simpler pad becomes a looping Renoise slice. Export does not yet write loops: Live shows a pad as "Multisample Mode" with no waveform when it is handed a loop block, so Paketti leaves that to Live. Simpler only loops forwards in any case, so Renoise's reverse and ping-pong have no equivalent there.
Batch Ableton. Ableton Export All Instruments as Drum Racks writes one .adg per audio-bearing instrument into a folder you choose. Ableton Batch Convert Folder walks a folder of .xrni, .wav, .mp3, .flac, .aif and .ogg — recursing — and writes a .adg beside each source. Both are in Main Menu:File:Paketti Export.
Slice counts. A Drum Rack holds 128 pads, one per MIDI note. Pads start at C1 where the set fits, which is Live's own convention; a larger set starts lower so it still fits whole, and more than 128 slices is split across several files (Kit.adg, Kit 2.adg, …). Nothing is dropped — a 256-slice instrument becomes two racks of 128 and 127.
One difference Renoise cannot express. A Live pad has an independent start and end, so its regions can have gaps between them. Renoise slices are contiguous — each one runs to the next marker. A rack with gaps therefore comes back with those gaps filled, and exporting it again keeps the filled version.
Writes a plain-text SFZ beside its WAV — an open format read by sfizz, Sforzando, Bitwig, Falcon and most free samplers. A sliced instrument gives one WAV and a region per slice using offset/end; anything else gives one WAV and one region per sample, keeping key range, root note, velocity range, transpose, fine tune and loops.
Main Menu:Tools:Paketti:Instruments:File Formats:Export SFZ Mapping (.sfz)...Sample Editor:Paketti:Export:Export SFZ Mapping (.sfz)...Global:Paketti:Export SFZ MappingBatch SFZ. SFZ Export All Instruments in Song writes one .sfz per audio-bearing instrument into a folder you choose. SFZ Batch Convert Folder walks a folder of .xrni, .wav, .mp3, .flac, .aif and .ogg — recursing — and writes a .sfz beside each. Audio sources are referenced, not copied, so nothing is duplicated; a WAV with CUE points arrives sliced and exports a region per slice.
Writes the selected instrument as an OP-XY drum preset: a ZIP with patch.json and one WAV per region, from key 53 up. A sliced instrument contributes its slices, one file each; anything else contributes its samples. Looping slices become looping regions. The device takes 24 regions and the rest are dropped, with a count in the status line.
Main Menu:File:Paketti Export:OP-XY Preset (.preset.zip)...Main Menu:Tools:Paketti:Instruments:File Formats:Export OP-XY Preset (.preset.zip)...Sample Editor:Paketti:Export:Export OP-XY Preset (.preset.zip)...Global:Paketti:Export OP-XY PresetWrites the selected instrument as a Digitakt II preset — a ZIP containing manifest.json, the sample under Samples/transfers-YYMMDD/, and a binary preset with one entry per slice. The device takes 64 slices and a twelve-character name of letters, digits and spaces; anything beyond that is trimmed or dropped, and the status line says so.
Main Menu:Tools:Paketti:Instruments:File Formats:Export Digitakt II Preset (.dt2pst)...Sample Editor:Paketti:Export:Export Digitakt II Preset (.dt2pst)...Global:Paketti:Export Digitakt II PresetFormat notes, for anyone writing their own converter: digitakt2-format.txt documents the .dt2pst container, the manifest, the binary preset layout and what remains unknown about it.
Polyend Tracker Instrument Export Support Extrabonus: Also with 48 slice drumkit support - meaning, Renoise can be used to create a 48 drum drumchain sample with slices, straight to .PTI
Main Menu:File:Paketti Export:Batch Convert PTI Folder to WAV with CUE... (also Disk Browser:Paketti:Import/Export:Batch Convert PTI Folder to WAV with CUE..., Instrument Box:Paketti:Instruments:Batch Convert PTI Folder to WAV with CUE...; keybinding Global:Paketti:Batch Convert PTI Folder to WAV with CUE; MIDI mapping Paketti:Batch Convert PTI Folder to WAV with CUE).
Point it at a folder of Polyend .pti files and it writes a .wav beside each one — recursing subfolders — with the PTI's slice markers embedded as WAV cue points in the chunk order the Dirtywave M8 loads (fmt → LIST/adtl labels → data → cue). This is the ".pti to .m8" path: an M8 reads those cue points as slices. Each .pti is read straight off disk as a binary transform — no Renoise instrument is created, no plugin is loaded, and your open song is left untouched — so the whole folder converts cleanly. PTIs with no slices export as a plain WAV; mono and stereo are both handled.
Octatrack Instrument Export Support Extrabonus: Also with 64 slice drumkit support - meaning, Renoise can be used to create a 64 drum drumchain sample with slices, straight to .OT
Export samples to IFF format
Main Menu:File:Paketti Export:Export Song to Yamaha TX16W (setup + performance + voices)... (also under Main Menu:Tools:Paketti:Instruments:File Formats and Disk Browser:Paketti; keybinding Global:Paketti:Export Song to Yamaha TX16W).
Sends the whole song, not one instrument. Every instrument with samples becomes a voice, and on top of those you get a performance (.P01) putting each voice on its own MIDI channel, and a setup (.X01) which rebuilds the entire arrangement on the sampler in one load.
Instruments take MIDI channels 1 to 16 in order. The sampler only has sixteen, so anything past the sixteenth still gets a voice and a program change number but no channel of its own. Every voice also gets a program change entry, so a single channel can step through the lot.
The manifest lists the MIDI channel and program change number for each instrument alongside the disk contents, so you can see the whole layout at a glance. Load the .X01 to get everything, or just the .P01 for the multitimbral setup without clearing the machine.
Main Menu:File:Paketti Export:Create TX16W Filter Table (.T18)... (also under Main Menu:Tools:Paketti:Instruments:File Formats; keybinding Global:Paketti:Create TX16W Filter Table).
Writes a new filter for the sampler. The TX16W holds twenty filter tables and ships with seventeen, so slots 18, 19 and 20 are free - nobody has made a new one for it since 2000.
Choose a shape - low pass, high pass, band pass or notch - and a slot, and you get a .T18 file. Put it on a disk alongside your kit and pick it as the group's filter in the export dialog.
Each table is an 11 by 11 grid of filter responses: one axis is cutoff, the other is resonance (or level for the band pass and notch), which is exactly the matrix the sampler's own filter page shows you.
The file's structure is verified - feeding a factory table's own coefficients back through this writer reproduces it byte for byte, all 4096 of them - but how these filters sound on real hardware has not been tested, because the machine has not been in the loop. Treat the first one you make as an experiment.
Main Menu:File:Paketti Export:TX16W Modulation Table... (also under Main Menu:Tools:Paketti:Instruments:File Formats; keybinding Global:Paketti:TX16W Modulation Table).
Sets the eight-entry modulation table that gets written into every voice you export, so the routing is already there when the kit loads instead of being typed in on the sampler's own screen for each voice. Each entry is a source, a destination, an amount and a Hold flag which freezes the source's value at key down. The two amount boxes are semitones and cents when the destination is Pitch.
Sources: Velocity, Velocity in range, Key, Key in range, Mod wheel, Pitch bend, Pitch bend held keys, External controller 1 and 2, Aftertouch, External input, LFO 1 and 2, Envelope 1 and 2. Destinations: Pitch, Volume, Filter, Pan, AEG attack, AEG time, Glide time, LFO 1 and 2 depth, LFO 1 and 2 rate, Envelope 1 and 2 depth.
Two things worth knowing about the hardware. External controller 1 and 2 are the machine's only free MIDI CC slots, and which CC each one listens to is set on the sampler under System Setup > X-Cntls, not per voice - so routing a particular CC to the filter means pointing XCtl1 at that CC once on the machine, then routing External controller 1 to Filter here. And a group has only one modulatable filter axis, chosen on the sampler as D-Axis, so cutoff and resonance cannot both be modulated on the same group.
Restore factory routing puts back the table the Typhoon factory voices use.
Main Menu:File:Paketti Import:Import TX16W Disk Image (.img)..., ...Import Typhoon Voice (.O01)... and ...Import TX16W Folder (.O01 + .C01)... (all three also under Main Menu:Tools:Paketti:Instruments:File Formats, Instrument Box:Paketti:Load and Disk Browser Files:Paketti:Import/Export; keybindings Global:Paketti:Import TX16W Disk Image, Global:Paketti:Import Typhoon Voice, Global:Paketti:Import TX16W Folder).
Reads a TX16W floppy back into Renoise - the mirror of the export. Point it at a 720K disk image and every voice on the disk becomes an instrument with its key mapping rebuilt: each split lands on the key range Typhoon gave it, and single-key splits get their root note centred so drums play at their recorded pitch. Waves that no voice claims still arrive, laid out one per key in an instrument named after the diskette.
Import Typhoon Voice takes a loose .O01 and picks up its .C01 waves from the same folder. Import TX16W Folder does a whole folder at once, falling back to loading every wave when the folder has no voices.
Pre-Typhoon disks work too. A TX16W disk made before Typhoon was installed holds waves in Yamaha's own format, .W01 and up. Those are read as well, with their loops intact - so a library you have owned since before any of this existed opens in Renoise the same as everything else.
Dragging a .img, .ima, .O01, .P01, .X01 or .W01 file straight onto Renoise works too, in either letter case.
The voice's references are matched to waves by Typhoon's own wave id first and by filename second, so a disk whose files have been renamed still resolves. Anything unreadable is reported and skipped rather than stopping the import, and uncompressed .A## AIFF files on the disk are counted in the summary.
Main Menu:File:Paketti Export:Export Instrument to Yamaha TX16W (.C01+.O01+720K disks)... (also under Main Menu:Tools:Paketti:Instruments:File Formats, Sample Editor:Paketti:Save, Sample Mappings:Paketti:Save, Instrument Box:Paketti:Save and Disk Browser:Paketti; keybinding Global:Paketti:Export Instrument to Yamaha TX16W).
A dialog opens first with the sample rate, how much RAM your TX16W has, and whether to mix to mono and keep the instrument's own key mapping. It tells you live how much of the sampler's memory the kit will need, and warns before you export if it will not fit - a kit can split across floppies perfectly and still be too big to load, because DWVW only shrinks the copy on the disk while the machine holds the decoded audio. There is a no-dialog version alongside it, Export Instrument to Yamaha TX16W with Saved Settings... (keybinding Global:Paketti:Export Instrument to Yamaha TX16W with Saved Settings).
The dialog also carries the voice's own settings, which used to be inherited wholesale from a factory template:
17 LOWPASS is the one Typhoon 2000 added.One-shot which lets every sample play out untouched (this is what a real TX16W drum voice uses, and it is what you want for kits), or follow the instrument's own AHDSR.KICK1, SNARE1, HHCLOSED) instead of DRUM_017. This switches itself on when three or more samples are already sitting on GM drum keys. Renoise's note numbers are the same as MIDI's, so the GM kick is the row Renoise labels C-3. Eight characters is all the sampler's screen shows, so this makes a real difference when browsing on the machine.Velocity layers are exported. If your instrument has samples on different velocity ranges, each range becomes its own group in the voice file, which is how the TX16W does velocity switching - the velocity range lives on the group, not on the split. Instruments with one velocity range export as a single group exactly as before.
Every export also writes a KITNAME_DISKS.txt manifest listing which sample landed on which disk, with the disk labels, so there is no guessing when the sampler asks for the next floppy. Disks follow the instrument's own order, so disk 1 holds the first samples.
Takes the selected instrument and produces everything a TX16W running Typhoon needs to play it: one .C01 wave per sample, one .O01 voice file mapping them across the keyboard, a linked .P01 performance on MIDI channel 10, an .X01 setup, and as many 720K floppy images as they take.
Loading a kit that spans disks. Load disk 1 and the sampler will ask for the rest as it needs them, showing which one: Missing wave VIBSLAP (from KITNAME2). That is a request, not an error - swap to that disk image while the message is on screen and press ENTER, and the prompt withdraws itself as soon as the wave is found. Press Skip only if you genuinely want to leave a sample out. The disk name in parentheses is there because Paketti writes it into every reference; without it the sampler can only say something is missing, not where it lives.
When the kit spans more than one disk, the disks are chained. The voices, the performance and an .X01 setup all sit on disk 1, the waves are packed across the set, and every wave reference names the disk that wave landed on - so the sampler fetches the later disks itself as it needs them. Load disk 1, pick the .P01, and feed it the next disk when it asks. The performance addresses every voice on MIDI channel 1 and channel 10, and the voices cover disjoint key ranges, so it is one kit across the whole keyboard. The output folder is created if it does not exist yet. Pick a folder and you get KITNAME_DISK1.img, KITNAME_DISK2.img and so on, plus a files subfolder with the waves, voice, and performance loose if you would rather assemble a disk yourself.
When it finishes, the folder opens in Finder so you can see what was written; the full path is also in the status bar and the scripting console.
Write the images to real floppies, or put them on a Gotek or HxC floppy emulator. They are ordinary 720K DOS disks - Typhoon reads those, which the stock Yamaha OS cannot.
Main Menu:File:Paketti Export:Export DWVW Sample (.C01)... (also under Main Menu:Tools:Paketti:Instruments:File Formats, Sample Editor:Paketti:Save, Sample Navigator:Paketti:Export and Sample Mappings:Paketti:Save; keybinding Global:Paketti:Export DWVW Sample (.C01)...).
Writes the selected sample as a DWVW .C01 at 33333 Hz, 12-bit, mixed to mono - the Yamaha TX16W's native format. The rate, bit depth and mono setting come from the Batch Convert dialog's settings, so change them there if you want something else. Pick Keep each sample's own rate there to export without resampling, which is what you want when sending a TX16W sample back out the way it came in.
The sample's root note, key range and loop points are written into the file too, so a .C01 from Paketti carries everything the sampler needs. Loop positions are rescaled if the export changes the sample rate. Renoise's ping-pong loop becomes an AIFF forward/backward loop; a reverse loop is written as forward, because AIFF has no reverse loop.
DWVW is lossless: what you put in at the chosen rate and bit depth is exactly what comes back out. Typical musical material lands around half the size of the equivalent 16-bit file, and silence compresses to an eighth.
Looped samples are trimmed at the loop end. The TX16W has no loop end - its loop is always the stretch between the loop point and the end of the wave, and the Typhoon manual warns when you set one that "any sound beyond the end of the new loop is lost." So any sample with a loop is exported cut off at its loop end, which makes the sampler play what Renoise plays. Nothing is lost: with a forward or ping-pong loop, Renoise never reaches the audio past the loop end either. Samples with looping off are exported whole.
Samples longer than 262016 frames will not load. That is the TX16W's hard ceiling - about 8 seconds at 33333 Hz, or 5 seconds at 50000 Hz - and the exports warn you when a sample goes over it.
Load a RX2 and export directly to Polyend Tracker Instrument
Please note: If there's something in the manual here, that feels hard to comprehend or you feel requires better explanations, please send me a message or leave an issue, so I'll focus on that.
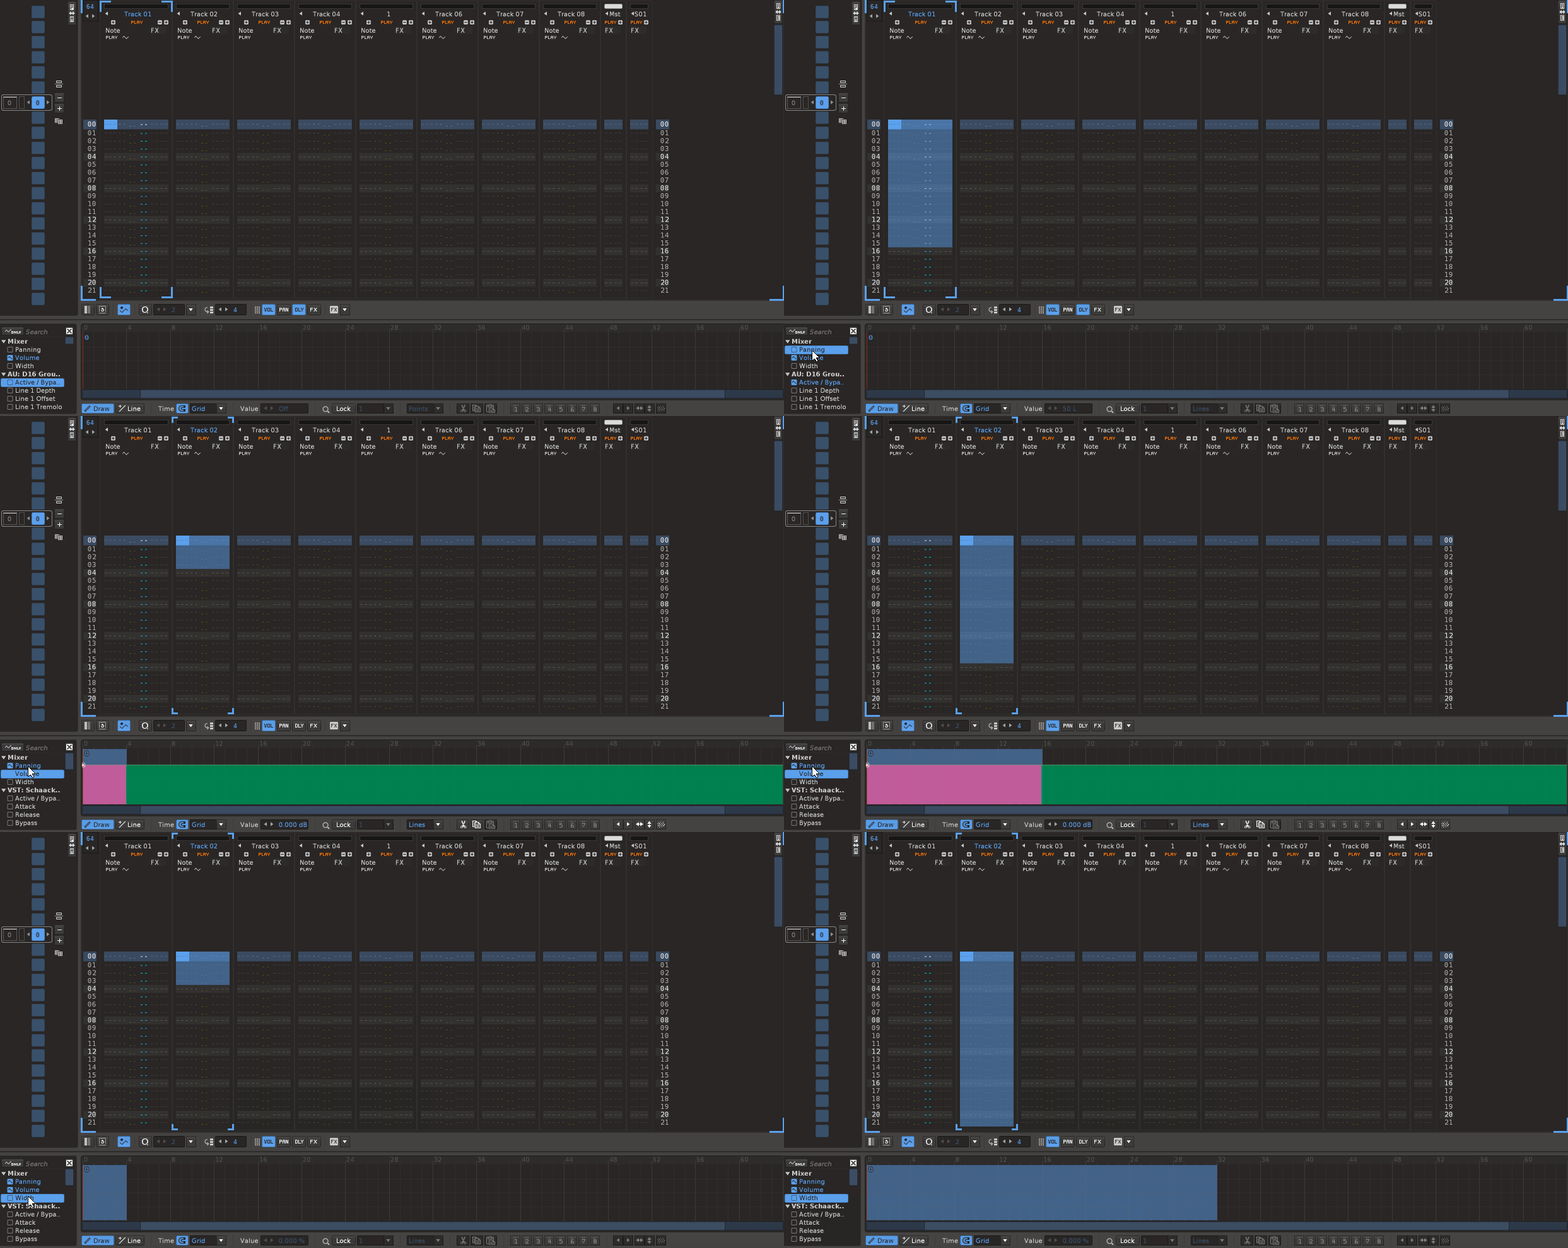
The Shortcut/Midi Mapping Flood Fill Automation Selection lets you select a segment of Automation, and fill the rest of the Pattern with the selection.
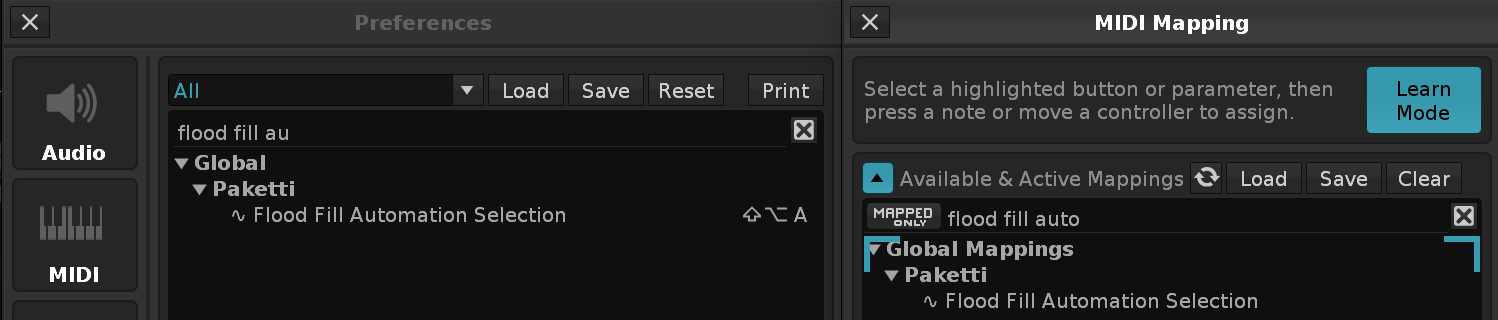
An example of usage:

This same feature is also available from the Automation Menu:
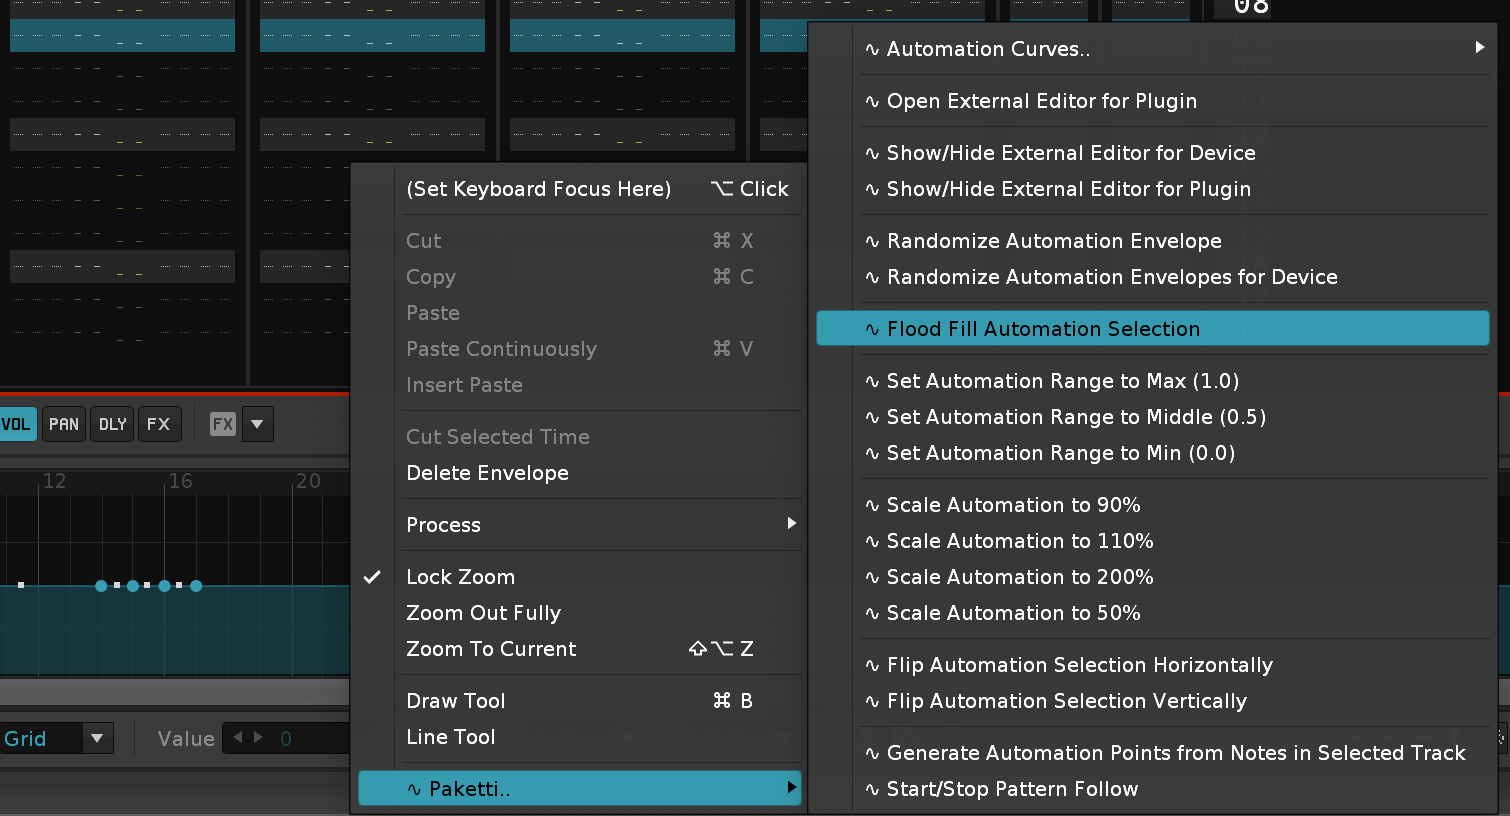 and the other in Main Menu -> Tools -> Paketti.. -> Automation.. -> Flood Fill Automation Selection.
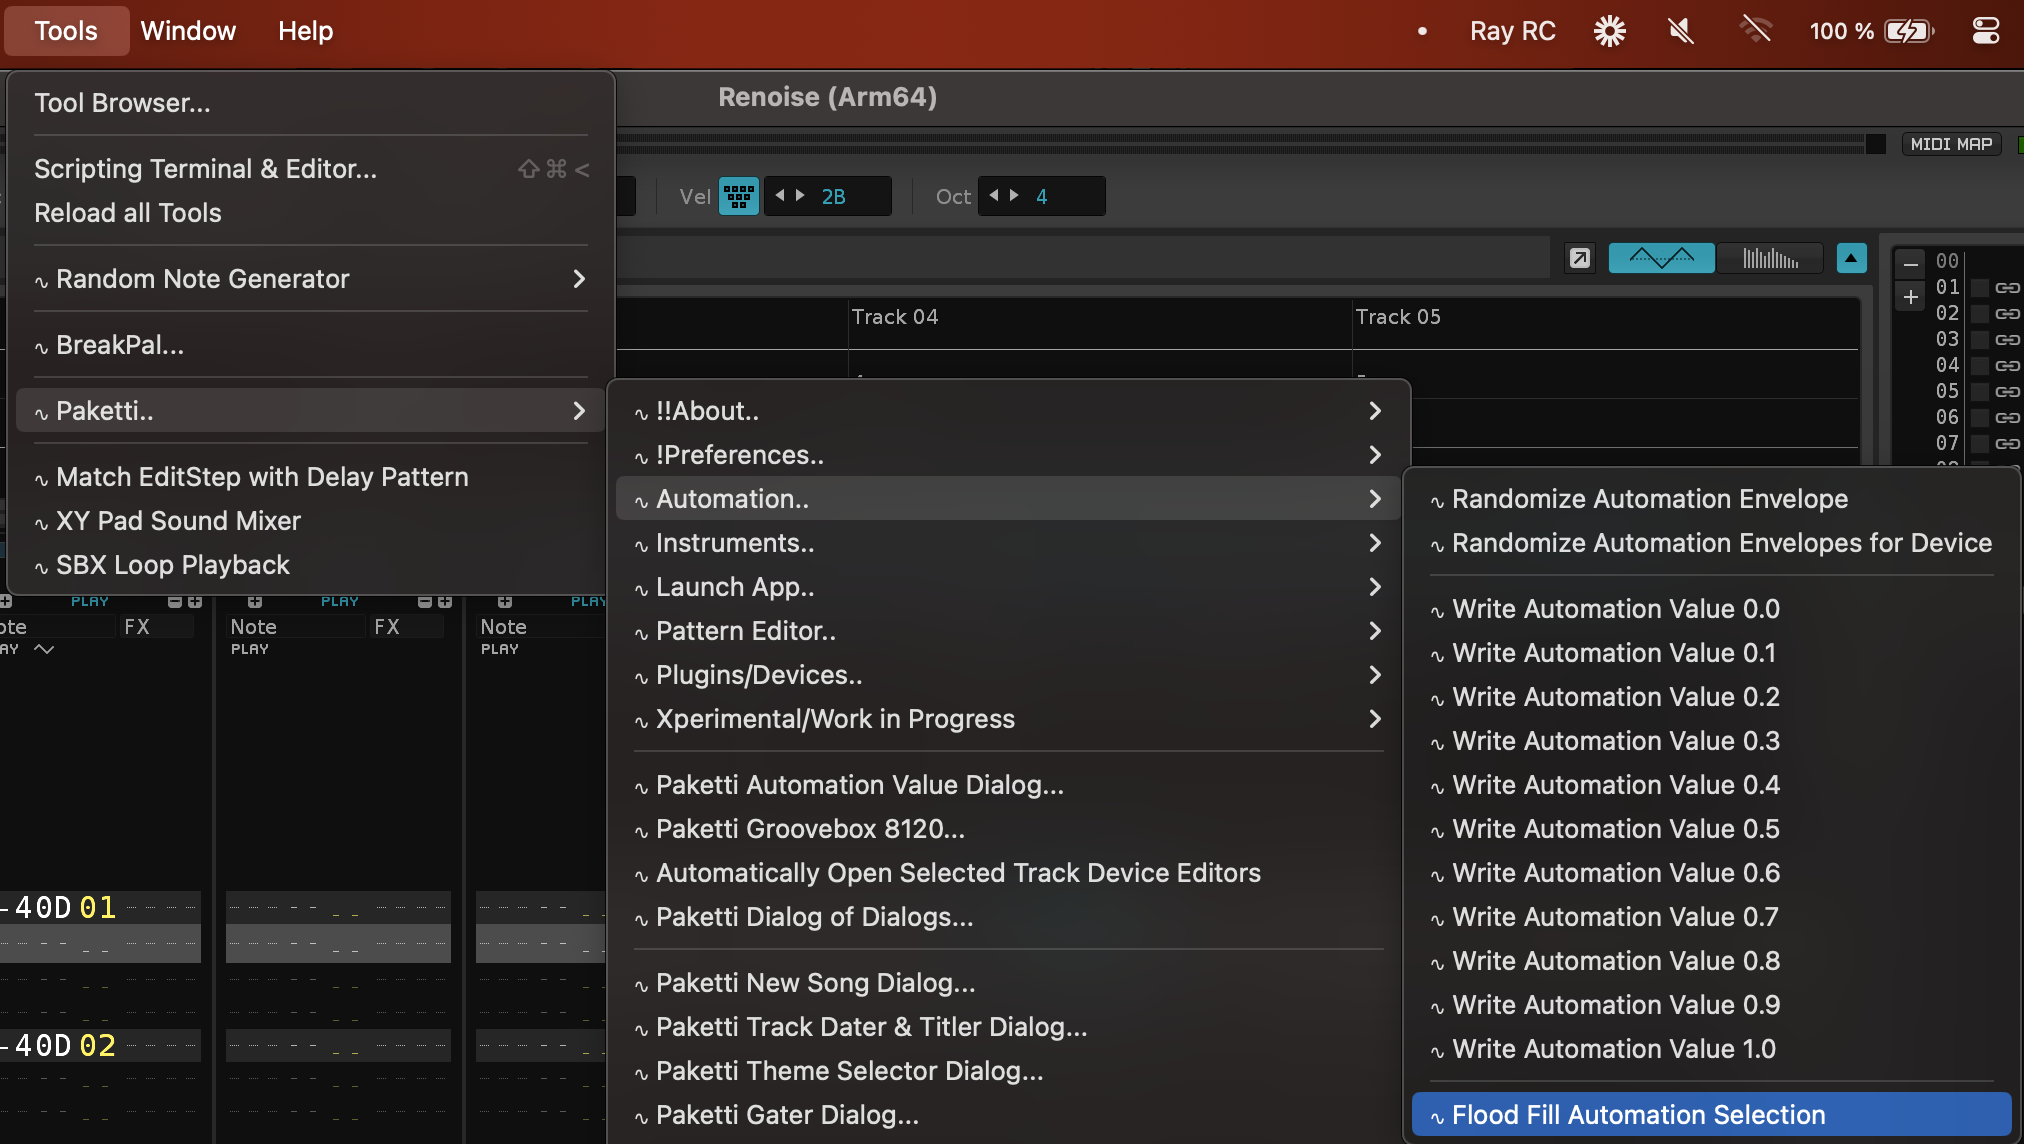
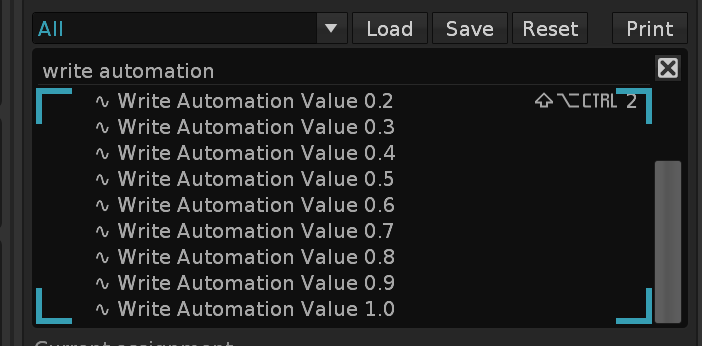
The Shortcuts for Write Automation Value 0.0 to Write Automation Value 1.0 will output the Automation Value to the selected Automation Parameter.
Note: If there is no Automation Envelope created for the Selected Automation Parameter, an Automation Envelope will be automatically created.
The Shortcut Impulse Tracker ALT-D Double Select w/ Automation takes the original ALT-D Double Select feature from Scream Tracker 3 and Impulse Tracker 2 and adds additional logic into the mix.
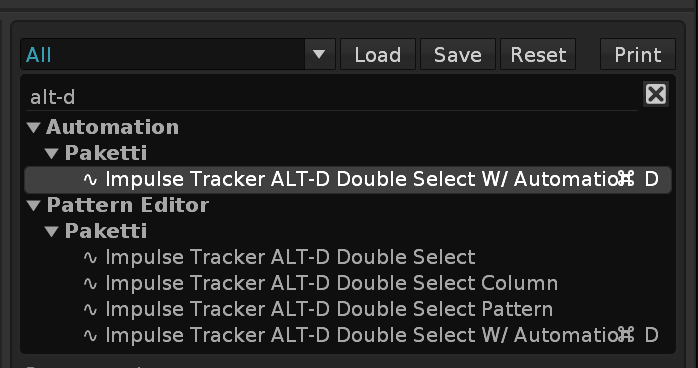
Meaning, if you have the Automation Frame displaying, the same Shortcut will also select the same rows in the Automation Frame.
An example of usage:
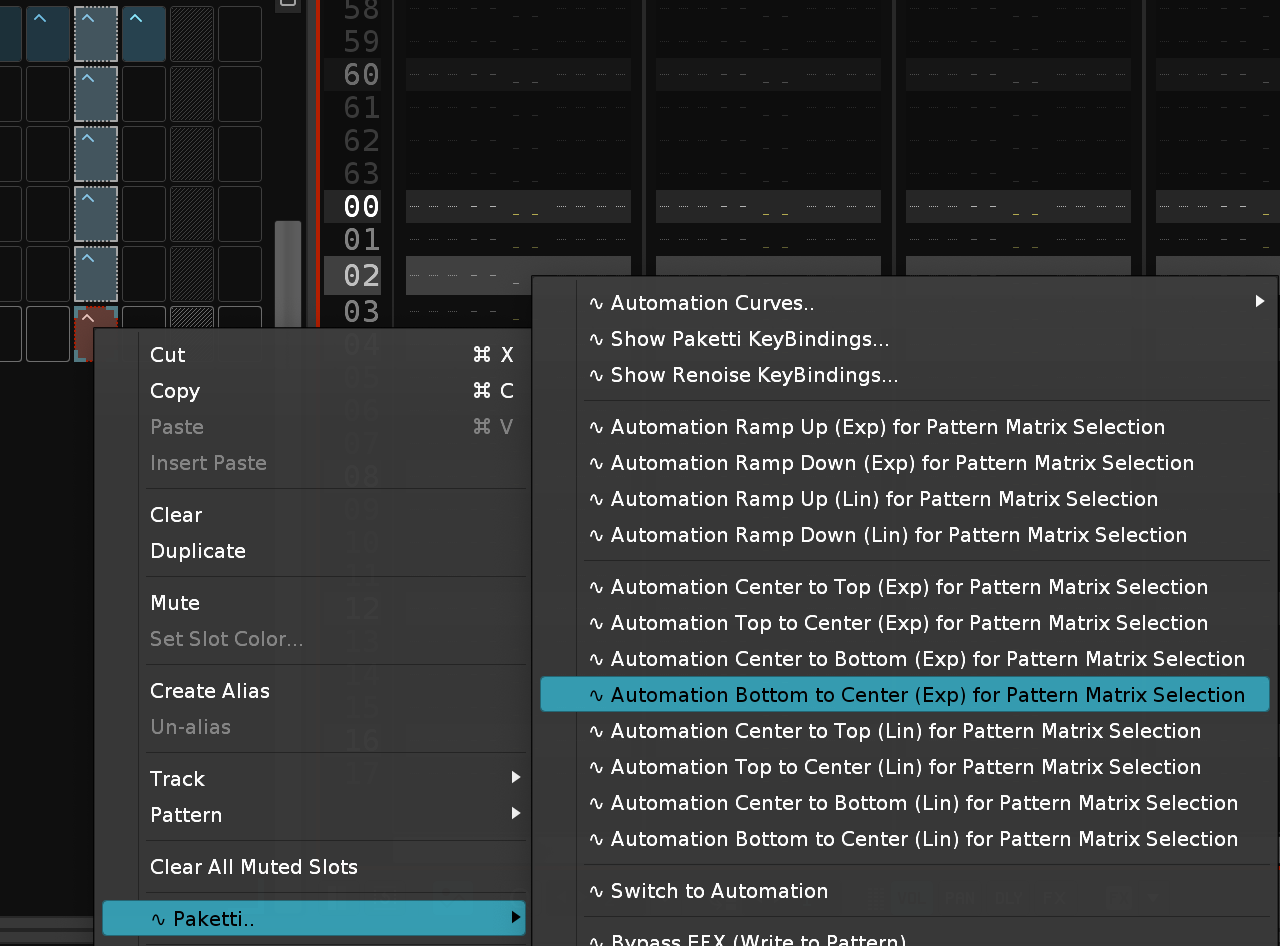
Menu Entries in the Pattern Matrix for creating Automation curves that start from the first selected Pattern and travel to the last selected Pattern for the Selected Track.

The Pattern Matrix Menu looks like this:
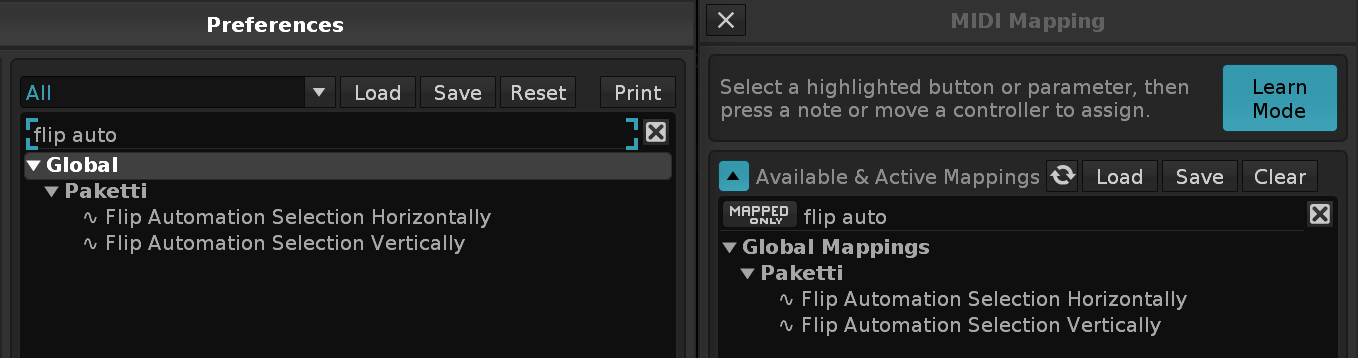
The Shortcuts / MIDI Mappings for Flip Automation Selection Horizontally and Flip Automation Selection Vertically will do the same thing as Flip & Mirror buttons in the Automation Frame, but these Renoise-native features do not have MIDI Mappings available.
This MIDI Mapping will read the Selection on your Selected Automation Parameter, and change the Automation Curve. With a regular Automation Envelope, this will cycle through

An example of usage:
 If you have selected a Panning, PitchBend or similar (get in touch if you want more configurations), these will cycle through the following:
An example of usage:

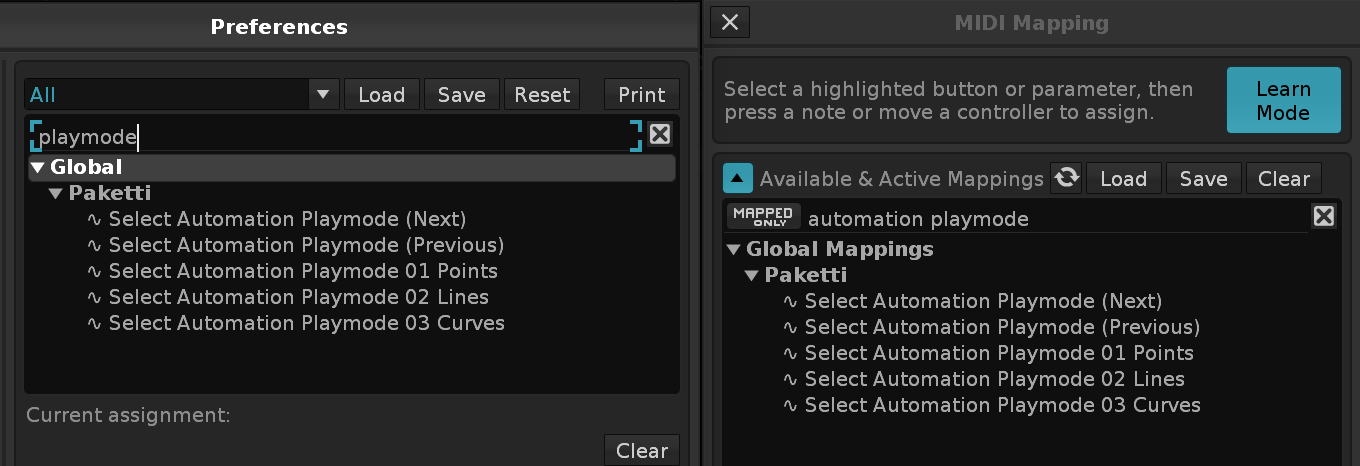
The Shortcuts / MIDI Mappings for Select Automation Playmode (Next)/(Previous) and 01 Points, 02 Lines, 03 Curves let you set the Selected Automation Parameter's Playmode states.
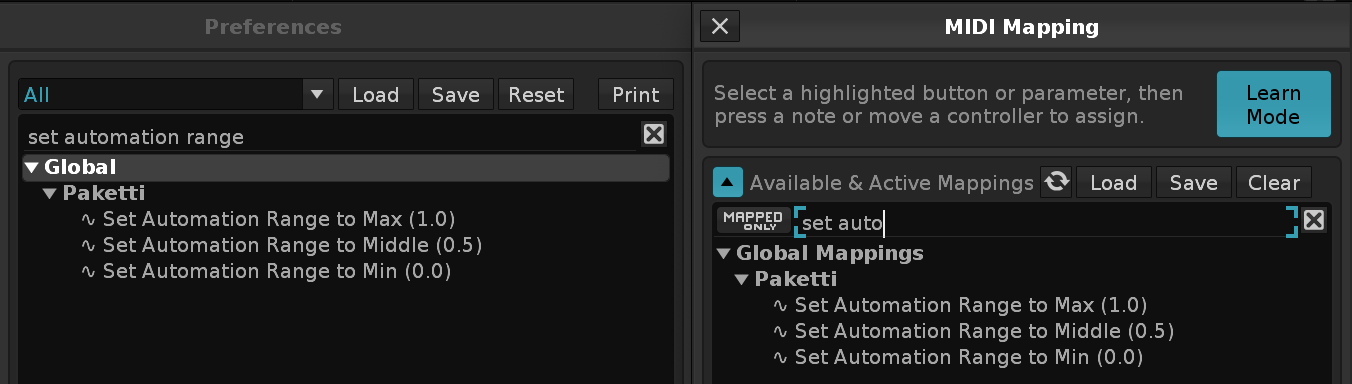
The Shortcuts and Midi Mappings for Set Automation Range to Max (1.0), Set Automation Range to Middle (0.5) and Set Automation Range to Min (0.0) output to the currently selected Automation Parameter's currently selected row.
The Shortcut / Midi Mapping Switch to Automation Dynamic is a multi-function feature.
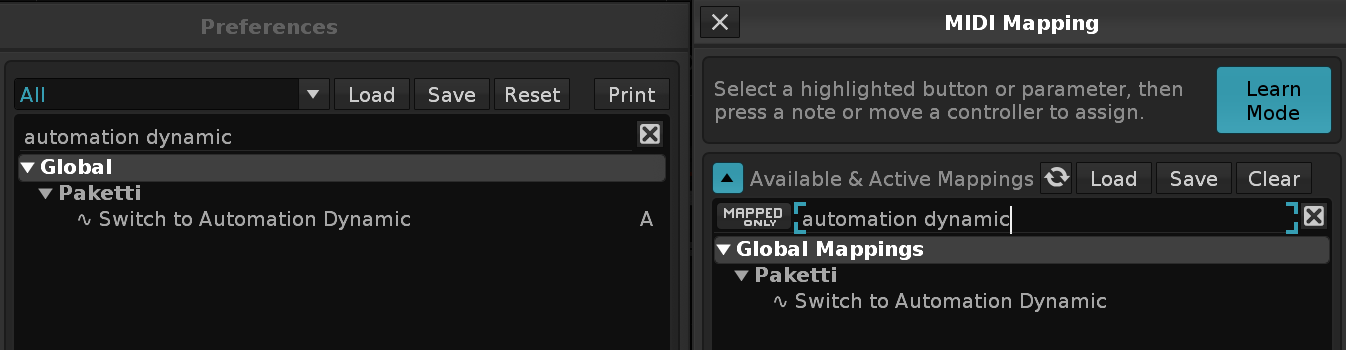
If you're not in the Automation Frame, it will display the Automation Frame. (Hence the "Switch to Automation" part of the name).
If you are already on the Automation Frame, pressing the same shortcut or midi button again, will result in you cycling through the parameters that have Automation Envelopes on them.
An example of usage:

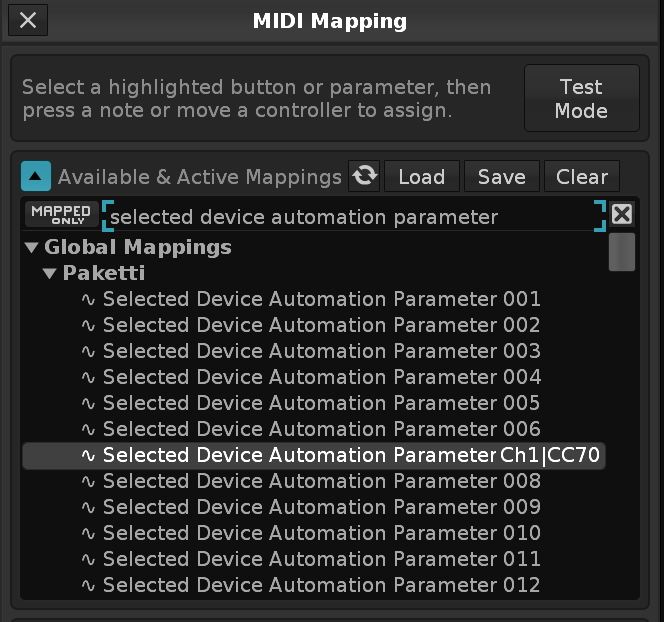
These 128 MIDI Mappings will directly write to the Automation Parameter of the Selected Device. This will happen without the Automation Frame switching to showing the Parameter, so, if you know which Selected Device Parameter you wish to control, just map them and fire away.
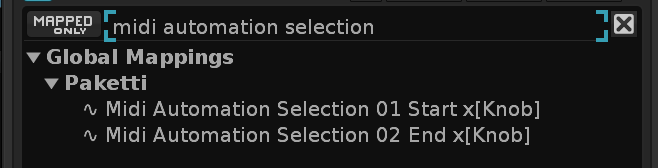
The following MIDI Mappings will let you use two knobs to set the Selection Start and Selection End of the currently selected Automation Envelope.
An example of usage:

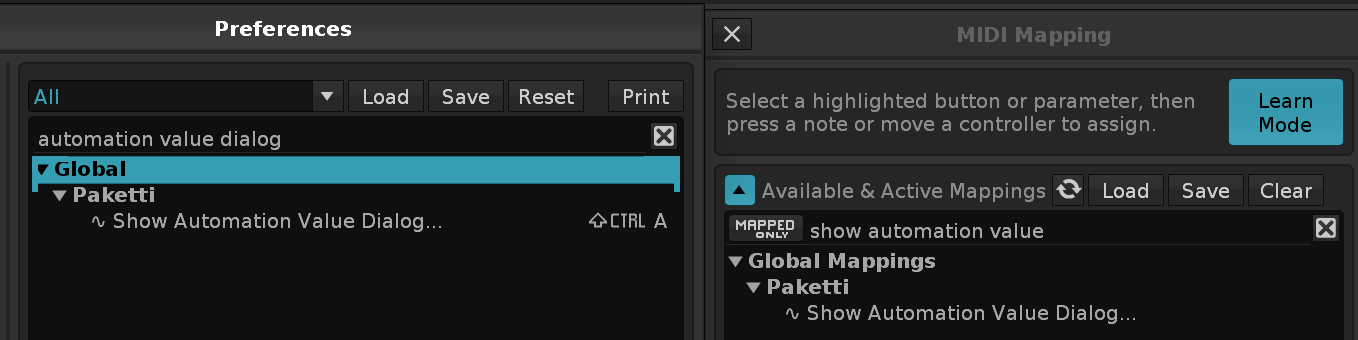
The Shortcut/Midi Mapping Show Automation Value Dialog... will open up a simple and small Dialog that lets you write an Automation Value to the currently selected Automation Line.
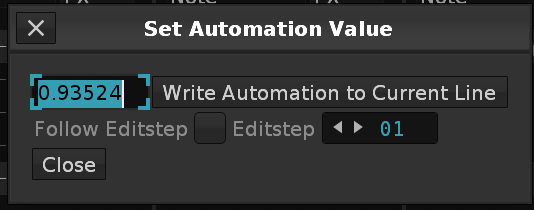
As you can see from the Dialog screenshot below, the textfield is autoselected. After opening the Dialog, you can simply input a value between 0.0 and 1.0, press enter, and the Dialog closes and the value is input.
An example of usage:

There is also an additional feature, the EditStep follow, which lets you get jumped to the next EditStep value after you press Enter in the Value textfield.
An example of usage:
 With the EditStep set, the Dialog never closes.
This MIDI Mapping will let you record Automation nodes to the Selected Automation Parameter.
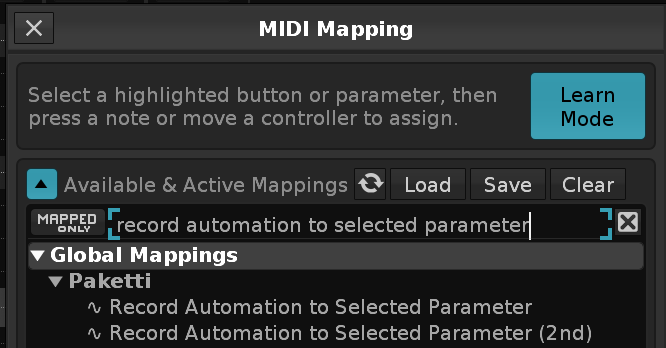
This will only record content to the Selected Parameter, if Edit Mode is on. Then it records to the whole selection. If you have a selection, it will change the value of the whole selection.
If you have Follow Pattern on, then it will record to changes to the playhead.
An example of usage:

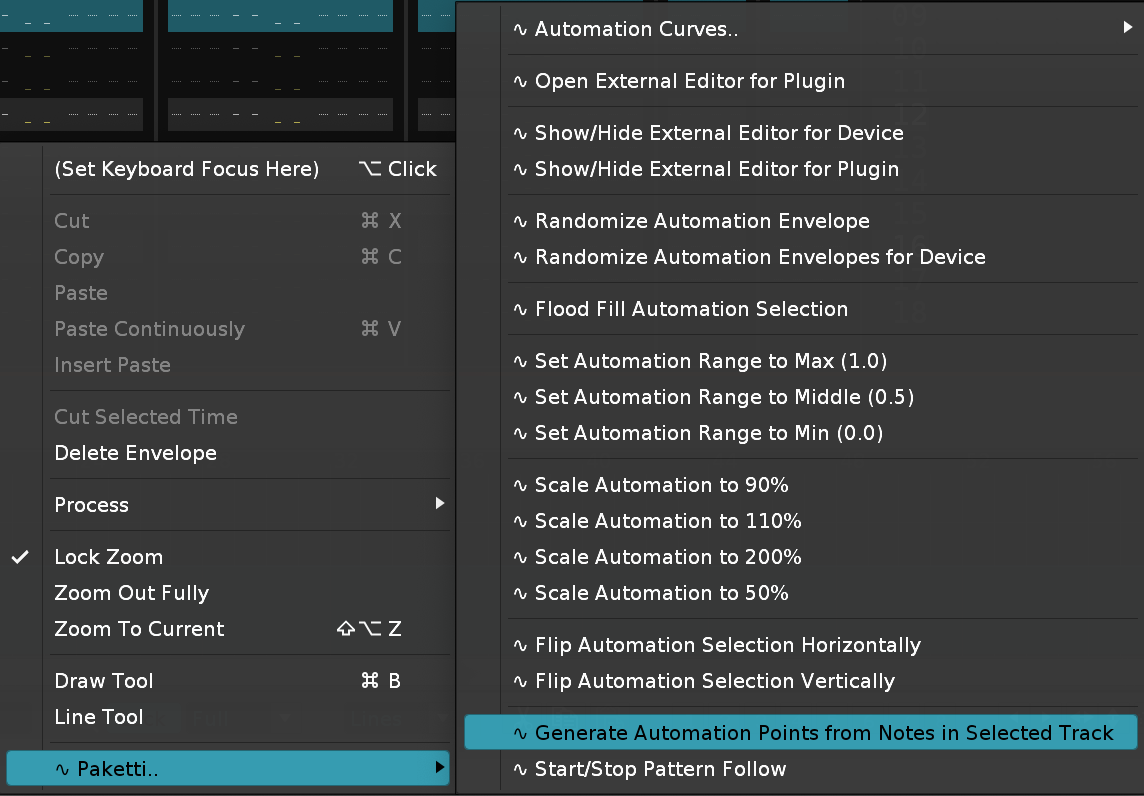
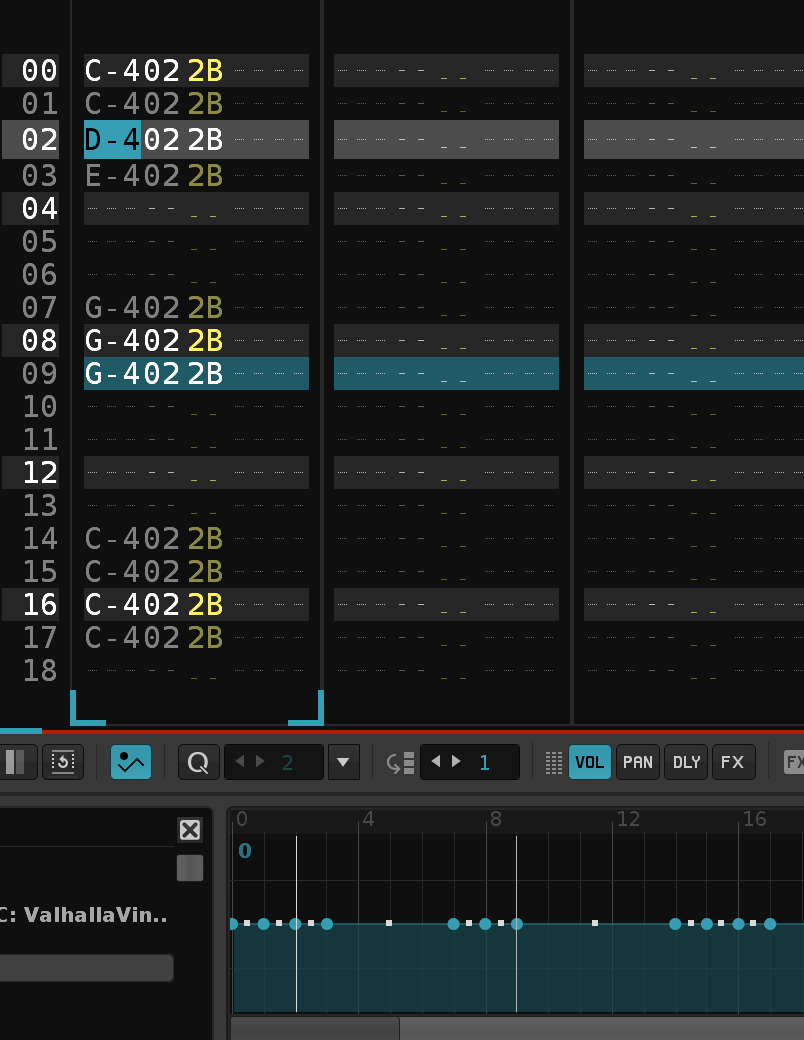
The Shortcut/MidiMapping Generate Automation Points from Notes in Selected Track will output Automation Points to the selected Automation Parameter based on the notes you have in the Pattern Editor.
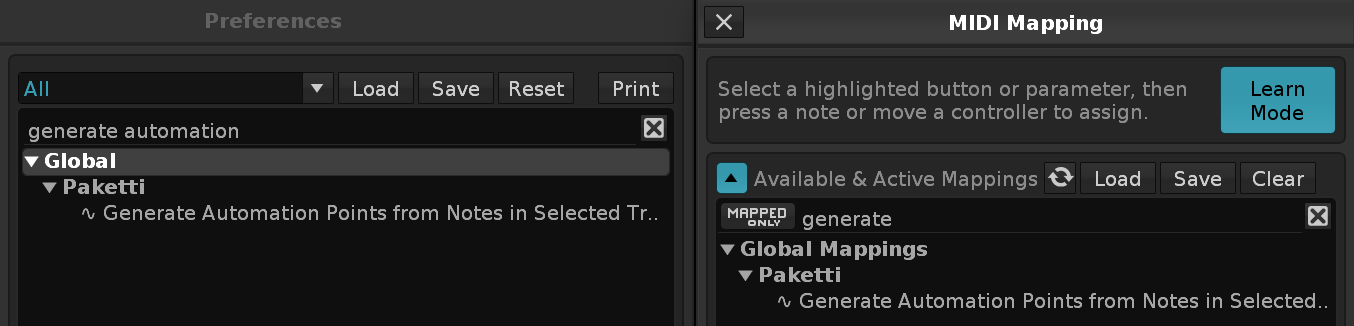
This same feature is also available from the Automation Menu:
An example of usage:
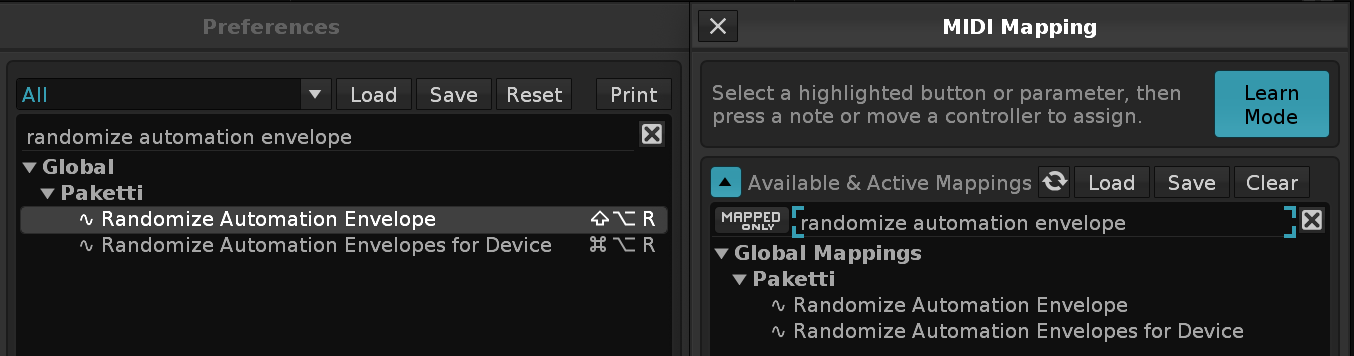
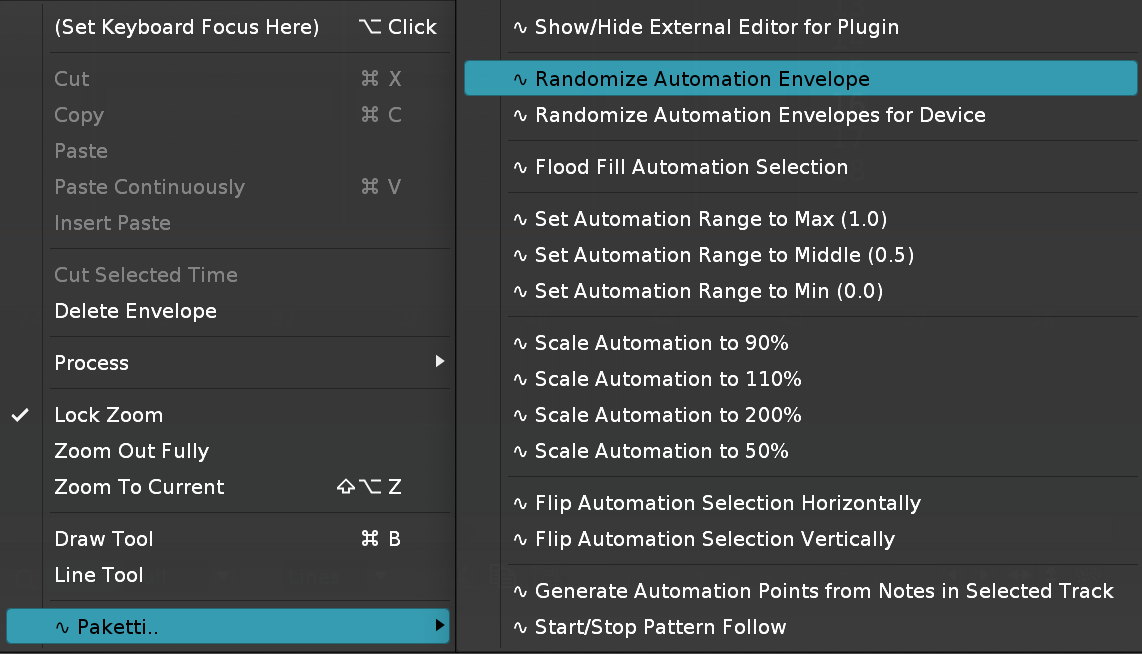
The Shortcut/Midi Mapping Randomize Automation Envelope will take your currently selected Automation Parameter and Randomize it, or, if there is a selection, only Randomize the selection.
This same feature is also available from the Automation Menu:
An example of usage:

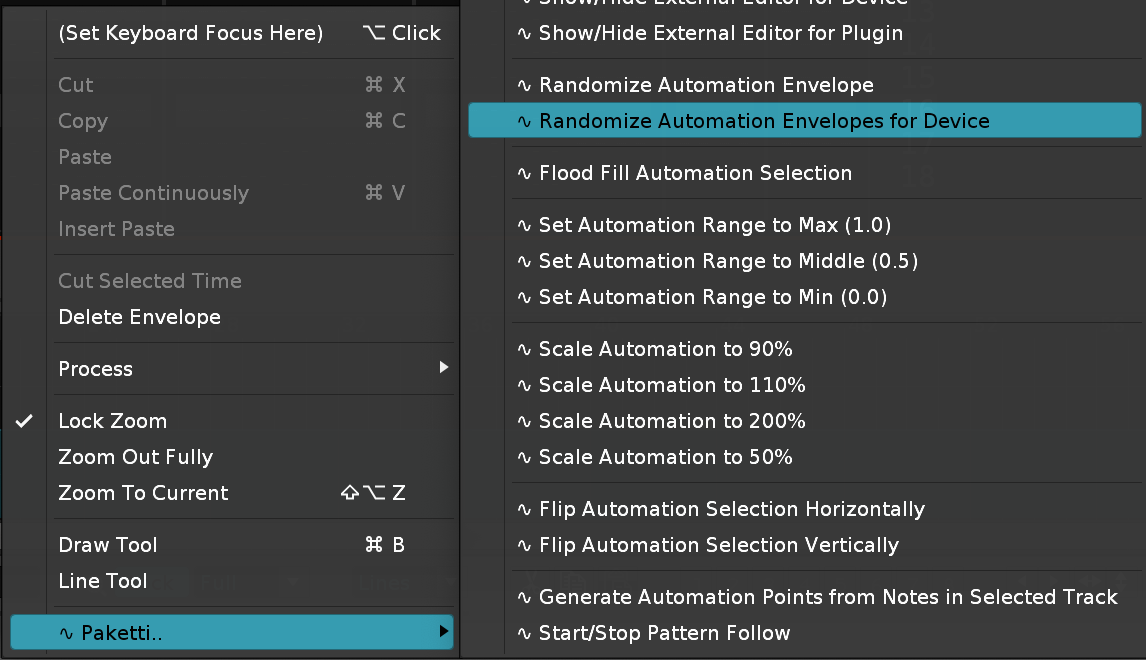
The Shortcut/Midi Mapping Randomize Automation Envelopes for Device will insert Randomization to each and every parameter of the Selected Device.
This will create a new Envelope per each Parameter, or overwrite the pre-existing one.
This same feature is also available from the Automation Menu:
TODO
TODO
I think one of the most consistent points of pleasure that Paketti can provide for those with MIDI controllers is this:
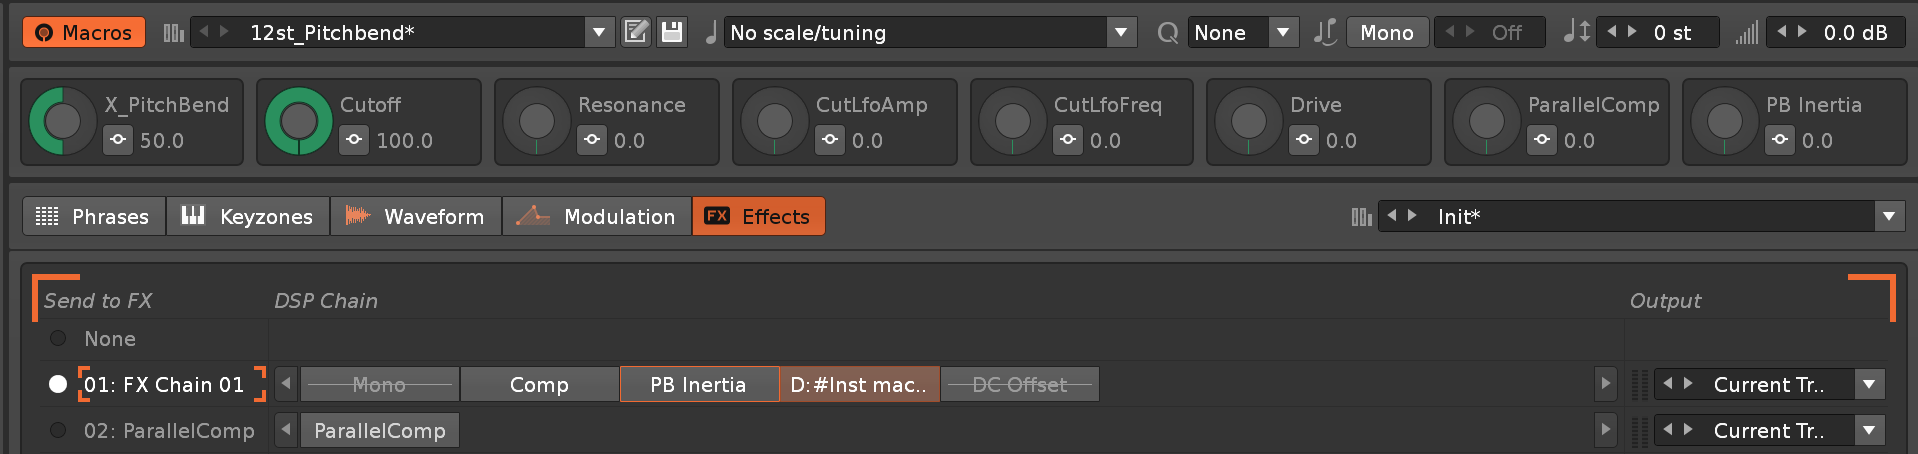
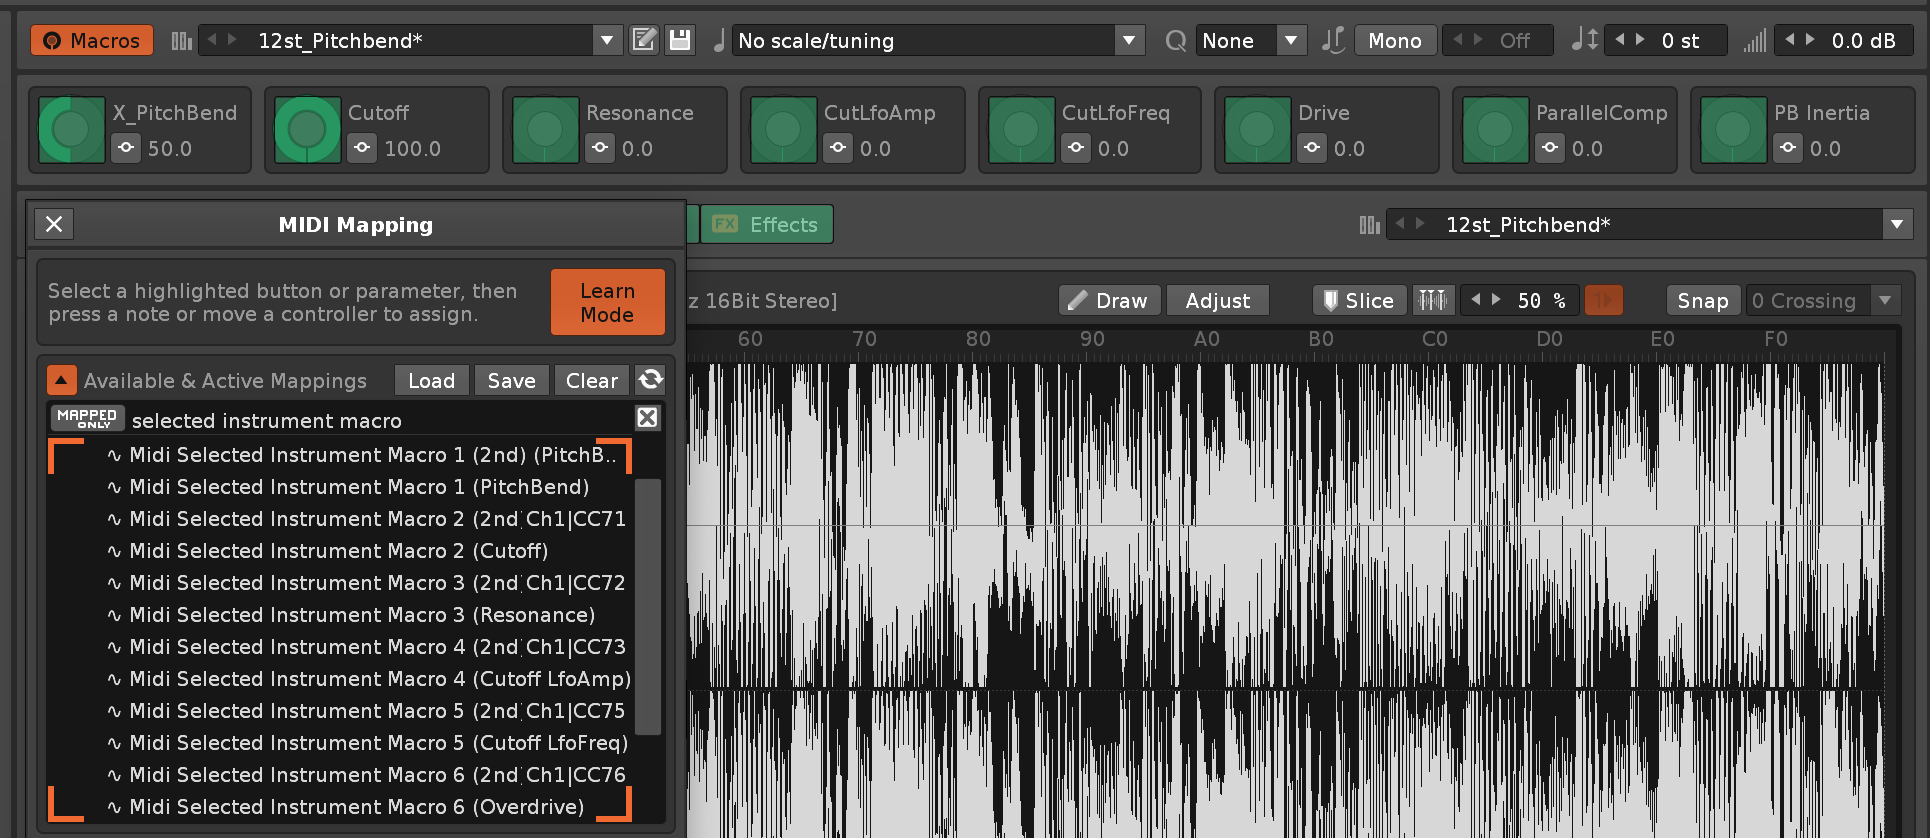 What you're seeing are 8 pre-configured macro knobs. And two versions of the macro knobs for controlling the Selected Instrument settings.
This means that after you're done configuring Macro2: Cutoff, Macro3: Resonance, Macro4: Cutoff LfoAmp, Macro5: Cutoff LfoFreq, Macro6: Drive, Macro7: ParallelComp Macro8: Pitchbend Inertia -- every time you're on any single Paketti Instrument, your 8 knob midicontroller will let you control these settings.
What you're seeing are 8 pre-configured macro knobs. And two versions of the macro knobs for controlling the Selected Instrument settings.
This means that after you're done configuring Macro2: Cutoff, Macro3: Resonance, Macro4: Cutoff LfoAmp, Macro5: Cutoff LfoFreq, Macro6: Drive, Macro7: ParallelComp Macro8: Pitchbend Inertia -- every time you're on any single Paketti Instrument, your 8 knob midicontroller will let you control these settings.
So, basically, set and forget.
Set Cutoff + Resonance, and any instrument you're on, your two knobs will change the Cutoff and the Resonance. Or any of those others.
This is what Paketti is all about, workflow improvements that "make sense (tm)" and improve the quality of life.
Also, every Paketti instrument comes in pre-baked with Pitchbend support - so you don't have to set it up yourself. Just load a sample using Paketti (or Clean Render, or Unison Generate, or eSpeak generate, or yt-dlp download, or .RX2 / .REX / .PTI / .IFF / .SF2 import), and you're already ready to control that specific instrument's macro knobs.
Menu: Main Menu:Tools:Paketti:MIDI:CCizer Control Surface...
Keybinding: Global:Paketti:CCizer Control Surface
MIDI Mapping: Paketti:CCizer Control Surface
The CCizer loader still creates Renoise's native *Instr. MIDI Control device from a CCizer text file. The Control Surface is the direct hardware-control version: pick a ccizer/*.txt file, pick a MIDI output and channel, then drag labeled sliders to send those CCs immediately.
It defaults to sc88st.txt when that file is present, so opening it gives a ready SC-88ST panel. The surface is not limited by the native MIDI Control device's 35-controller ceiling; it reads every active line in the text file. Pitchbend lines get a centered slider, while normal 0..127 CC lines send ordinary MIDI CC messages.
Menu: Main Menu:Tools:Paketti:MIDI:Sysexizer Control Surface...
Menu: Main Menu:Tools:Paketti:MIDI:Sysexizer Dump .syx File...
Menu: Main Menu:Tools:Paketti:MIDI:Sysexizer Send Selected Sample as SDS
Keybinding: Global:Paketti:Sysexizer Control Surface
CCizer gives you a text file of CC numbers and turns it into a MIDI Control device. Sysexizer does the same thing for System Exclusive — the parameters a synth exposes only over SysEx, with no CC equivalent. Renoise has no device that sends SysEx, so Sysexizer sends the bytes itself.
The dialog is 32 slots. Load a definition file from the popup, and the slots fill with that synth's parameters. Move a slider and the SysEx goes out of the selected MIDI port immediately.
Binding your controller. Each of the 32 slots has a permanent MIDI mapping, Paketti:Sysexizer Control 01 [Knob] through Paketti:Sysexizer Control 32 [Knob]. Bind your knobs and faders to those once in Renoise's MIDI Mapping dialog and they stay bound — the names never change, so loading a different definition file re-points the same knobs at a different synth. Your controller sends 0-127 and Sysexizer scales it into whatever range the parameter actually accepts.
Writing a definition file. Drop a .txt into the sysexizer folder next to the tool. One control per line:
@device  Roland GS (DT1)
@channel 1
@delay   30

Master Volume : F0 41 10 42 12 ~ 40 00 04 VV SUM F7 : 0 127 127
Hex bytes are literal. The tokens are:
| Token | Meaning |
|---|---|
VV |
the control's value as one 7-bit byte |
VH VL |
high / low 7-bit halves of a 14-bit value |
CH |
bare (channel - 1) byte |
XX+CH |
literal byte plus (channel - 1) — Yamaha's 1n is 10+CH |
~ |
opens a checksum region (emits nothing itself) |
SUM |
Roland/Yamaha checksum of everything since ~ |
The trailing : min max default is optional and defaults to 0 127 0. Lines starting with # are comments, and files whose names start with _ are treated as documentation and hidden from the popup.
Included: universal.txt (Device Inquiry, Master Volume/Balance, GM On/Off — straight from the MIDI 1.0 spec, safe to send to anything), roland_gs.txt (checksummed GS parameters), _format.txt (the format reference), and a Yamaha TX16W template. The TX16W lines are commented out on purpose — the byte addresses need filling in from the machine's implementation chart, which was not available to verify against. Everything around them works.
Dumping .syx files. Load .syx... reads a SysEx file and splits it into individual F0…F7 messages; Dump to Port sends them to the selected output. It paces itself rather than firing everything at once. MIDI is 31250 baud, so a 512-byte block takes about 164 ms to actually leave — push messages faster than that and the driver queue backs up, at which point short messages overtake long ones already waiting. The gap between messages is therefore each message's own transmission time plus the Msg gap ms value, which you can raise for older hardware that needs time to write each block to memory. Stop aborts a dump in progress.
Sending the selected sample as SDS. Send Selected Sample in the dialog, or Main Menu:Tools:Paketti:MIDI:Sysexizer Send Selected Sample as SDS, transmits the currently selected Renoise sample using MIDI Sample Dump Standard. It sends a dump header followed by 127-byte data packets, with 40 16-bit samples per packet and the standard XOR checksum. The same MIDI output, device/channel value, sample number, and message gap are used. Stereo samples are folded to mono because classic SDS is a single waveform stream. This first sender is open-loop: it paces packets but does not yet wait for ACK/NAK/WAIT responses from the sampler.
Menu: Main Menu:Tools:Paketti:MIDI:Sysexizer SysEx Monitor...
Keybinding: Global:Paketti:Sysexizer SysEx Monitor
Some synths never had their SysEx format published. The Yamaha TX16W manual says outright that the machine sends System Exclusive for front panel switches and parameter changes, and then tells programmers to contact Yamaha for the details — a document that is not in the manual and is not coming.
You can get it from the machine instead. Connect the synth's MIDI Out to your computer, open the Monitor and pick that input. Then:
If exactly one byte changed, that byte is the parameter's value and everything around it is its address — and the Monitor writes the definition line for you:
My Parameter : F0 43 10 7A 00 4A VV F7 : 0 127 0
Rename it, save it into a .txt in the sysexizer folder, and that parameter now has a slider and a MIDI mapping in the Sysexizer control surface. Repeat per parameter and you have built an editor for a synth nobody documented.
If the diff reports several changed bytes, the message probably carries a checksum (see the ~ and SUM tokens) or the two captures were different message types. If lengths differ, they are definitely different messages — capture again, moving only the one control.
Save .syx... writes every captured message to a file, so a bulk dump pulled off the synth can be sent back later with Dump to Port. Incoming SysEx reaches Renoise in 256-byte chunks rather than whole messages; the Monitor reassembles them, so a long dump shows as one message.
Analyze SDS checks captured MIDI Sample Dump Standard traffic, which is the proof path for ReCycle's old “Transmit”/“send via MIDI” sampler link. Start the Monitor on the MIDI input ReCycle is sending to, transmit from ReCycle using a Generic SDS/MIDI sampler target, then press Analyze SDS. Paketti reports each SDS dump header, sample number, bit depth, sample rate, sample length, loop points, captured packet count versus expected packet count, packet sequence errors, and checksum failures. A clean OK dump means ReCycle sent a complete SDS sample stream and Paketti captured it intact.
Step through a sample by attack transient the way Renoise lets you step through slices — but without filling the sample with slice markers. The "tab to transient" workflow from Pro Tools, REAPER and Acon Acoustica. Assign Next / Previous Transient to any key (Tab is unused in the sample editor) and jump straight to the next detected attack, snapped to a zero-crossing, so you never have to zoom in and out to find the true start of a hit.
Detection uses Paketti's Beat Detector engine (combined lowpass + highpass) and runs in the background — the first Next/Previous shows a progress %, then jumps when ready; everything after that is instant from a per-sample cache. Run Re-detect Transients after you edit a sample's audio to refresh.
Two zoom styles drive the unified Next / Previous Transient commands, switchable with Toggle Next/Previous Mode:
A plain Point Cursor (No Zoom) mode is also available for when you don't want the view to change.
Once the cursor is where you want it: Slice at Cursor drops one slice marker there; Delete Left of Cursor and Delete Right of Cursor destructively crop the sample to one side of the cursor (Pro Tools' a / s), remapping surviving slice markers and loop points. Isolate a drum hit entirely from the keyboard: tab to the hit, Delete Left, tab past the hit, Delete Right.
Sample Editor → Paketti → Transient Navigation → (Next/Previous Transient, Next/Previous Transient (Zoom to Onset), Next/Previous Transient in Full (Zoom to Fit Region), Next/Previous Transient (Point Cursor, No Zoom), Toggle Next/Previous Mode (Region/Point), Slice at Cursor, Delete Left of Cursor, Delete Right of Cursor, Re-detect Transients)Sample Editor:Paketti:Transient Next, Sample Editor:Paketti:Transient Previous, Sample Editor:Paketti:Transient Next Zoom Onset, Sample Editor:Paketti:Transient Previous Zoom Onset, Sample Editor:Paketti:Transient Next in Full Zoom Region, Sample Editor:Paketti:Transient Previous in Full Zoom Region, Sample Editor:Paketti:Transient Next Point Cursor, Sample Editor:Paketti:Transient Previous Point Cursor, Sample Editor:Paketti:Transient Toggle Mode, Sample Editor:Paketti:Transient Slice at Cursor, Sample Editor:Paketti:Transient Delete Left of Cursor, Sample Editor:Paketti:Transient Delete Right of Cursor, Sample Editor:Paketti:Transient Re-detectPaketti:Transient Next, Paketti:Transient Previous, Paketti:Transient Toggle Mode, Paketti:Transient Slice at Cursor, Paketti:Transient Delete Left of Cursor, Paketti:Transient Delete Right of CursorHighlight a region in the Sample Editor, trigger this command, and Paketti will trim the sample down to just the selected range and then normalize it to 0 dB — all in one step. No more trimming first, then normalizing separately.
Main Menu → Tools → Paketti → Samples → Trim Selected Sample to Selection and NormalizeSample Editor → Paketti → Process → Trim Selected Sample to Selection and NormalizeGlobal:Paketti:Trim Selected Sample to Selection and NormalizePaketti:Trim Selected Sample to Selection and NormalizeThe Parameter Editor is a Paketti-specific dialog that provides quick access to device parameters. When enabled via Main Menu -> Options -> Open Parameter Editor On Device Selection, it automatically opens whenever you select a new Device on the Mixer or Track DSP view.
The Parameter Editor provides a focused interface for controlling and automating device parameters without cluttering your workspace.
For more details on enabling this feature, see Open Parameter Editor On Device Selection.
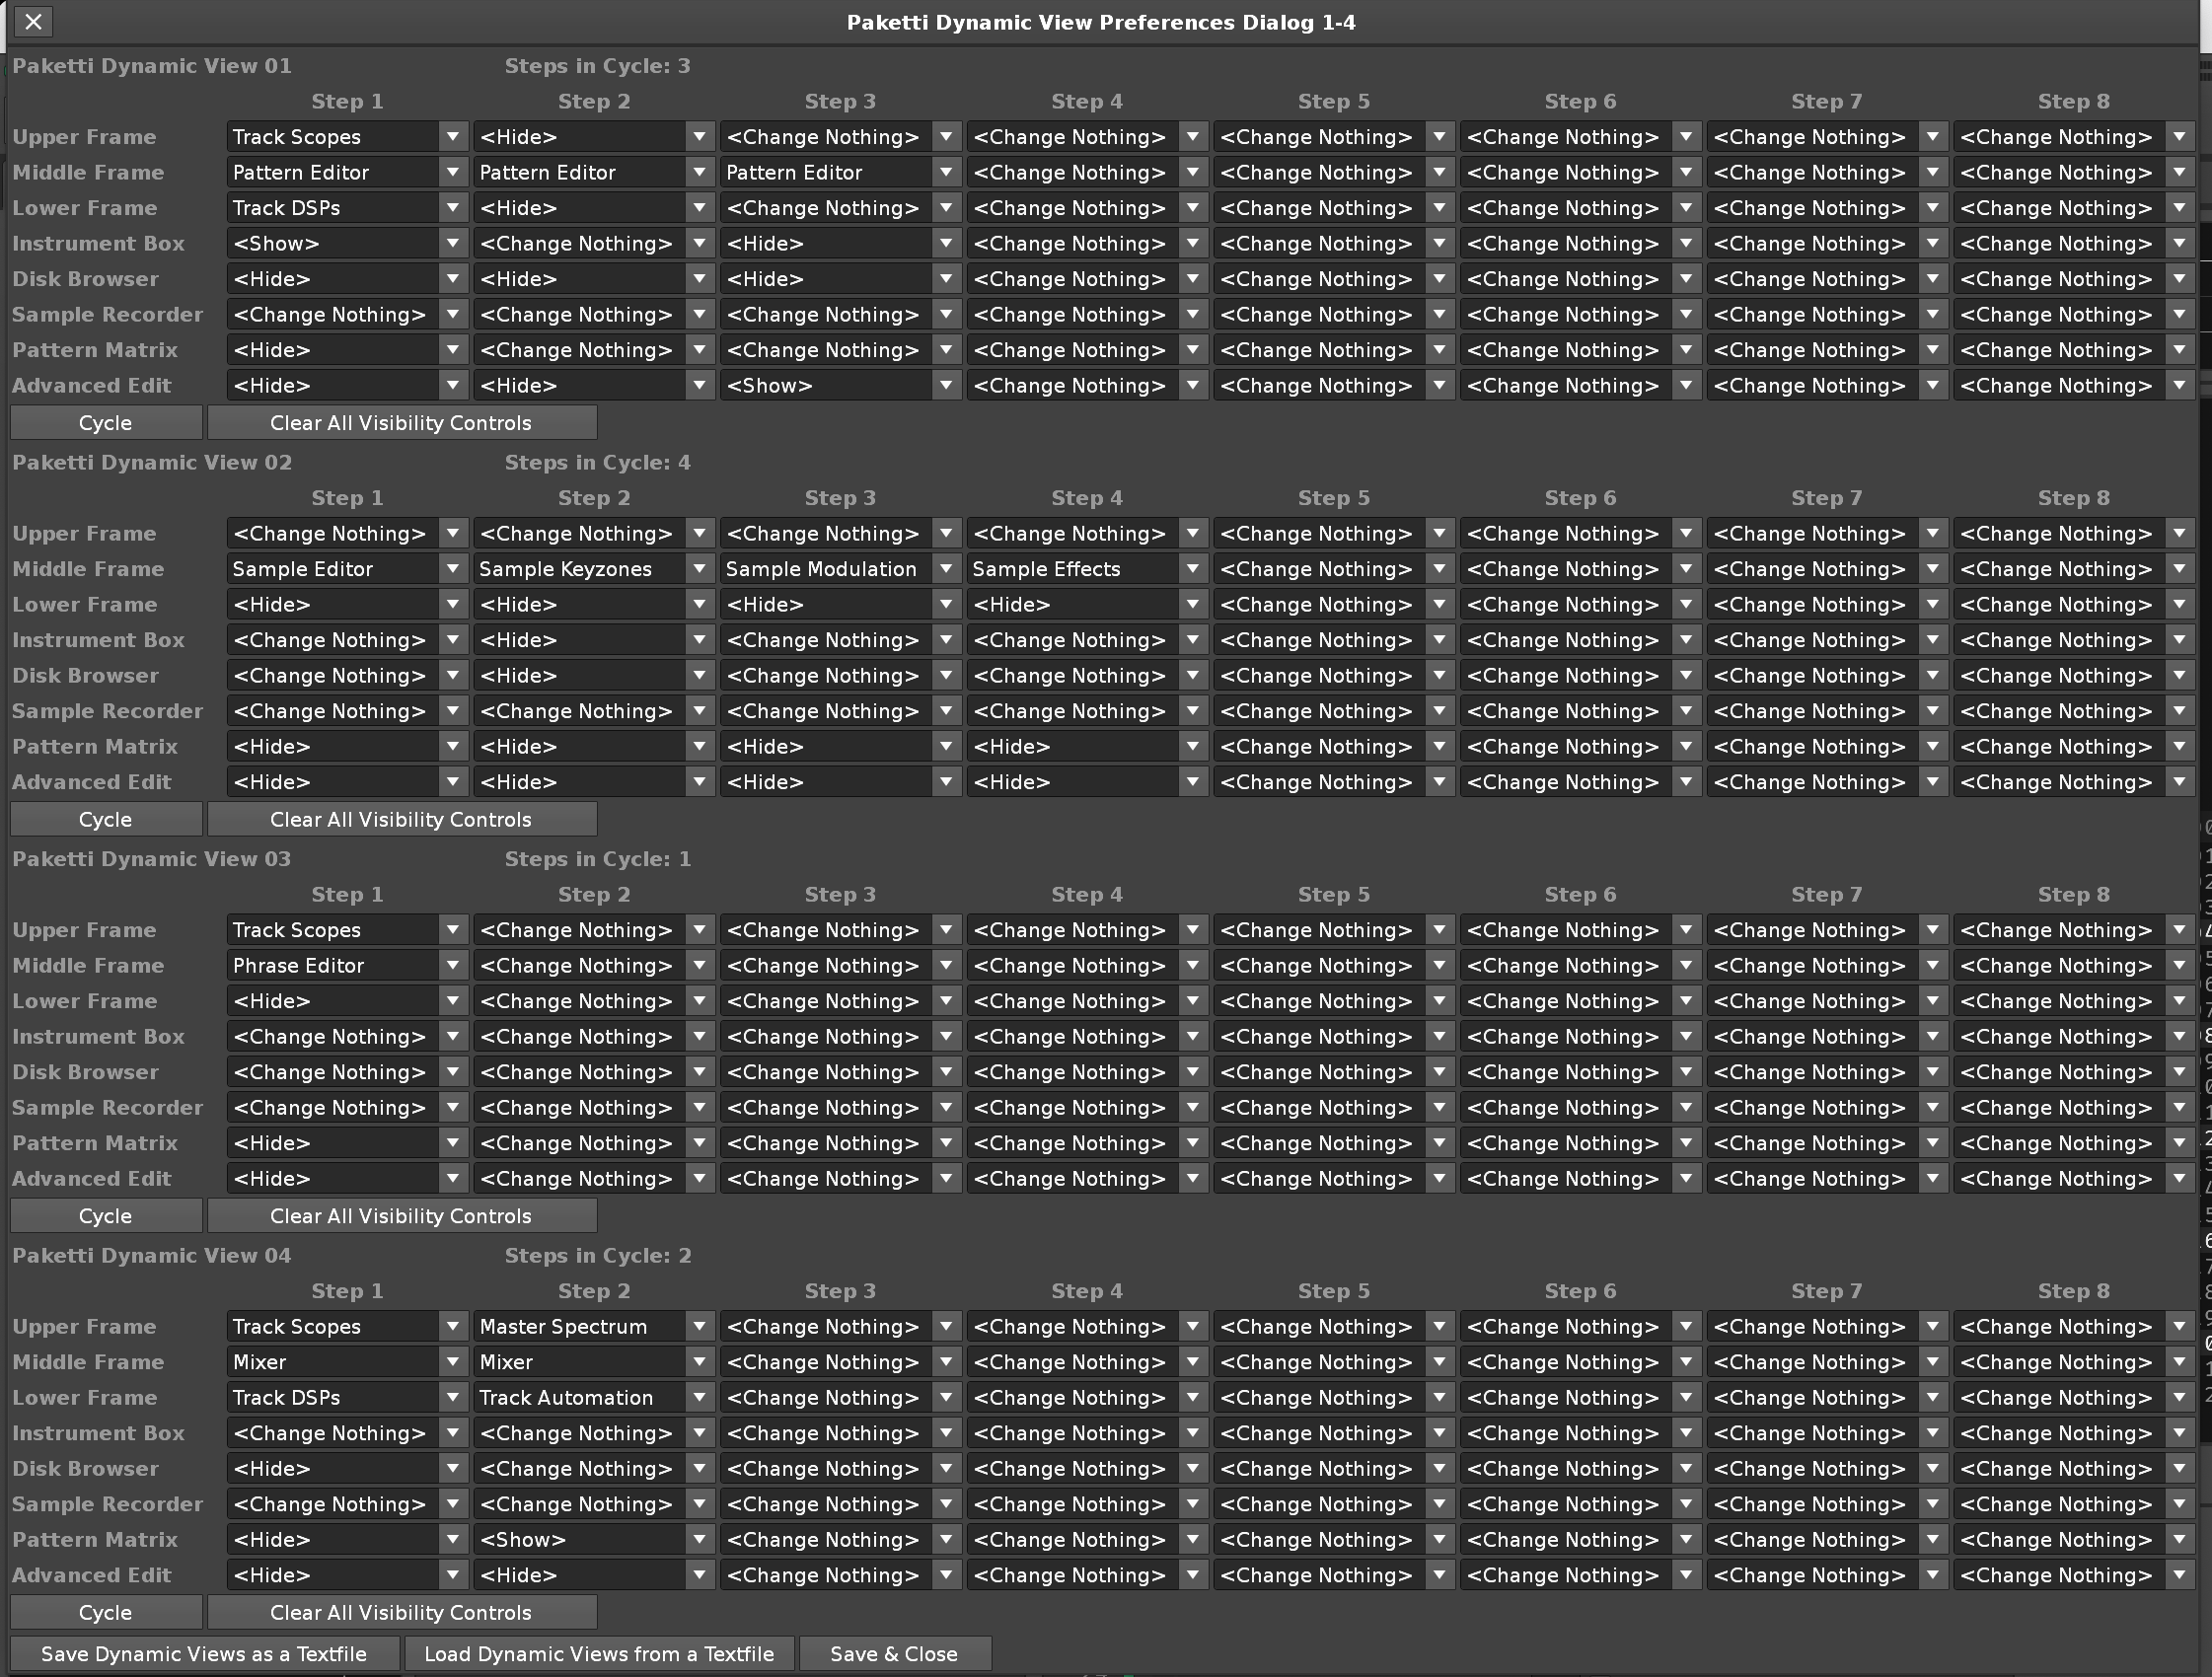
Since there are limitations to what the Global View Presets can do - I've opted for creating 8 slots for Dynamic Views. These can be triggered with user-defined shortcuts, and they fully control what is visible or not-visible. Here are the four that I use - note well: you could have a single shortcut that runs through all 8 cycles of the one slot, meaning, it could be anything - going to anything. A single shortcut that jumps from Pattern Editor to Phrase Editor to Mixer to Sample Editor, with all the other frames and information either displayed or not displayed.
Paketti tries to circumvent some of the most painful points of Renoise, and replace them with better, easier, faster, more user-friendly solutions. Quality-of-Life & Workflow improvements over "multiple mouse clicks".
One of them is the complete dismissal of the Disk Browser. You don't need to use it to load samples or save samples. In fact, I would encourage you to never use it for loading or saving samples - just use the Paketti solutions.
The Windows Explorer and macOS Finder are far more robust and stronger solutions than the Renoise Disk Browser. When you trigger the following shortcuts or menu entries or midimappings, the Windows Explorer, or the macOS Finder will be opened - allowing you to select multiple samples from multiple folders, access the sidebar/favorites you have set yourself, and, just, be faster than the Disk Browser.
For that, you just use the Paketti PitchBend Multiple Sample Loader & Paketti PitchBend Drumkit Loader shortcuts. These will load a sample (or multiple samples), and immediately initialize it with:
8 Macros (PitchBend, Cutoff, Resonance, Cutoff LFO Frequency, Cutoff LFO Amp (4+5 are used for autofilter like features), OverDrive, Parallel Compression, PitchBend Glide/Inertia) (set it to max, and your regular midicontroller pitchbend input will be very slow, set it to minimum, pitchbending will be immediate). For these, there's a Default XRNI instrument being used, which comes with Paketti. you can of course replace it with a completely different XRNI - which will then get it's sample overwritten on every load.

Paketti Preferences "Paketti Loader" preferences, such as using your preferred loopmode, autofade, autoseek, oneshot, interpolation, New Note Action, selected FilterType.
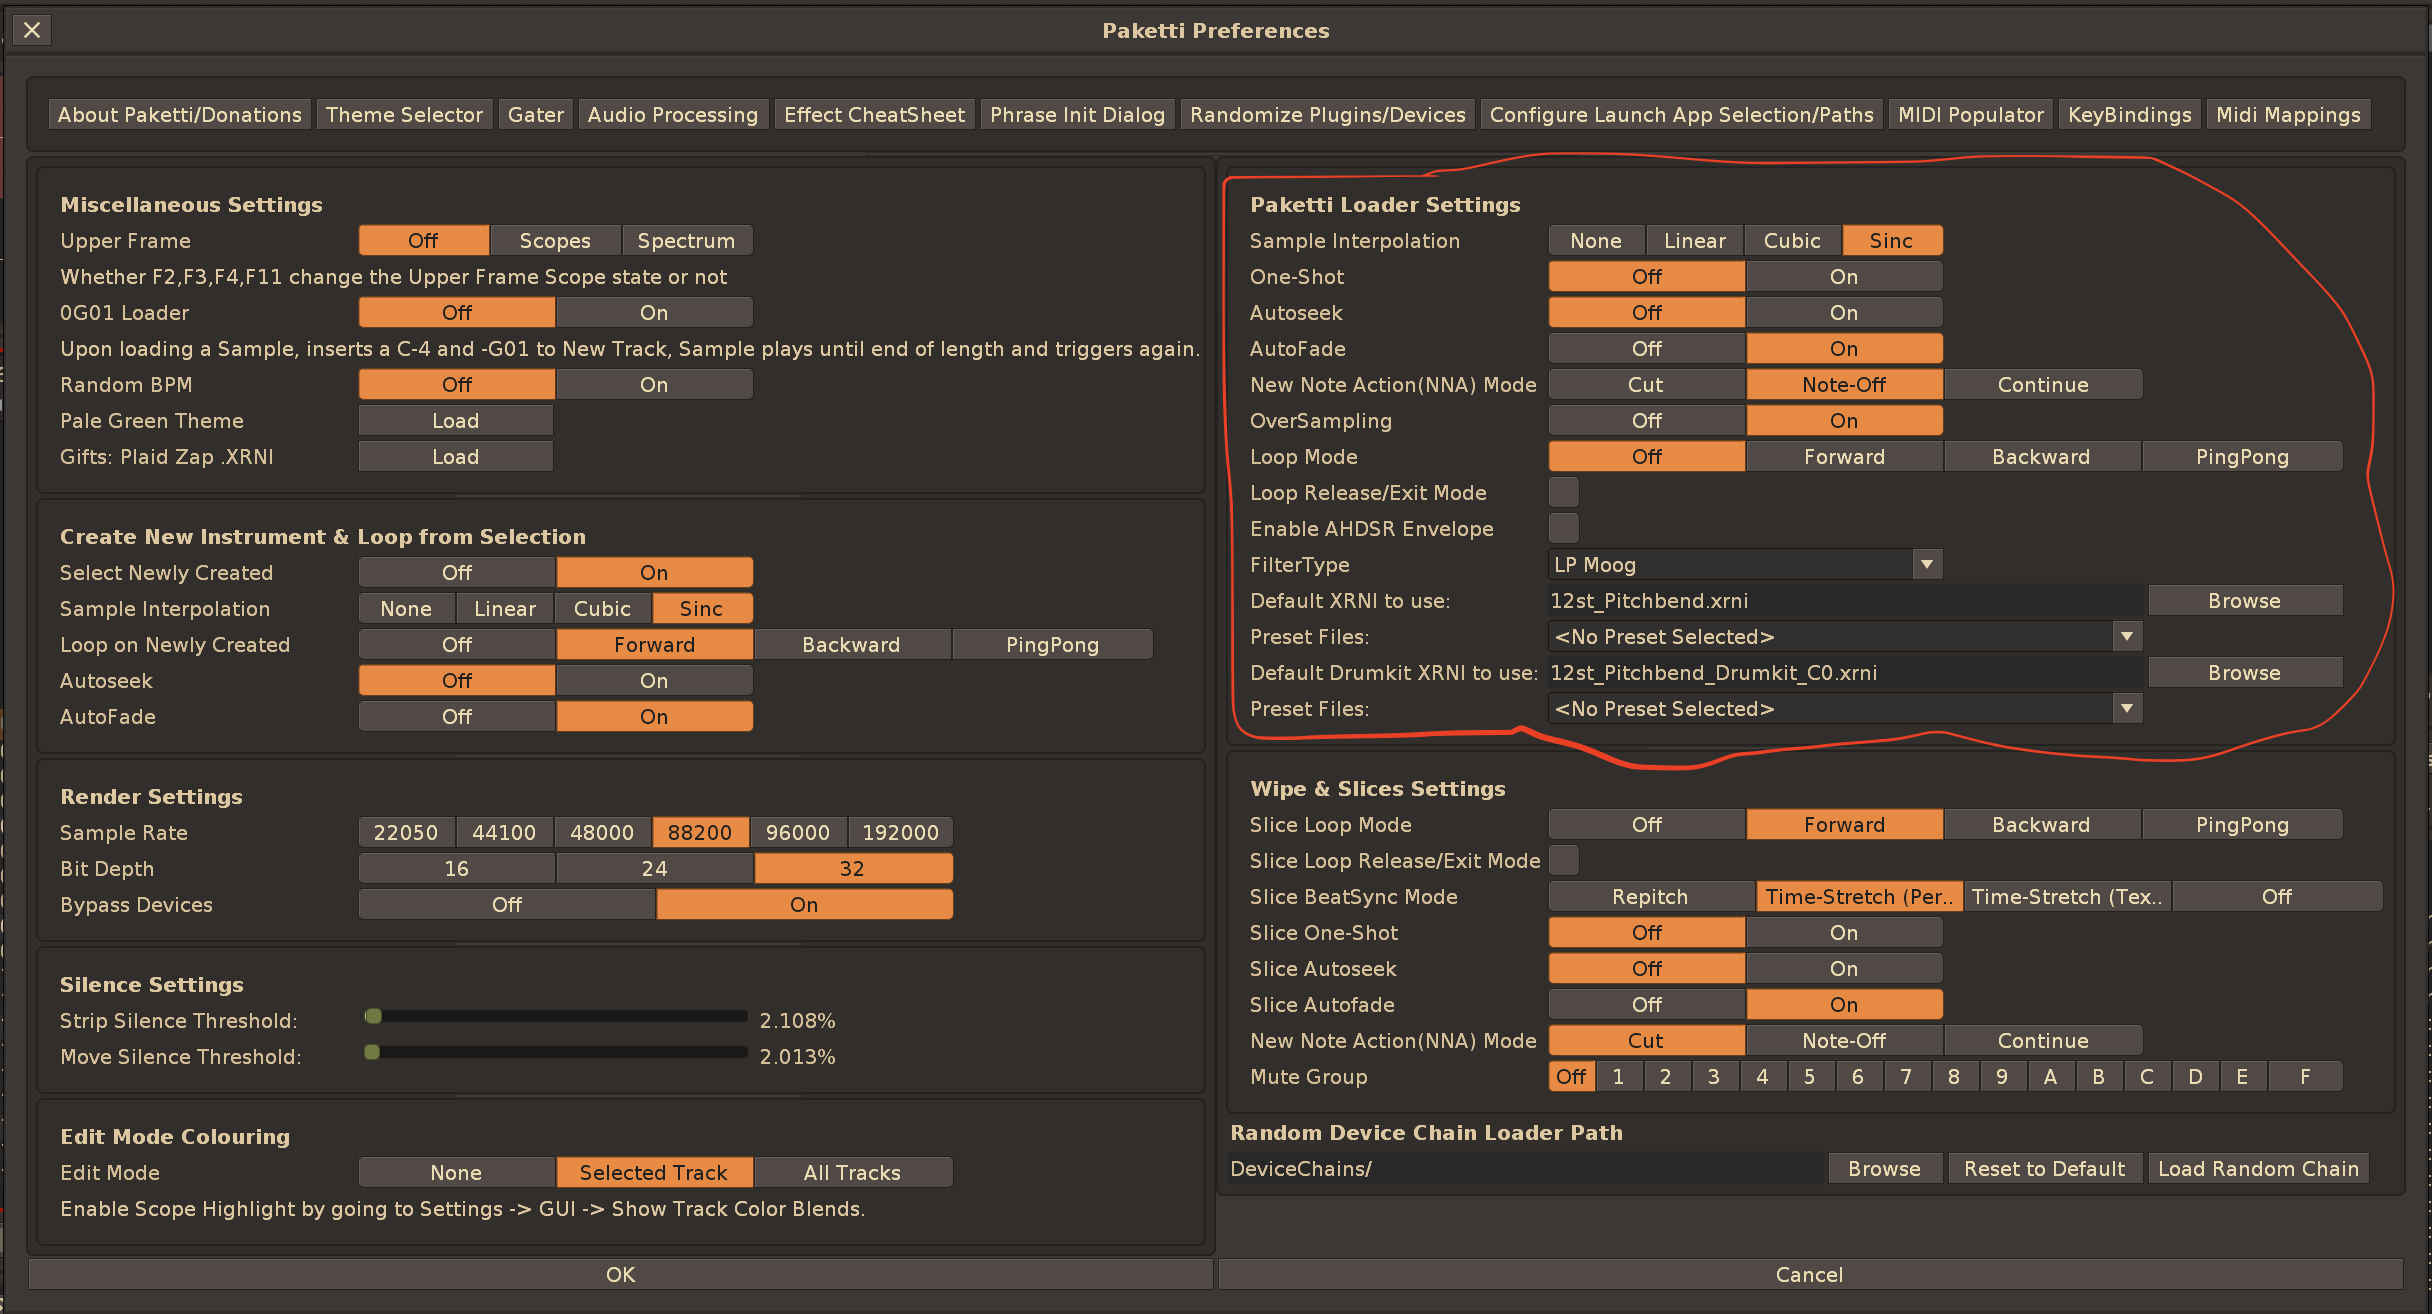
If you pay close attention, you'll also see a checkbox for setting the AHDSR Envelope. Yes, the Default .XRNI Instrument of Paketti also comes in with some Sample FX Chain settings. There's a:
Some examples below:


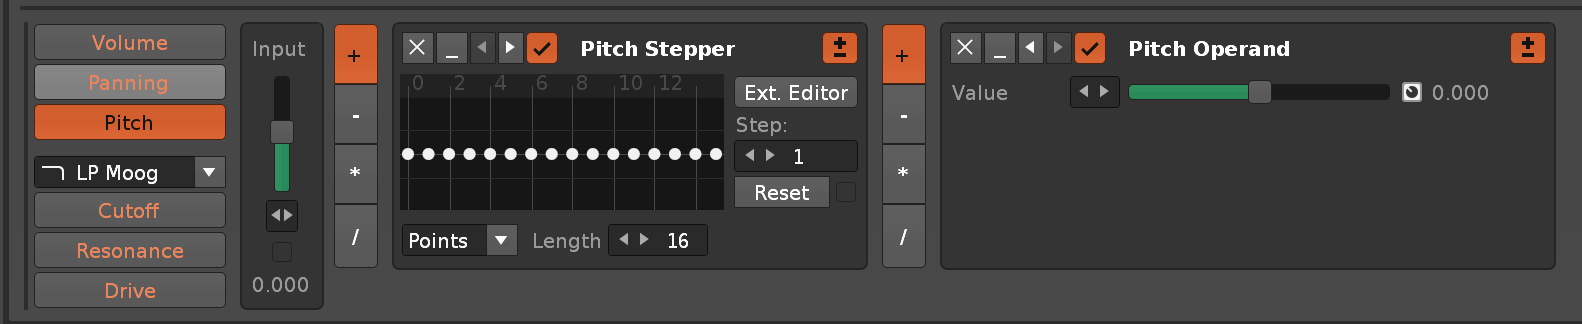
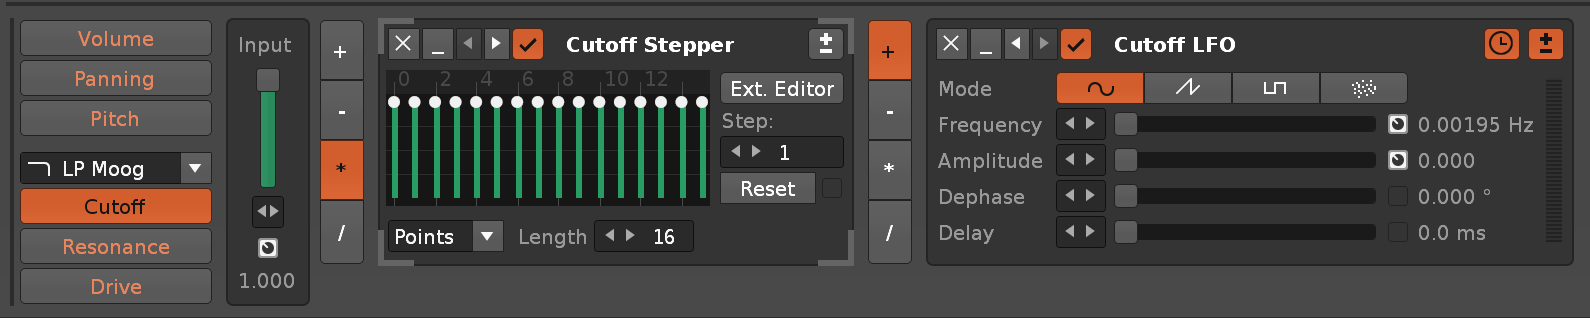
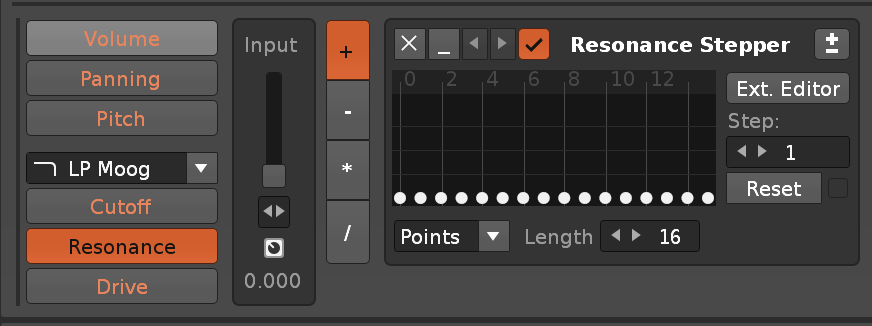
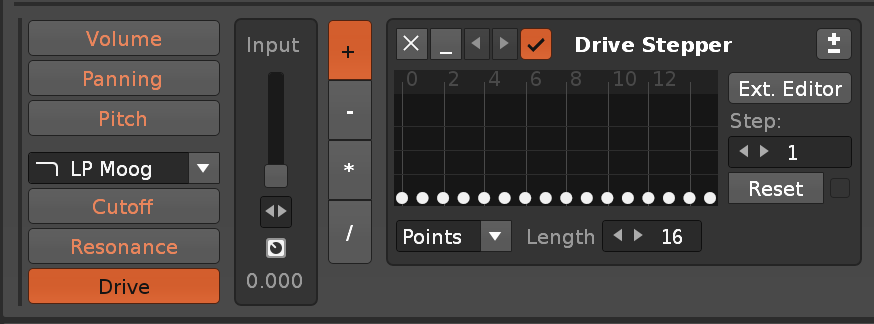
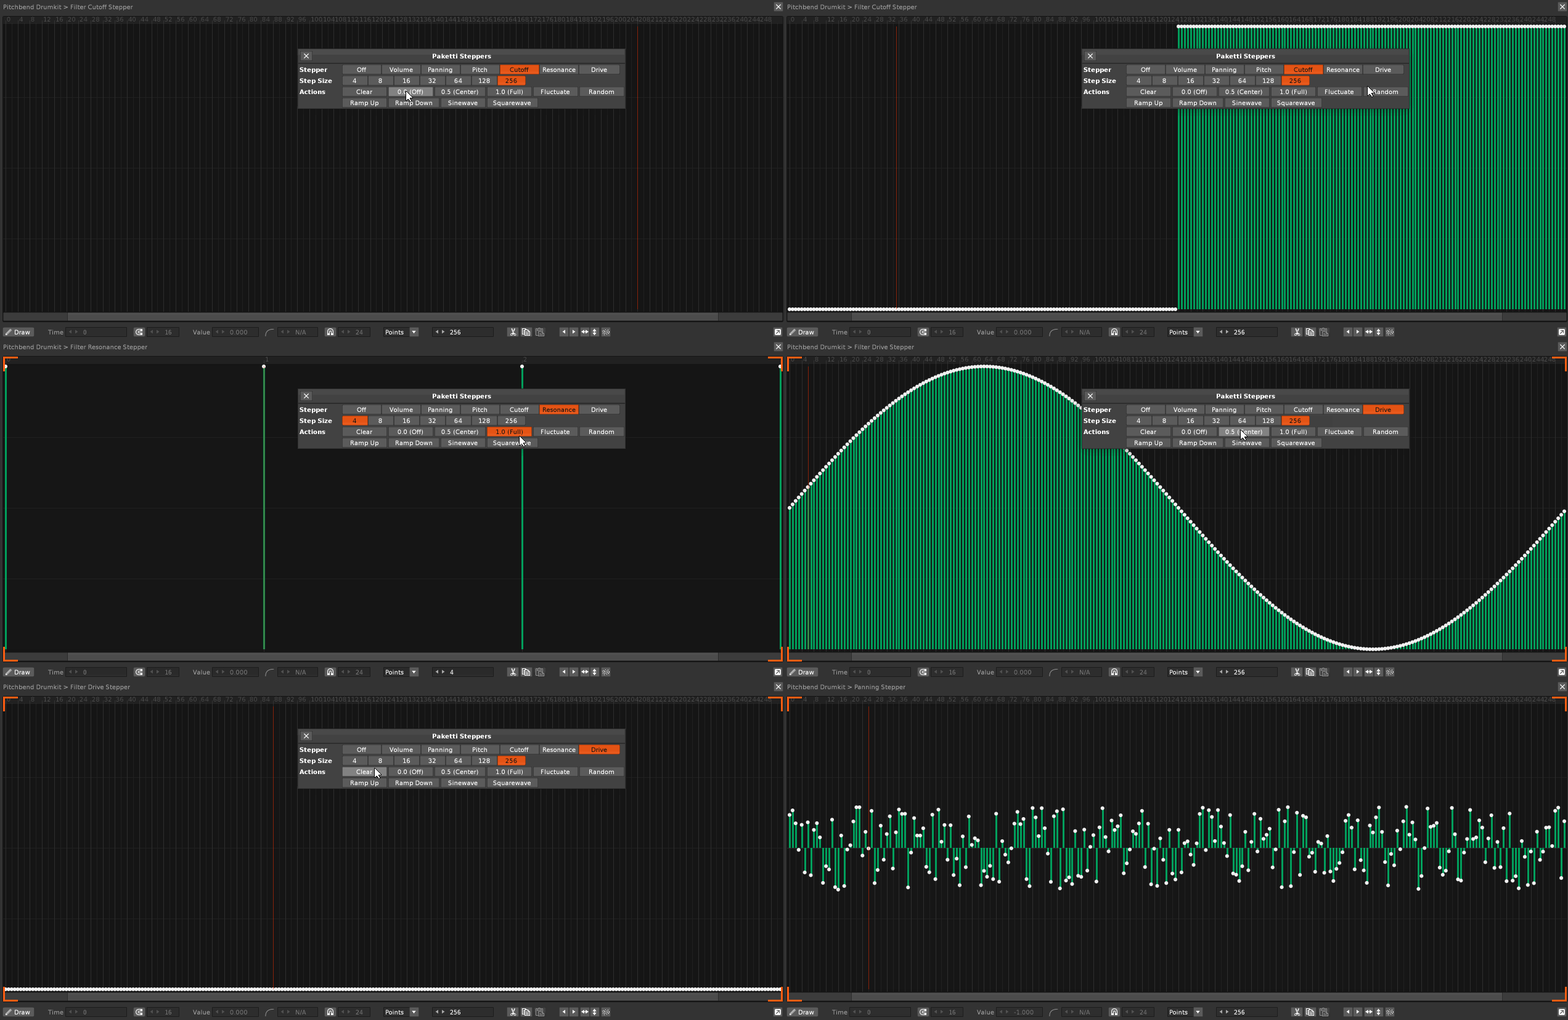
I have created a Stepper switching dialog that lets you visit the stepper of your choice and draw the steps you wish. Here's an example:
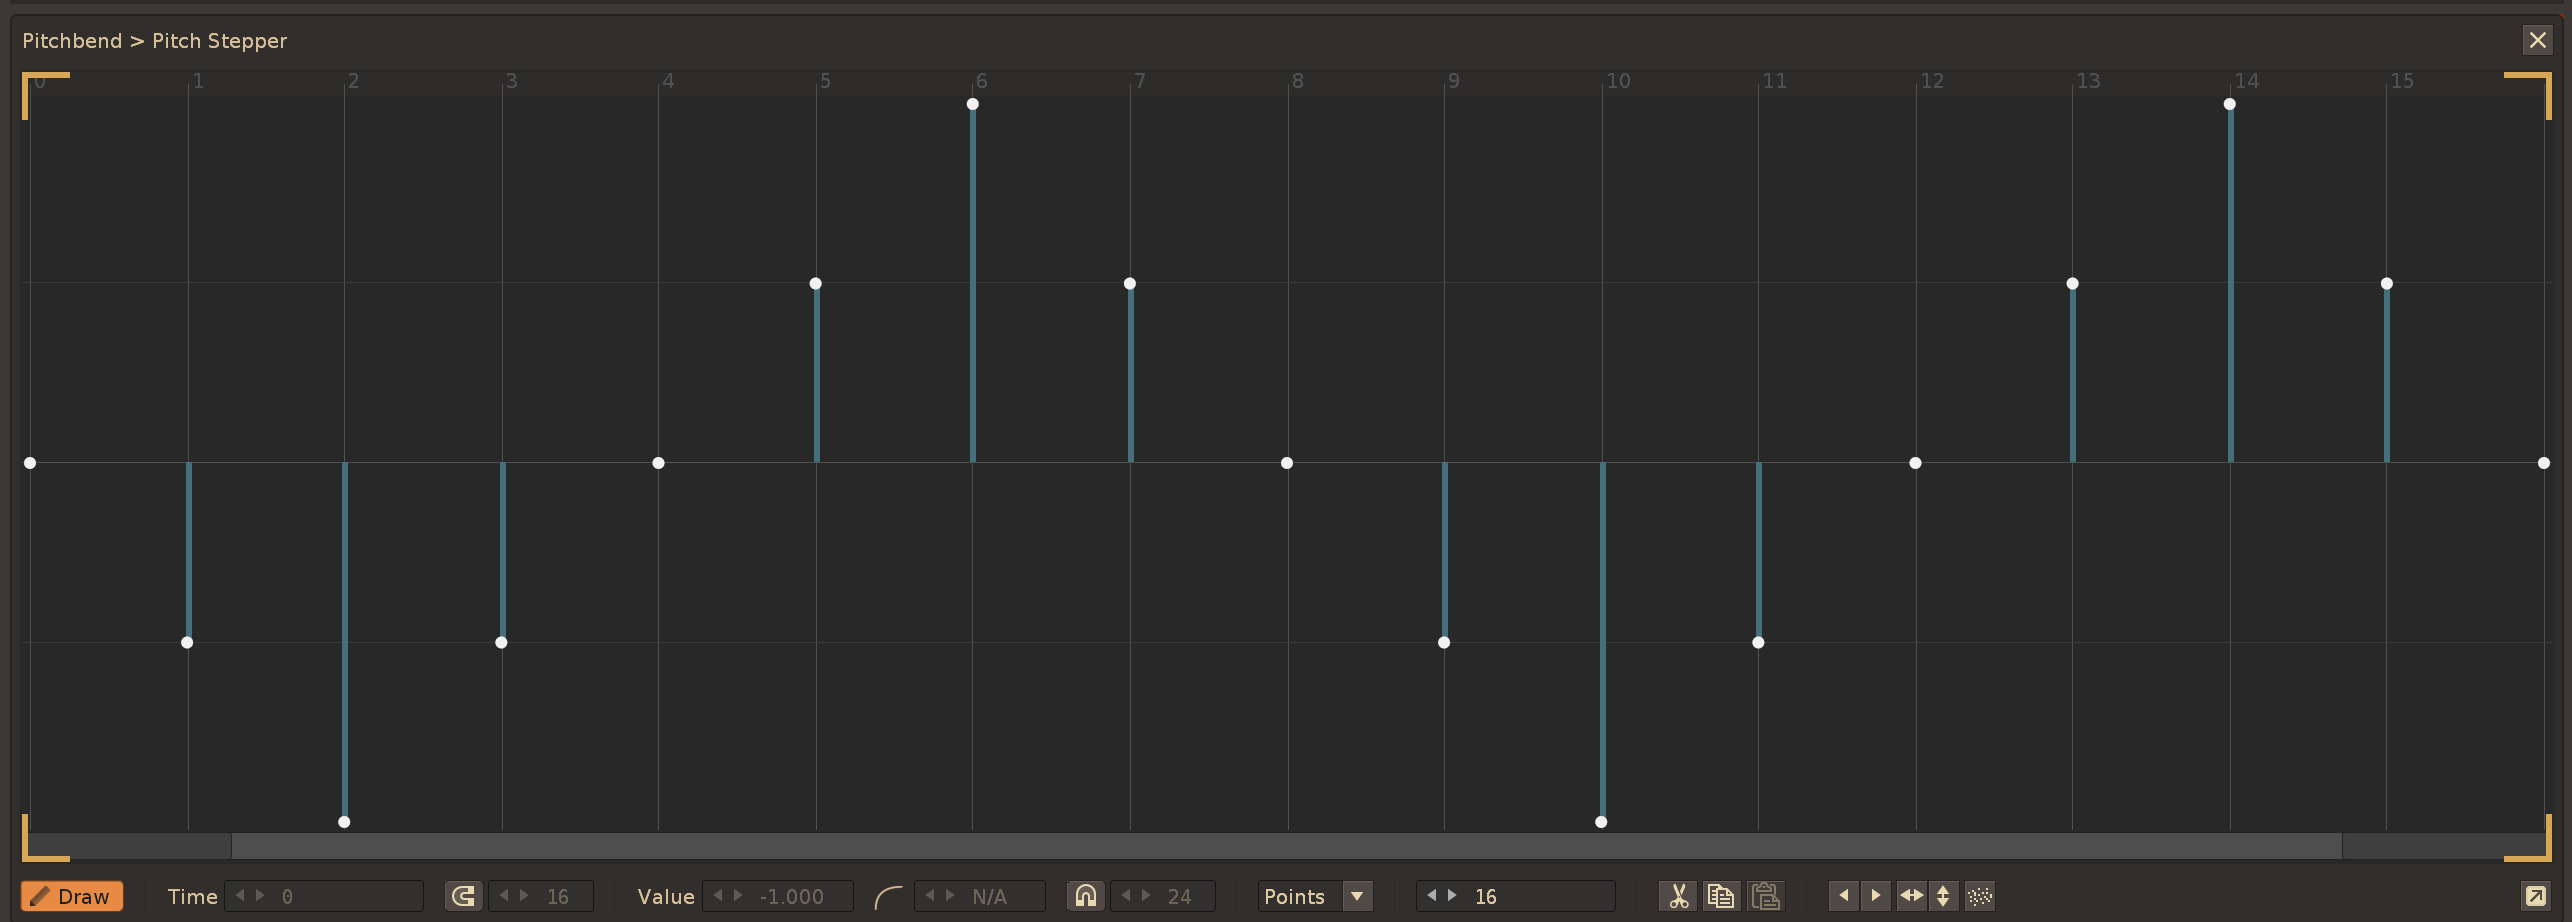
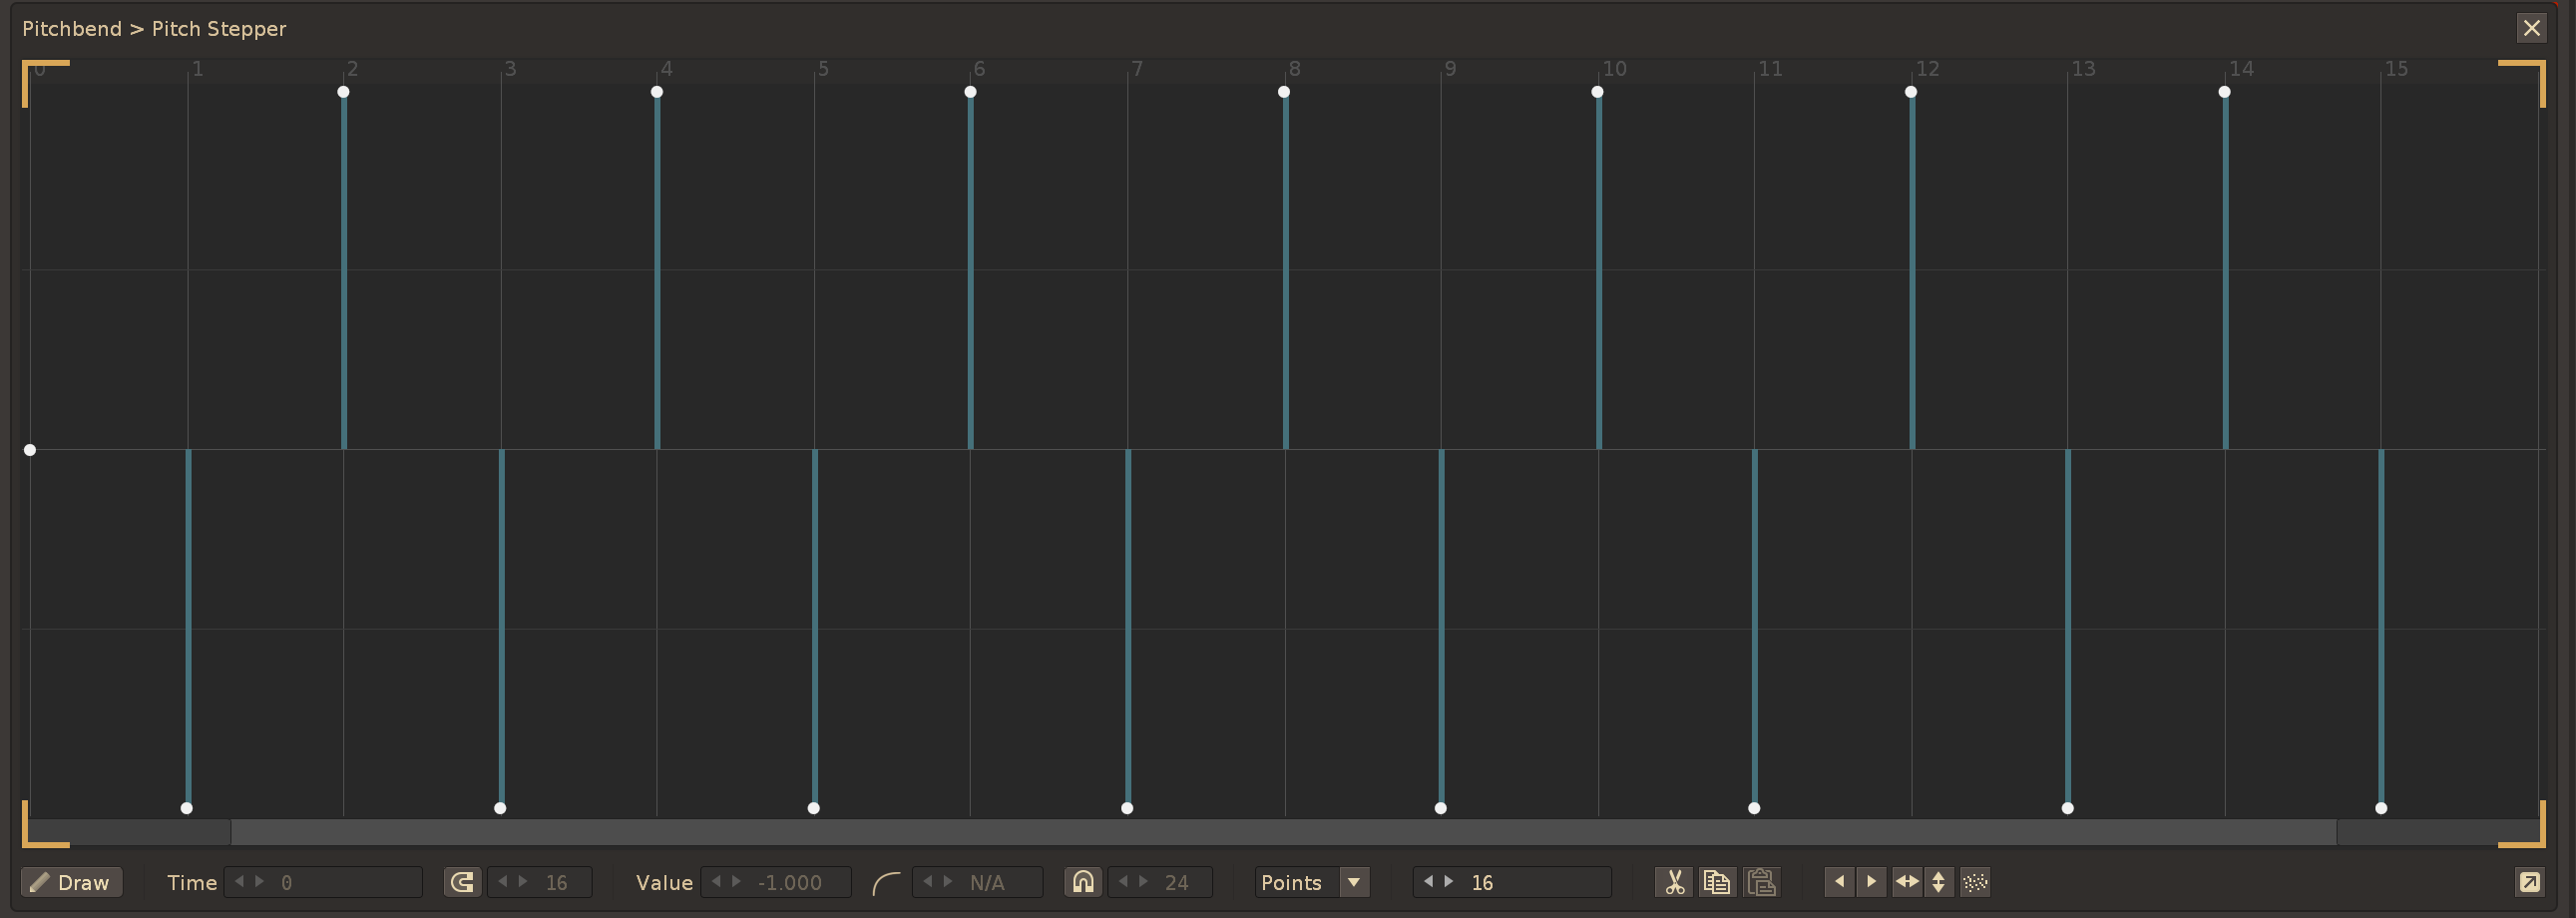
There are also other shortcuts for directly sending PitchStepper settings to the selected instrument: The other shortcuts do these:
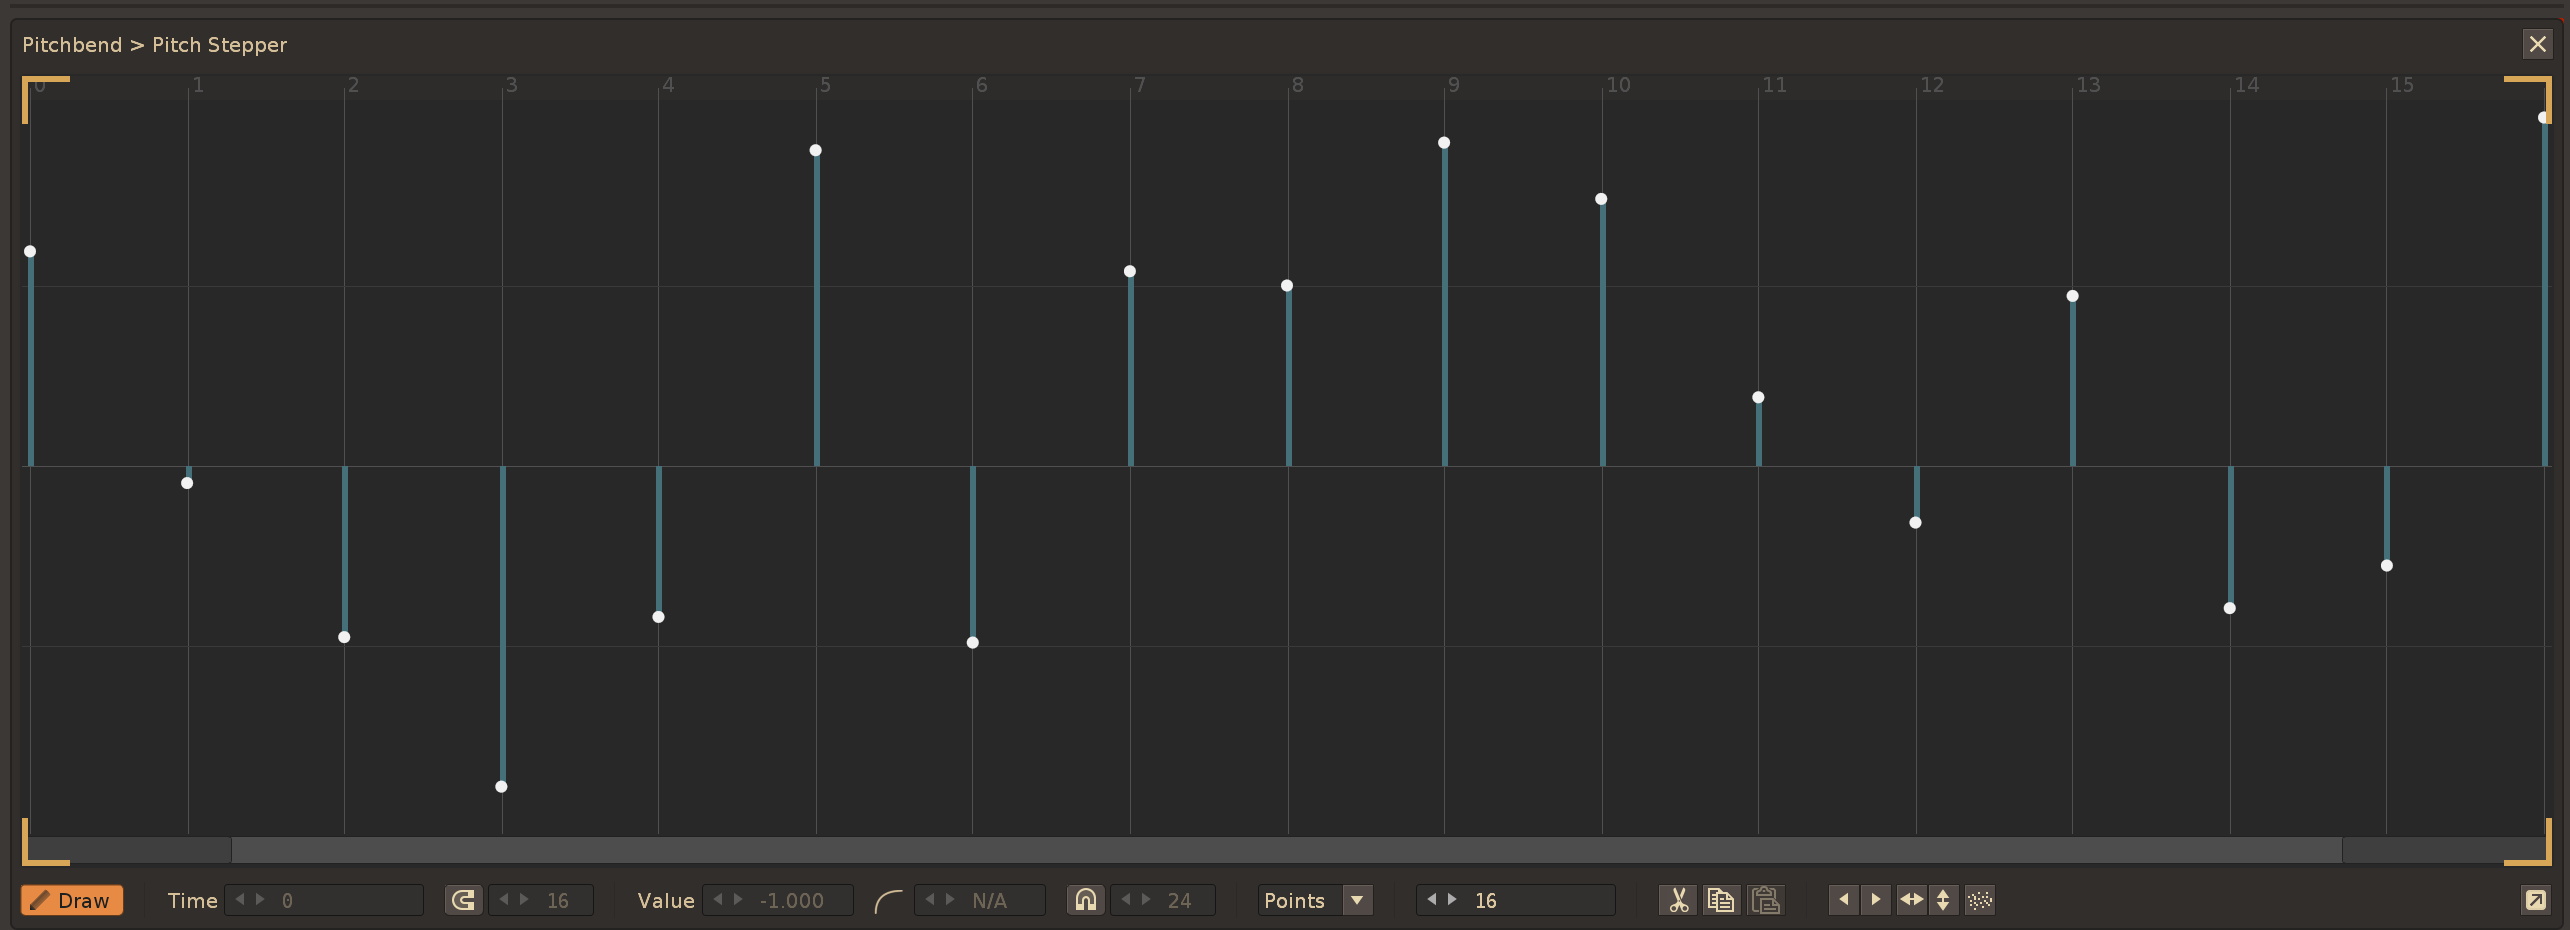
The *Instr. Macros device which is also added to the track you are on, allows you to directly start automating the Macro parameters.
Meaning, you would load a sample using Paketti, input a few notes to the pattern editor, and immediately be able to start drawing automation for any of the 8 macro controls. So you could for instance put in a drumloop, and start drawing a cutoff automation curve directly to modulate the cutoff parameter.
The 8 Macros are also available as a Midi Mapping like this:
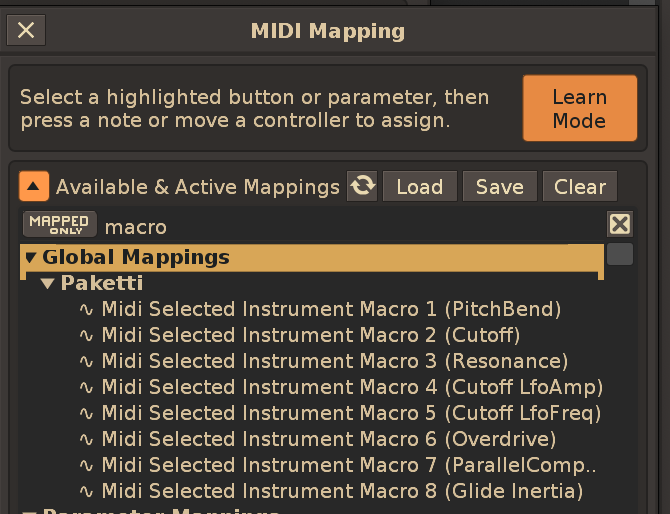
The reason for adding these, is, so, that when you are on any instrument with the Paketti Default XRNI Instrument (or any instrument with any of the 8 Macros set up), the same 8 Midi knobs on your controller will control those 8 settings. So you can rest your hands on the knobs, select a different instrument, and keep crafting. These also, of course, apply to the DrumKit Loader - which we'll cover next.
The DrumKit loader loads a max of 120 samples into the instrument. Select more? Only loads 120 samples. The drums are mapped automatically from C0 to B9.
This is the Impulse Tracker "Load Sample" screen, rebuilt for Renoise as a Canvas dialog. It solves a problem Renoise has never had an answer for: auditioning a sample file on the keyboard before you commit to loading it — even during playback.
Open it and you get a folder/file browser on the left, and on the right the highlighted file's details (filename, sample rate, bit depth, channels, length, format, file size, date) together with its waveform, so you can skip files that don't look like what you want.
zsxdcvgbhnjm for the lower octave, qwertyuiop plus 2 3 5 6 7 9 for the upper — at the current keyboard octave, during playback, without loading it into your song. The preview uses a single hidden scratch instrument, so your instruments and your selection are left completely untouched while you browse.The folder you navigate to is remembered and becomes the default the next time you open the dialog. If that folder has since been deleted, it reverts to ~/Music/Samples. The very first time you ever open the dialog it asks you to pick a default folder. The highlighted file is remembered too, so reopening drops you back onto the same file (safely clamped if the folder now holds fewer files). Going up a folder lands the cursor on the folder you just came out of, rather than the top of the list. The file list shows filenames left-aligned with any trailing date/time stamp and the extension lined up in a right-hand column, and the keyjazz octave readout updates live as you change the keyboard octave.
The selected row is shown as a full-width inverted bar (black background / white text normally, white bar / black text when selected), like Impulse Tracker, so it reads at a glance. The folder path and the metadata panel are ordinary Renoise text; the file list and the waveform are drawn on canvases (the file list needs a canvas so the whole selected row can invert). Clicking a row selects it; clicking the already-selected row opens or loads it.
Non-WAV formats (.mod, .rex, .rx2, .iff and friends) still appear in the list and still load when you press Enter (via the normal Paketti file expander); live keyjazz preview is available for the formats Renoise can decode directly (WAV, AIFF, FLAC, OGG, etc.).
Global:Paketti:Load Sample Browser Keyjazz PreviewPaketti:Load Sample Browser Keyjazz PreviewMain Menu:Tools:Paketti:Instruments:Load Sample (Keyjazz Preview)Sample Navigator:Paketti:Load Sample (Keyjazz Preview)Instrument Box:Paketti Gadgets:Load Sample (Keyjazz Preview)...There are Midi Mappings, Keyboard Shortcuts and Menu Entries for Save Selected Sample .WAV & Save Selected Sample .FLAC. There's also Save Selected Sample Range .WAV & Save Selected Sample Range .FLAC. The Sample Range saving is from Fast Tracker 2.

There's also a method for saving all Samples to a Backup Folder - which are user configurable - meaning, you can have 3 different Backup Folders, and thus three different shortcuts for saving either Selected Sample, or all Samples to the Backup Folder.
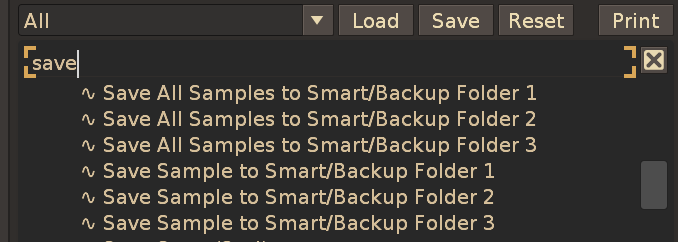
The dialog where you get to select the Backup Folders is the "Launch App Selection Dialog", pictured below:
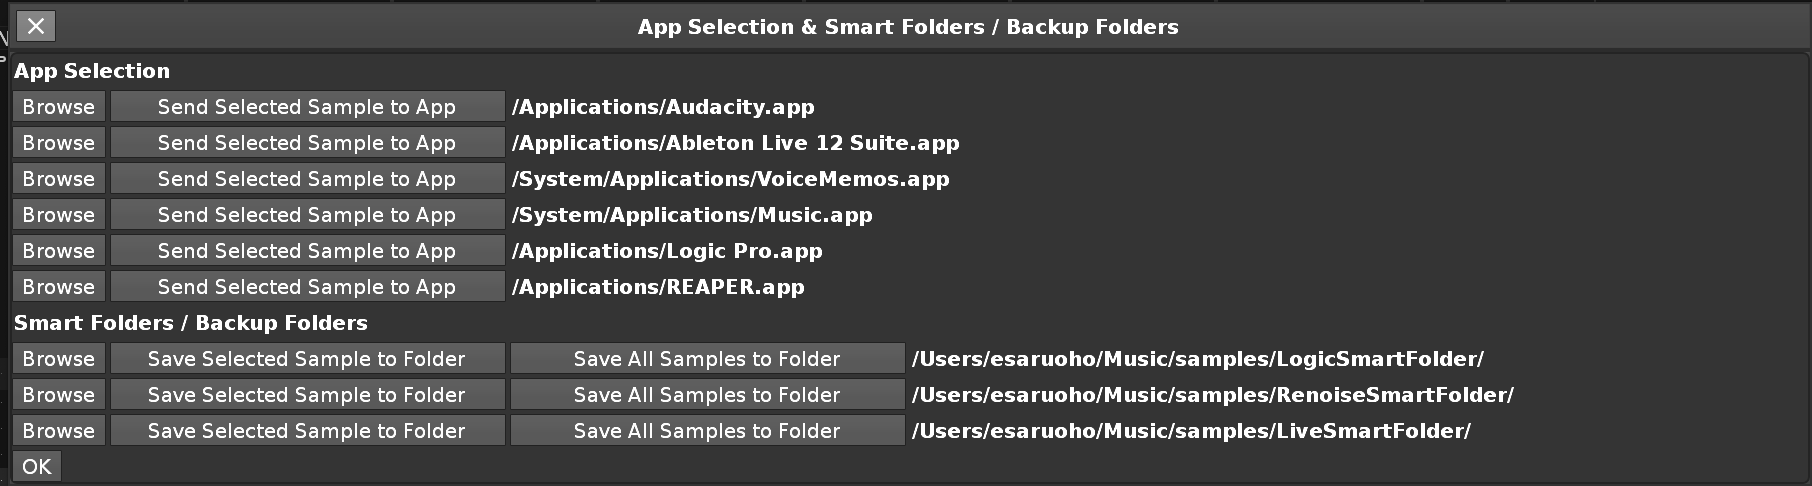
If you carefully look at the same dialog:
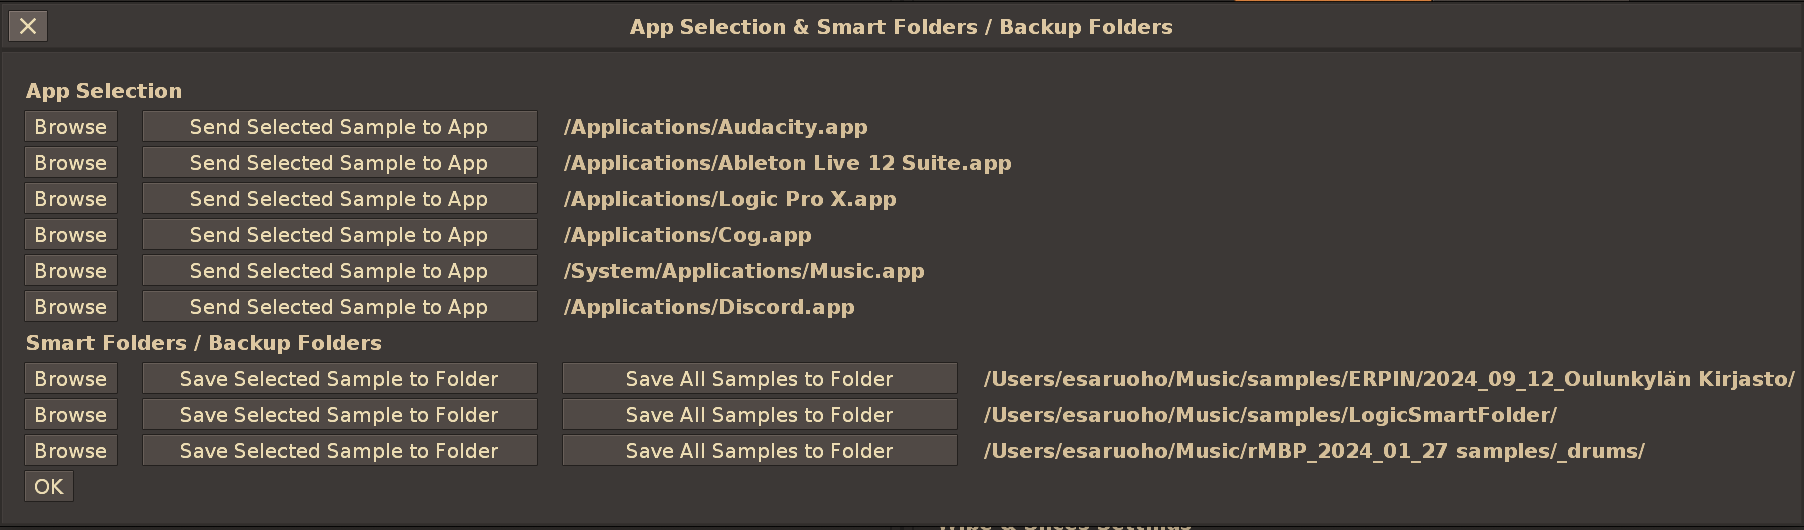 You'll see there is also a way of sending a selected sample to a specific app! This means, you can set your preferred programs, and Renoise / Paketti will save the selected sample to a temporary folder, and start the app and load the sample.
Note well, Bitwig developers: Your app does not support sending files to it via bitwig.app file.wav. Please fix.
Those who like BeatSlicing, there's a mathematical slicer - which takes your loop, and, depending on which shortcut you pick, slices it in half (two slices), or 4 slices.. to max 128 slices. meaning if your loop already loops well, you can just split it into 16-32-64 slices and start drumming away at the loop.
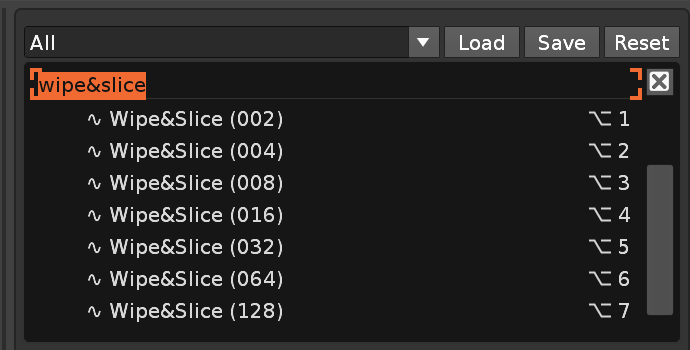
There are additional configuration steps in the Paketti Preferences dialog:
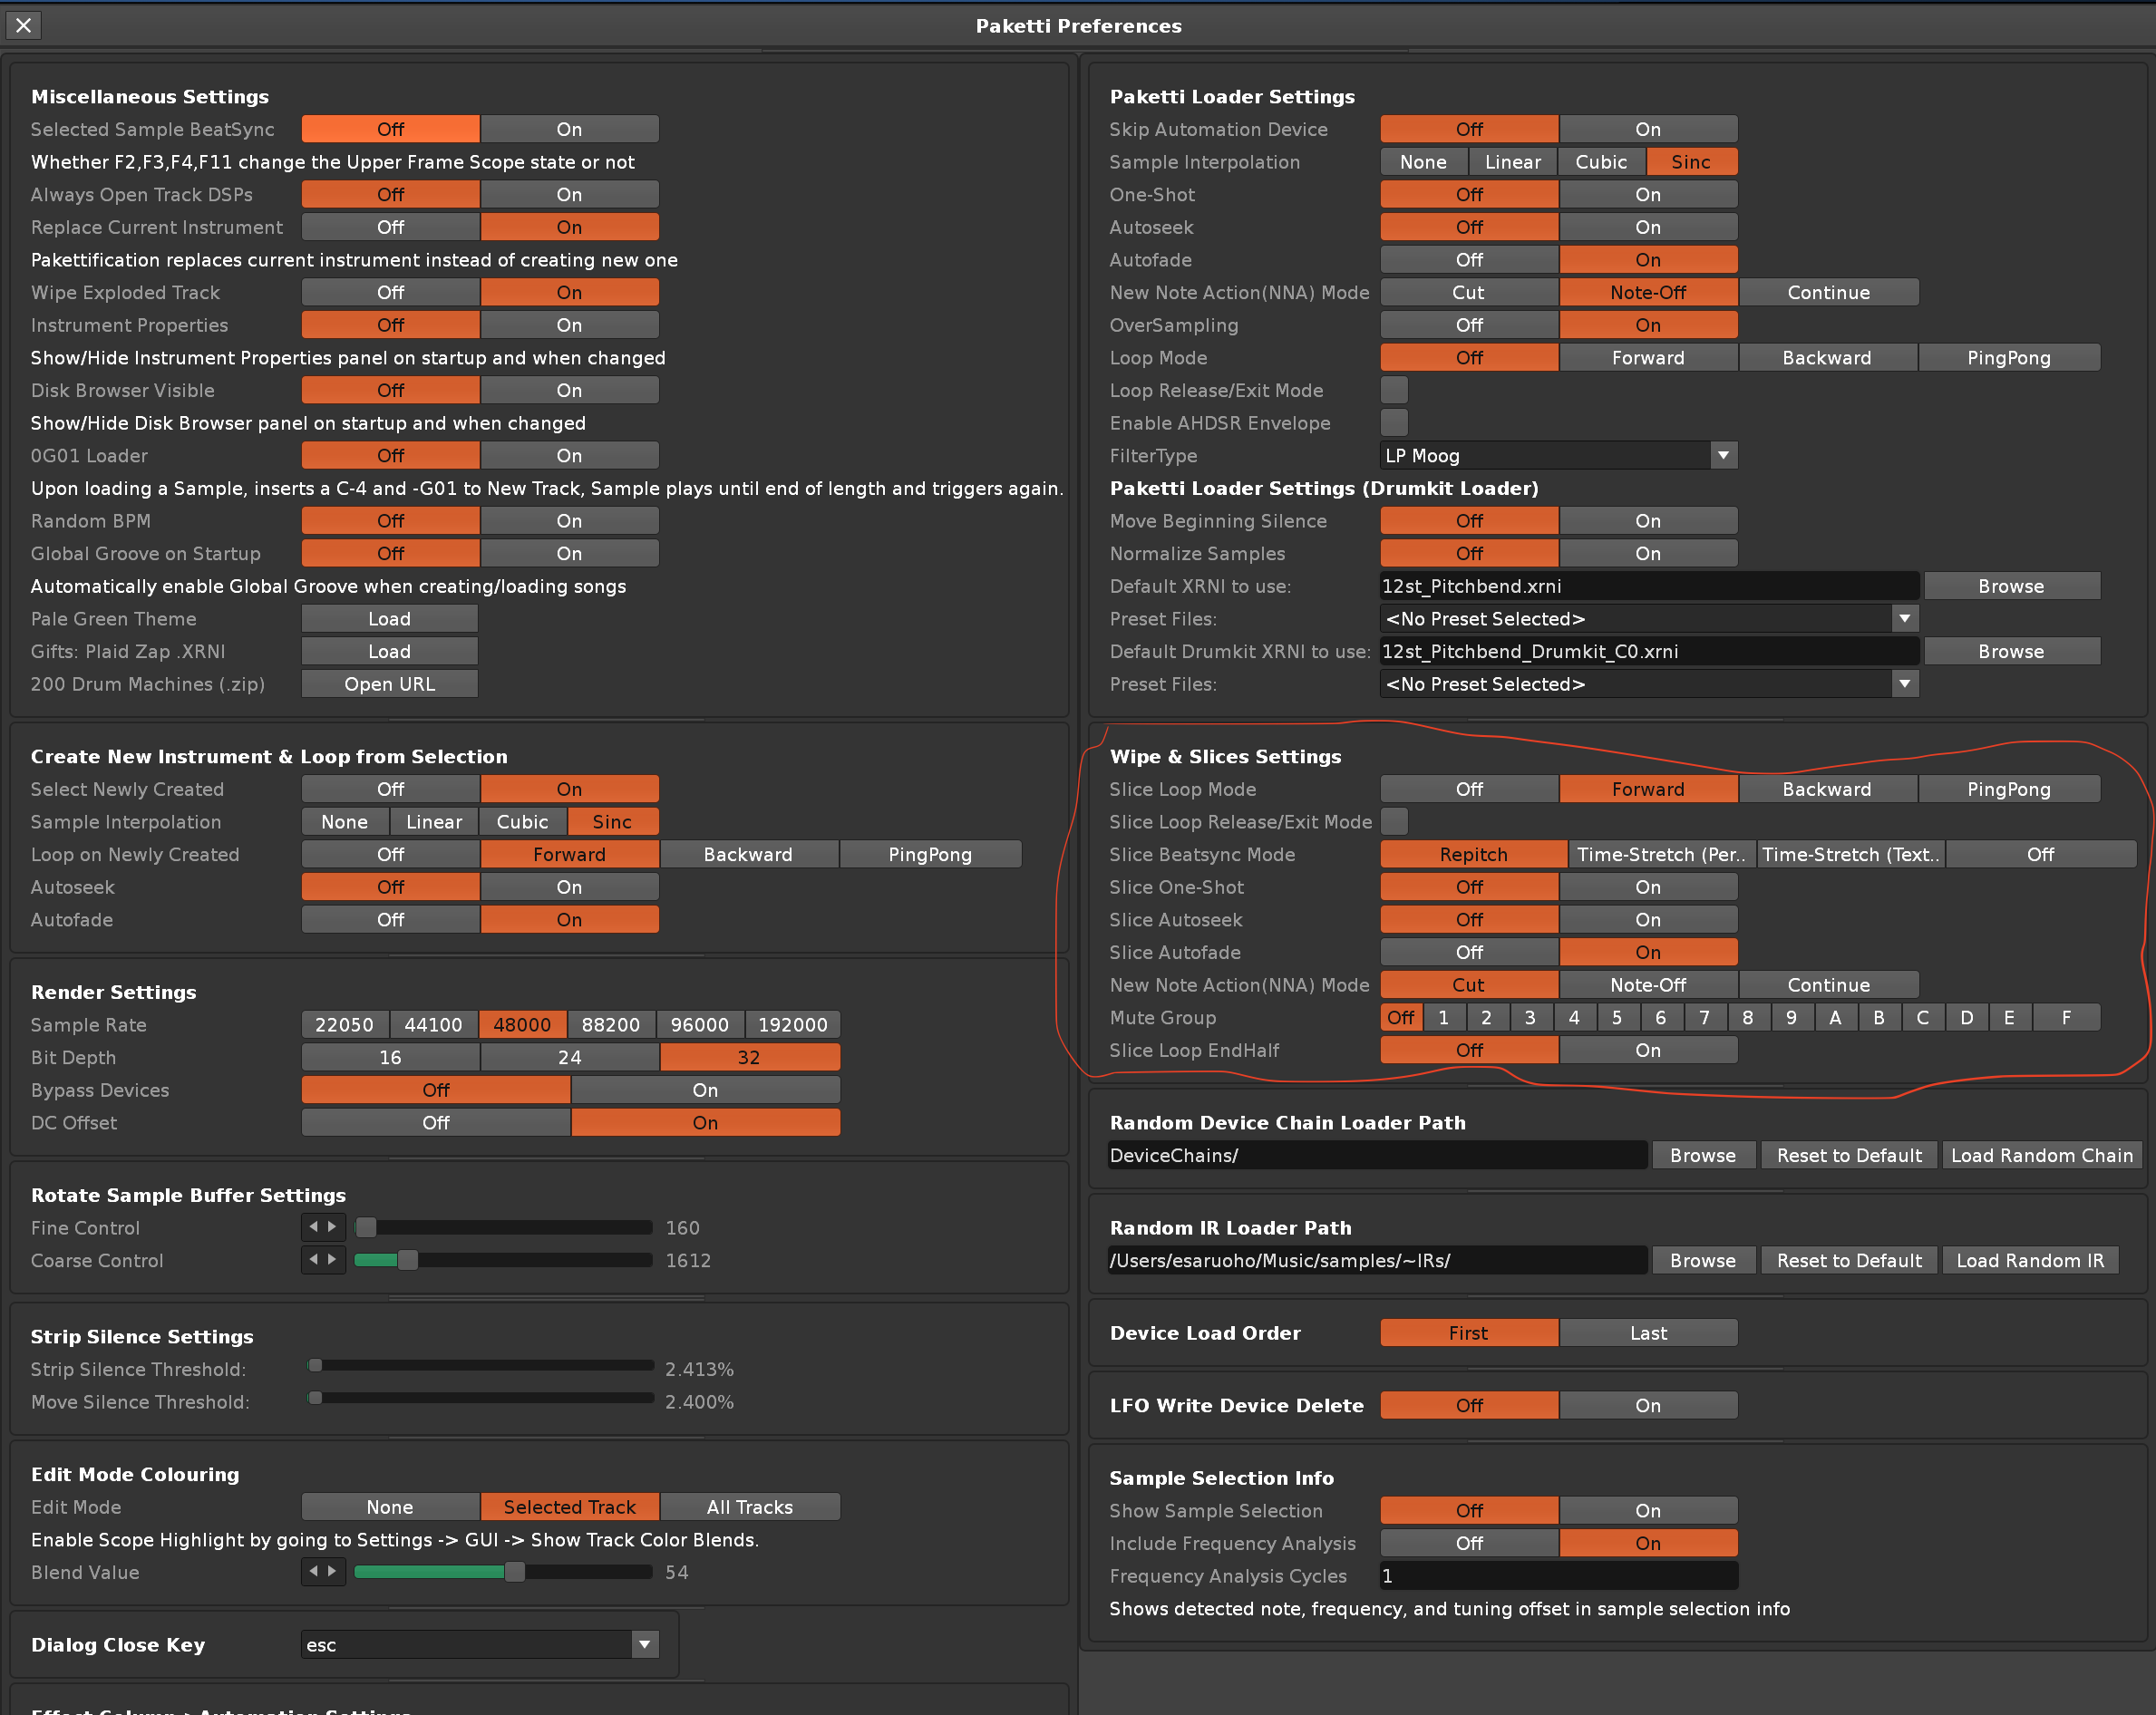
The Beatsync Mode can be set, also, and if, for instance, you set a 256 Beatsync Line setting for the sample, and chop it in 16 pieces, then each Slice will play at 16 Beatsync - maintaining the pitch and speed that you would expect. All this is taken care of behing the scenes.
But Slices aren't always precise. So there are methods for adjusting the Start and Endpoint of the Slices, much like MPC does it. This means that you don't need to keep viewing the original sample, zooming in, adjusting the Start/Endpoints, zooming out, moving a bit, and then doing the same thing like an automaton. Just look at the Slice, and change where it starts and ends.
Here are the shortcuts - and examples of how it could be done.
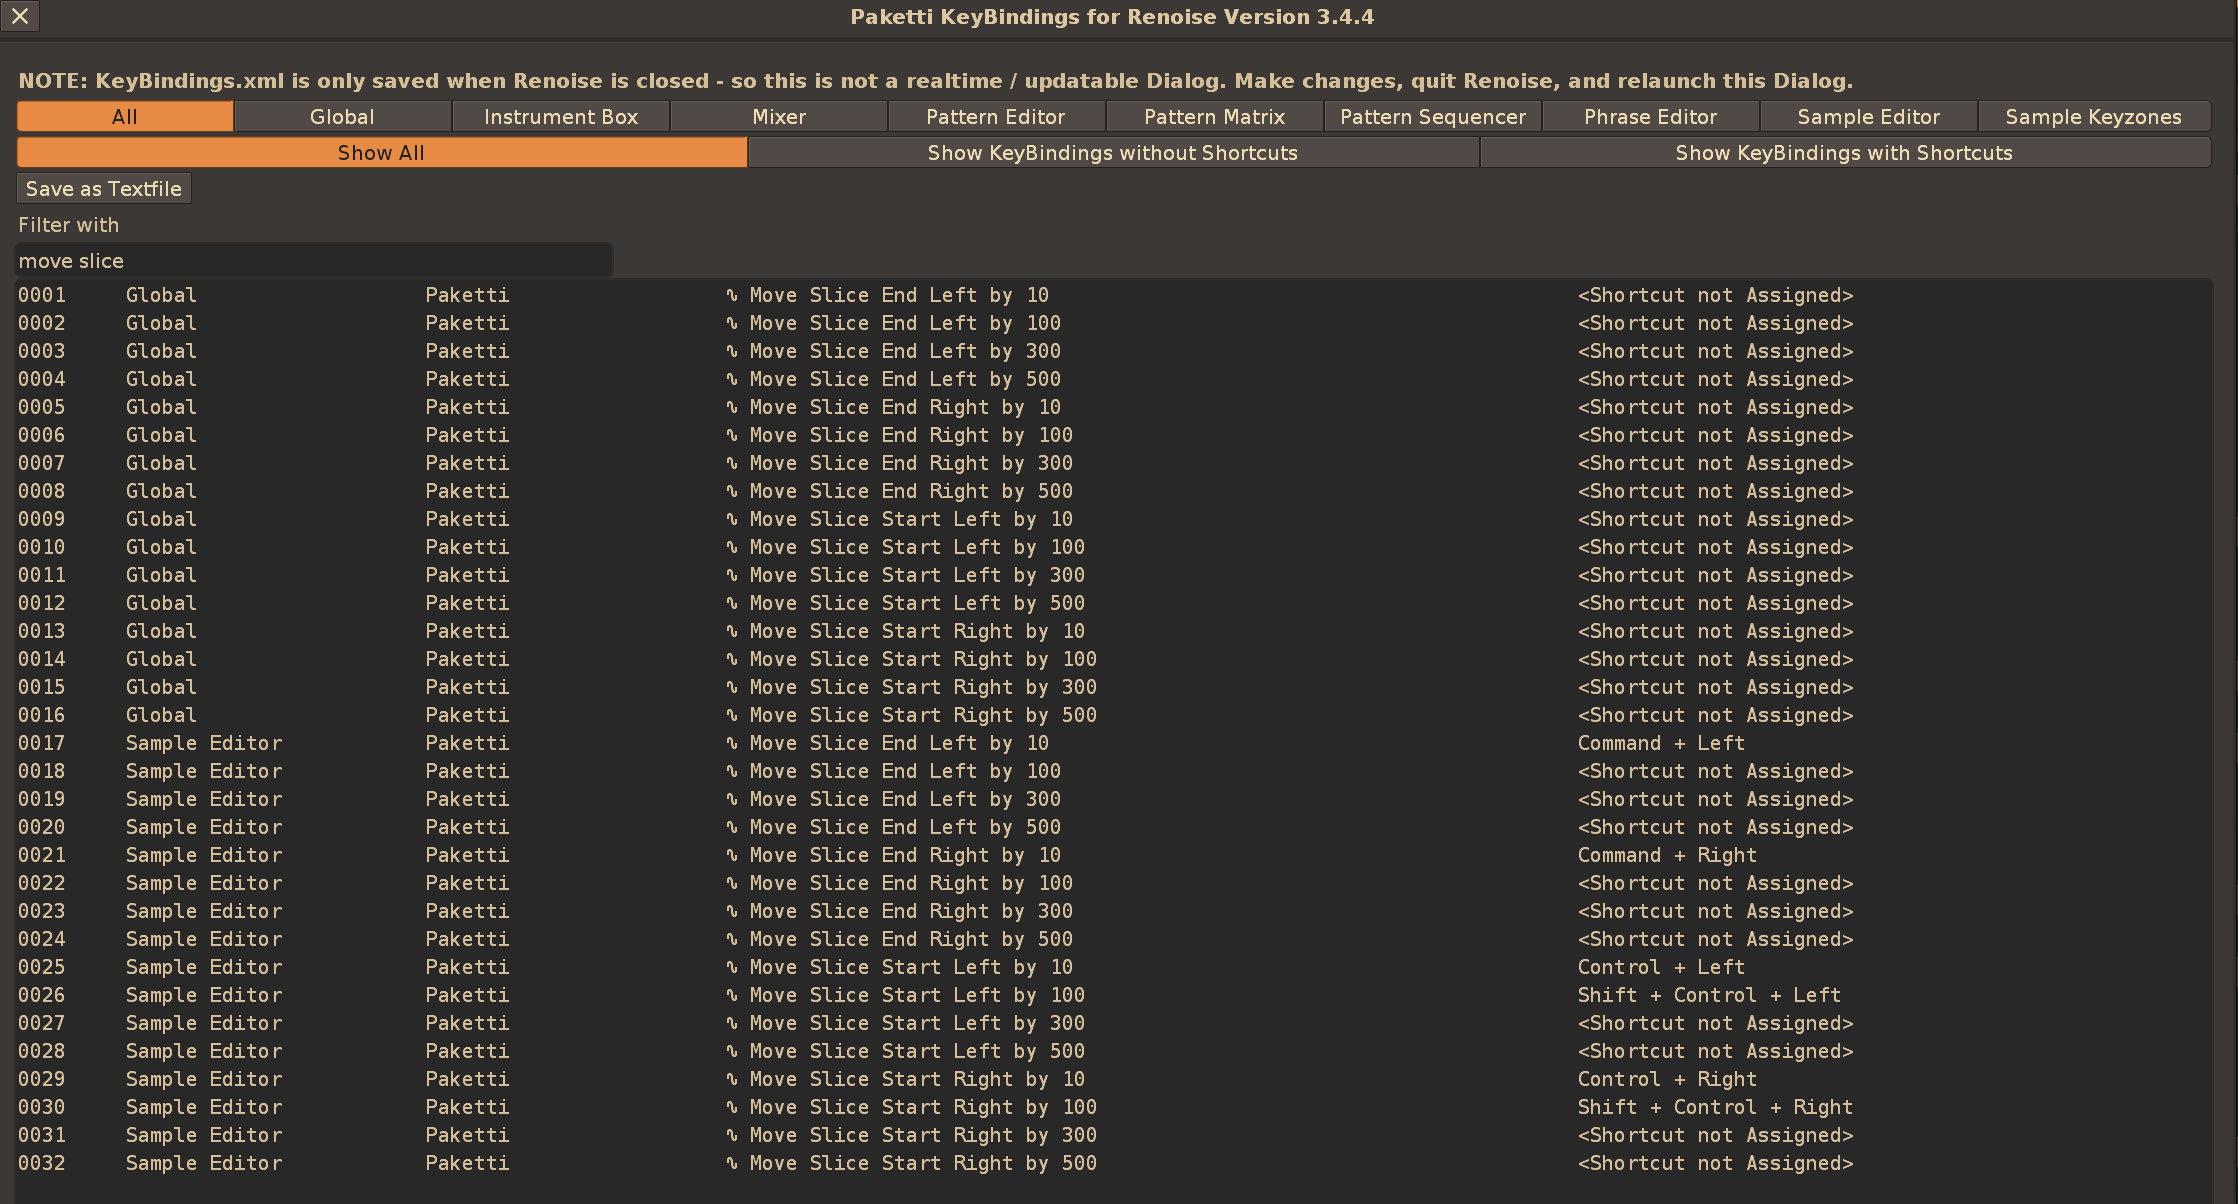 And here's a little .gif of what it looks like:
While we're on the Slice topic, there's also Isolate Slices to New Instruments, which takes all the Slices in your Instrument, and creates new Instruments below it. And if you were on, say the Slice that was a Snare - isolate slices, you'll still be on the Snare.
Of course, the Paketti Default .XRNI instrument is introduced for each slice.
You can also Isolate Selected Sample to a New Instrument - which takes the selected Sample or Slice, and creates a new Instrument, with the Paketti Default .XRNI Instrument introduced.
There's also Isolate Samples / Slices to New Instruments - which takes the selected Instrument, and gets the Samples & Slices to brand new Instruments, with the Paketti Default .XRNI Instrument injected.
Another step in the abandoning / circumventing of Native Renoise loading methods, is the doing away with the usage of the Track DSP Device Loading.
Instead, Paketti introduces Keyboard Shortcuts, MidiMappings for loading your preferred VST,VST3,AU,LADSPA,DSSI,Native devices to both Track DSP Chains and Sample FX Chains.
There are also Menu Entries for loading your Native devices (including the Hidden / Legacy effects), if you're mouse inclined.
By going to Tools -> Paketti.. -> Plugins/Devices.. -> Load Devices Dialog... and ticking your favorites, clicking on the Add Device(s) as Shortcut(s) & MidiMappings button will result in, from now on, the selected devices being available in Keybinds and MidiMappings. Set them up, and away you go!
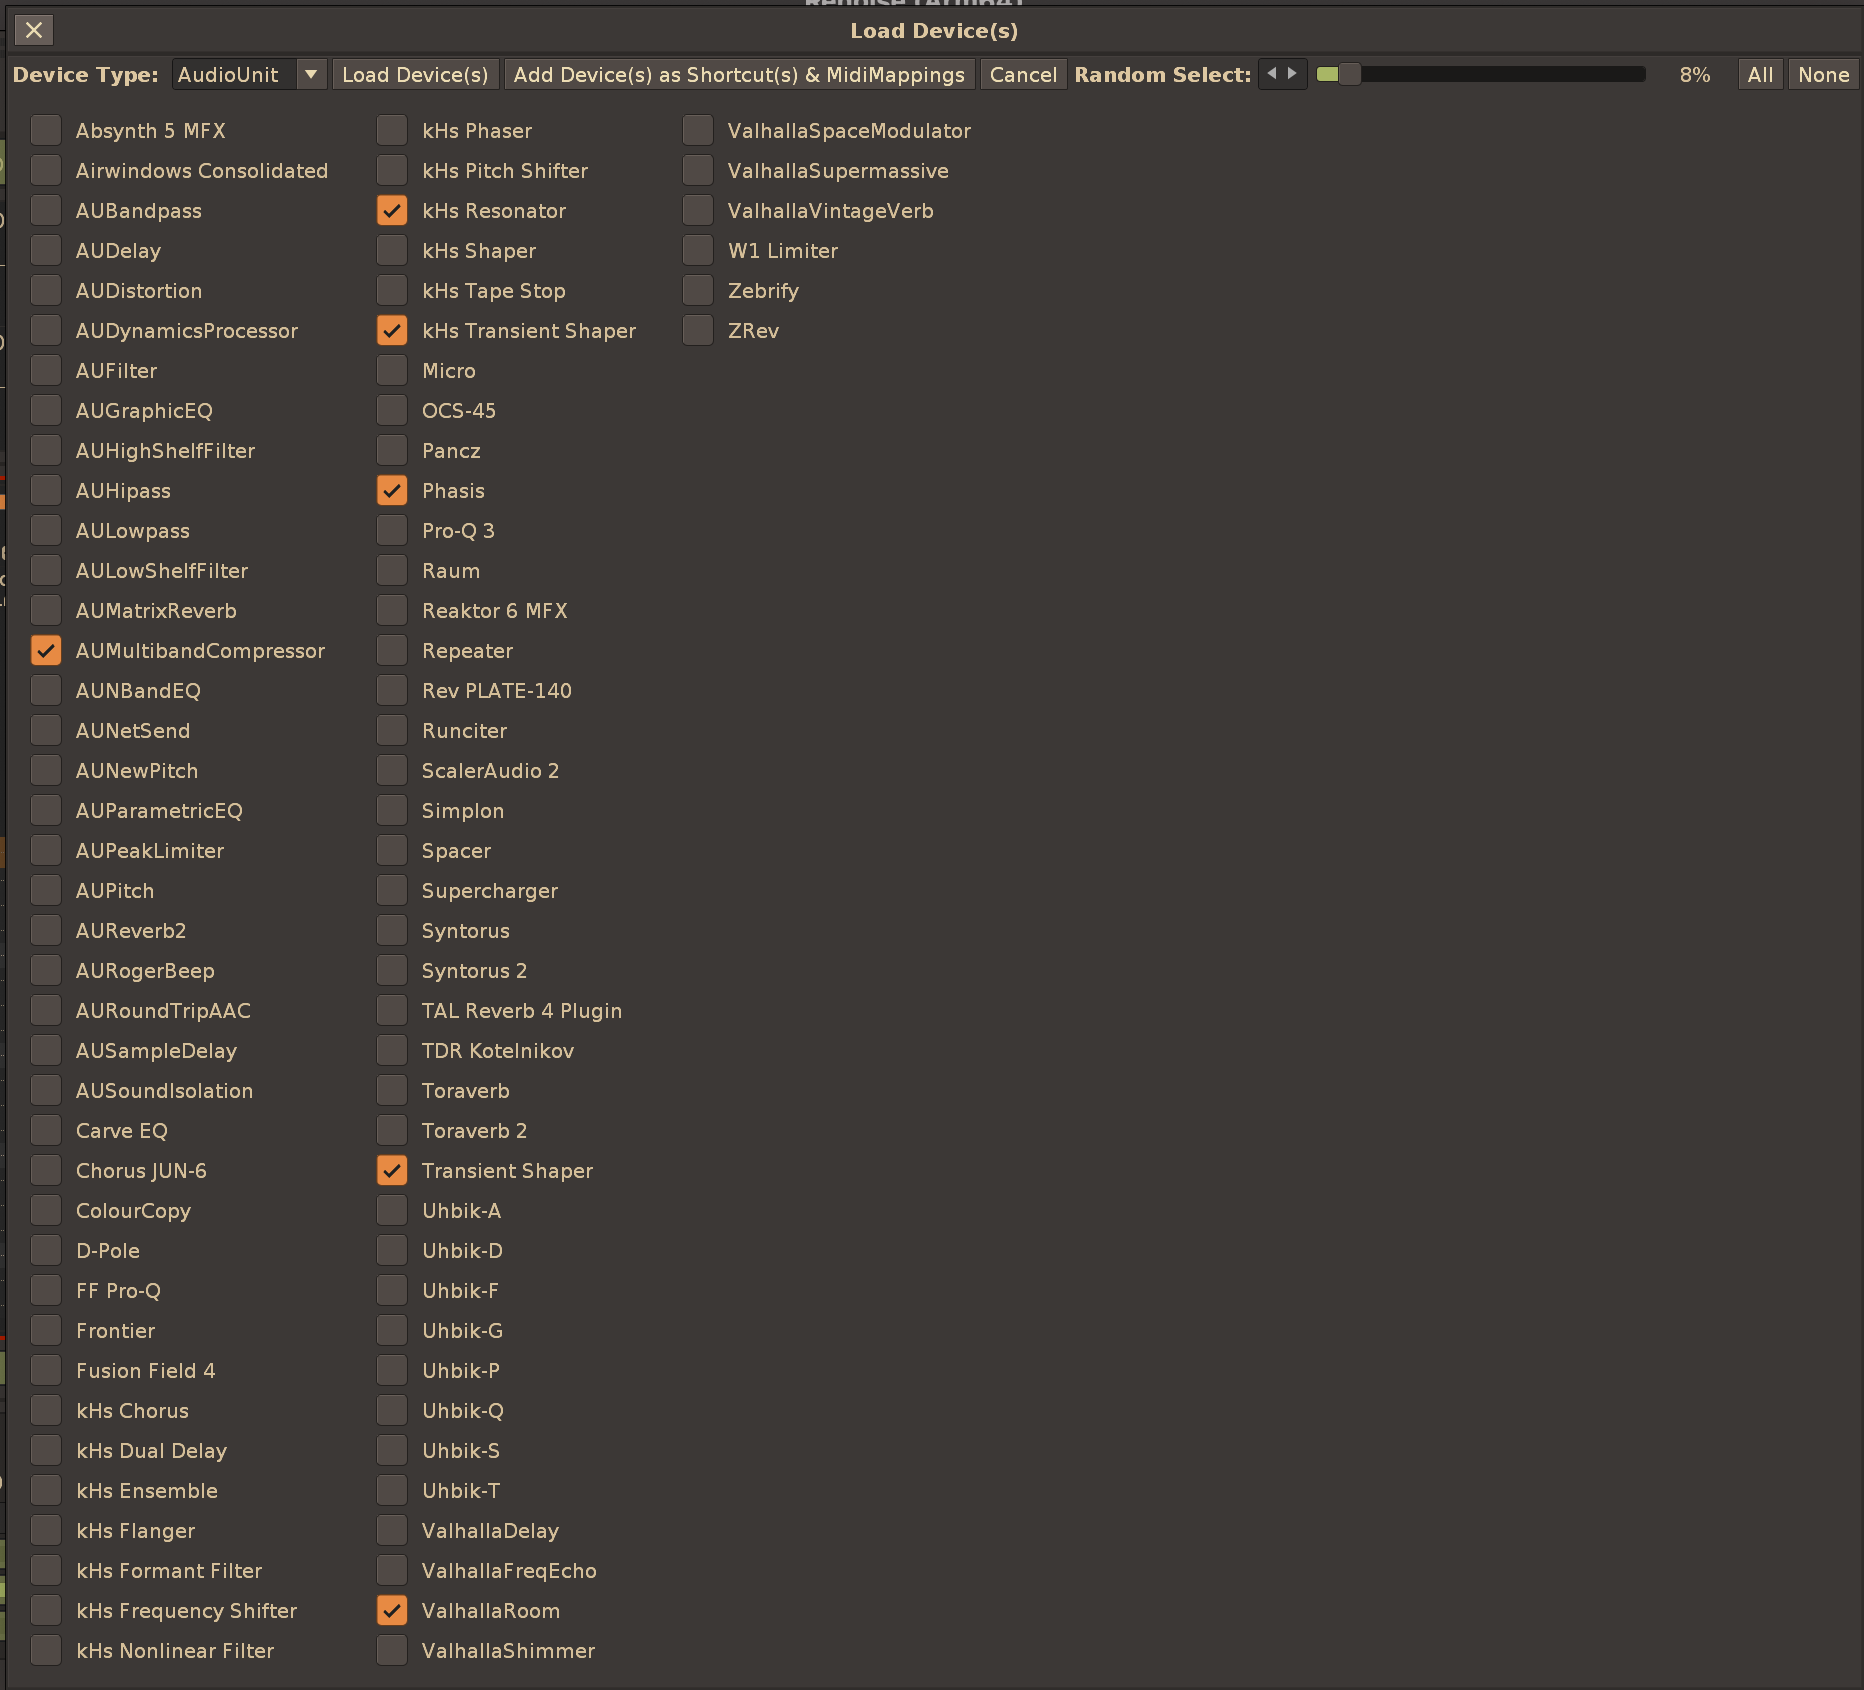
This means that you can, for instance, (in my usecase) press shift-q e r t z a v and out come 7 devices to the selected track. Same with midibuttons, after selecting your favorites, you can use the midi mappings to set up midi controls for loading your desired device onto your selected track. Trust me, it's fast, fluid and just feels natural. Set them like you want to, and throw in your devices.
There are some additional details, such as: the external Devices are loaded in minimized mode, so they don't take up extra space. The Renoise Native devices are not loaded in minimized mode, because the parameters are displayed there.
And the more important detail: the External Editor is automatically opened!
The same thing exists for loading Plugins, go to Tools -> Paketti.. -> Plugins/Devices.. -> Load Plugins Dialog...
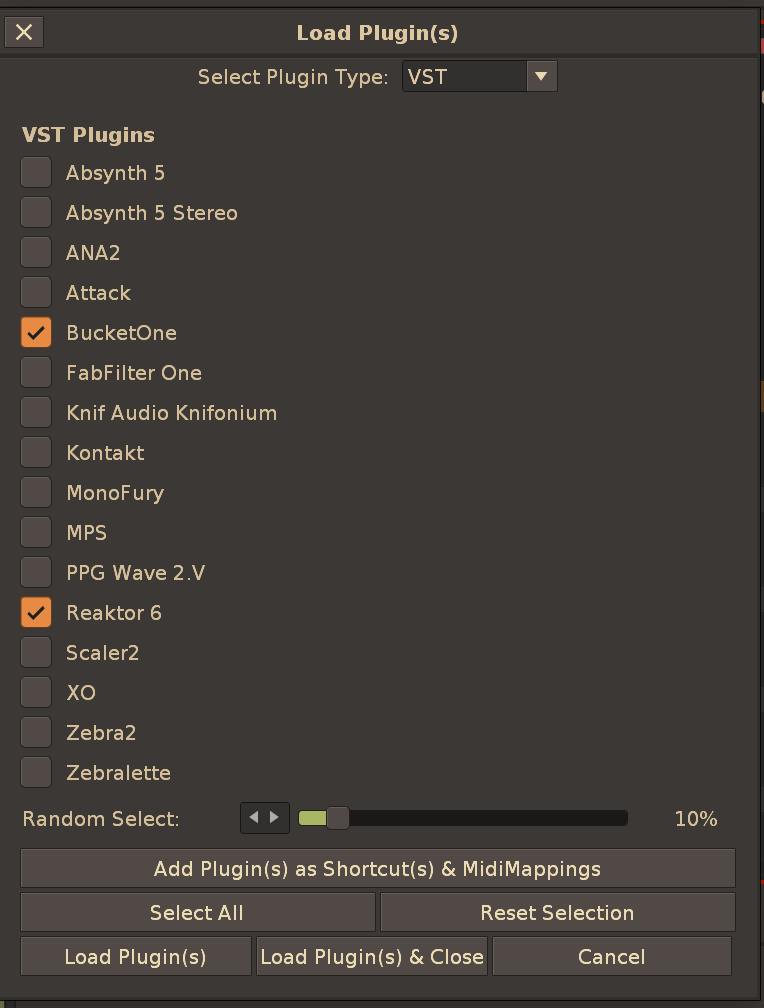
Same logic. Pick the ones you want, add them to the Paketti Preferences - they'll always be there.
The extra logic with Plugins, is, that it wouldn't make much sense if they overwrote the current instrument - so, a new instrument slot is added, every time you load a plugin. And the External Editor is made visible. So you can just start tweaking away.
there's a Clean Render Selected Track / Group. this will solo the selected track, render it as a wavefile, create a new track (named with a matching title such as "Bass (Rendered)" (if your original track was called Bass, input C-4 to the newly created track, ingest the 8 macros to it, mute the original track, collapse the original track, and if you select it, also bypass the effects in the original track. and it's ready to be automated, by default, too. if you have a line input device on the track, instead of "Highest" diskwriting speed it will switch to "Realtime" - meaning, if you have incoming audio being processed through renoise effects, that incoming audio will be recorded to the new instrument, with the effects. perfect for external synthesizers being controlled by midi, for instance.
since the renoise automation drawing is quite limited, i've added midi shortcuts and menu entries for drawing curves up/down (exponential, linear), and also added logic that if you're trying to do an "exponential to max" curve on a pitchbend/panning automation lane, it will be drawn from the center to the top, instead of from the bottom to the top. there's also multipattern automation drawing, meaning, you make a selection from pattern matrix and it will draw an exponential curve or linear curve from patternStart to patternEnd.
there's also midimappings for automation start and automation end, and a third midimapping knob for deciding which automation curve is drawn and from where to where. so you can pick an automation area, and use a knob to decide what the curve would look like.
i've also introduced a "Draw Automation to Selected Automation Parameter". this means, you're in ANY automation lane whatsoever, have playback on, set record on, set follow pattern on, and turn the knob == result == you are drawing automation to that lane. you don't need to map the midi anywhere in the track device or anywhere, just map it once to the "automate selected parameter" and just select any parameter and just draw in. it also works with selections, meaning, you select a section and draw with the knob, and it writes to the section (this with follow pattern off, of course).
This dialog comes in pre-populated with 518 themes, and you can pick your favorite themes out of the mix, and have Renoise randomize through the favorites (or all themes). So every time you boot up Renoise or load a new song, a different theme will load. Great for discovering new themes.
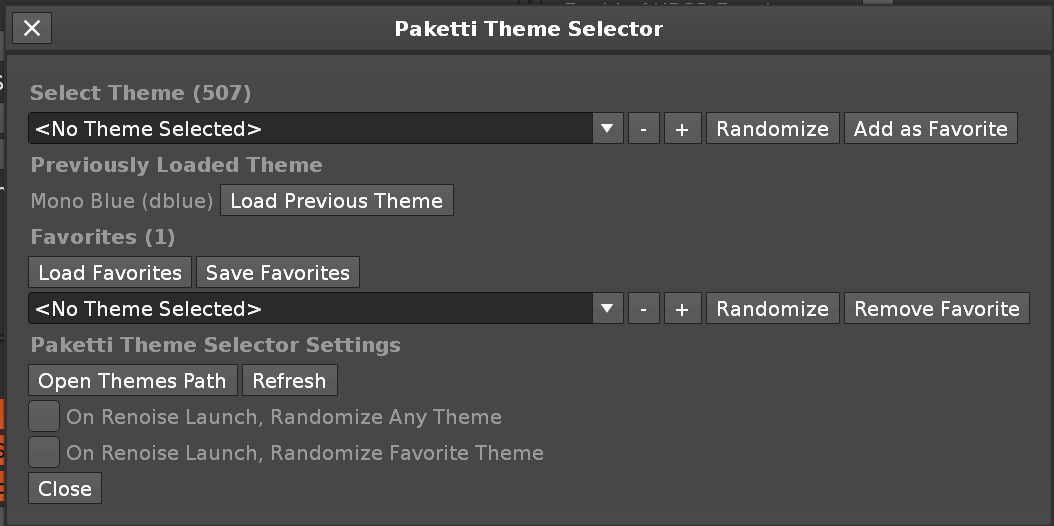
This allows directly writing in looping volume, retrig, backwardsplayback and panning gates. E Each of these rows have their own steps, min 1 max 16. so if you have a 512 row pattern and use a 16 row volume gater, then it'll keep looping till the end of the 512 row patterns. or if you have a 3 row panning step, those 3 steps will repeat until the end of the pattern, and so on. these are also designed to type directly to the pattern editor, either for volume control of sample, or volume control of the mixer channel.
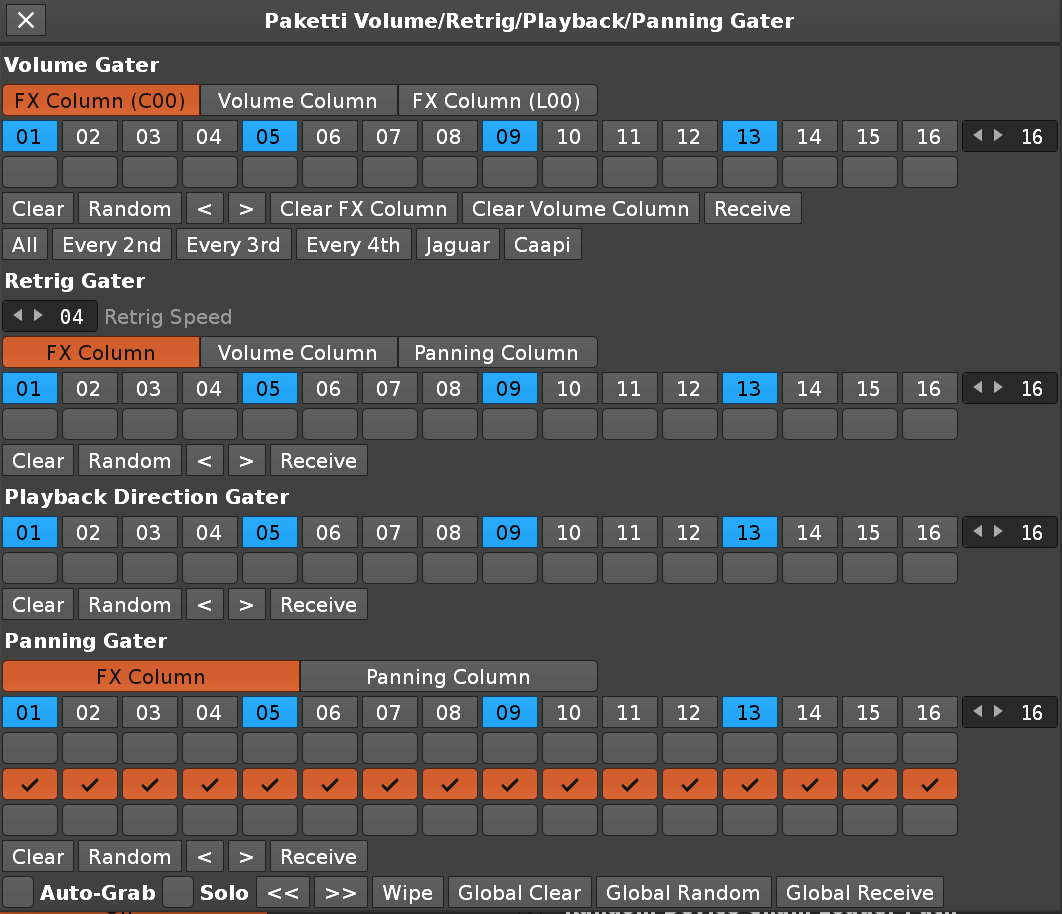
Example:
There's a 8 part 16 step stepsequencer which writes directly to the Pattern Editor. You can load 120 samples into each part, pick your preferred sound, and use checkboxes to make them play. Probability checkboxes to modify how likely the step per part is to play, can draw automation directly by clicking on Automation (leveraging the 8 macros introduced on every Sample Load) and use buttons to randomize step sequencer content, select a random sample for all parts, or selecting random samples for each part, reverse any part or all part samples.. and you can limit the steps from 16 to 1 at will. Or increase steps till 512 - meaning, 16 steps will play, and x amount of silence until 16 steps play again.
a brief demo at SO HEY TWITCH DELETES STREAMS SO ITS GONE // TODO I need to make a new one. Here's an updated screenshot:
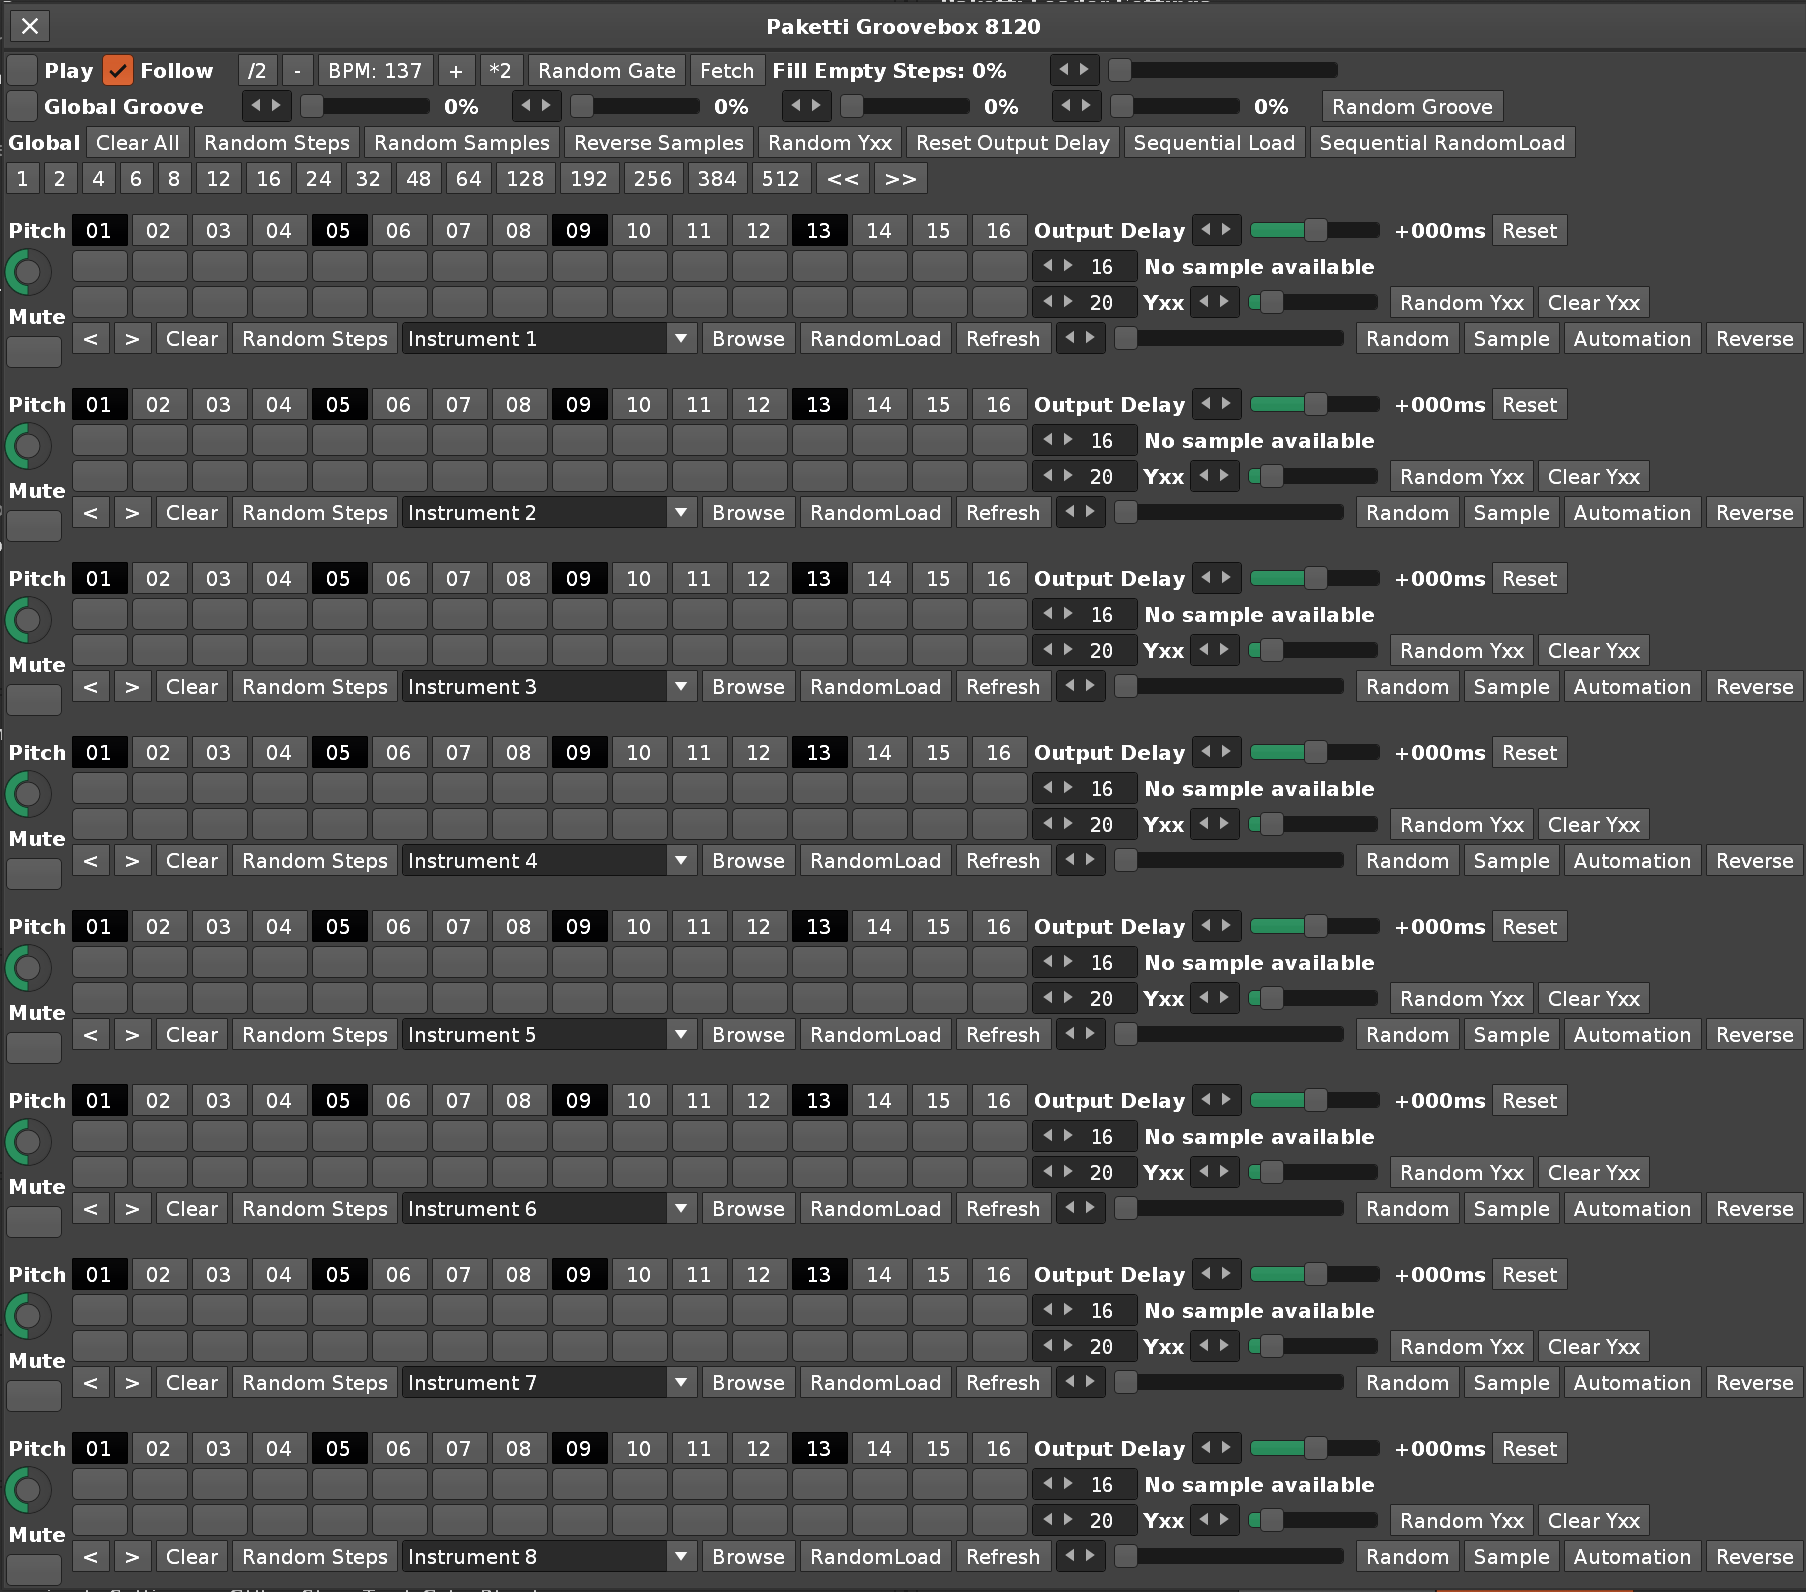
There's dozens of ImpulseTracker/ScreamTracker3 shortcuts for pattern editing and modification, some of which have been recently supercharged to also allow for selecting automation, gif here meaning when you select something using paketti shortcuts, it will also select the automation, if automation is visible. this can be combined with the midiknobs for drawing automation curves easily.
The Dynamic Views let you have a max of 8 shortcuts which cycle through the view settings that you have picked. each of the 8 shortcuts can have max 8 different cycles.
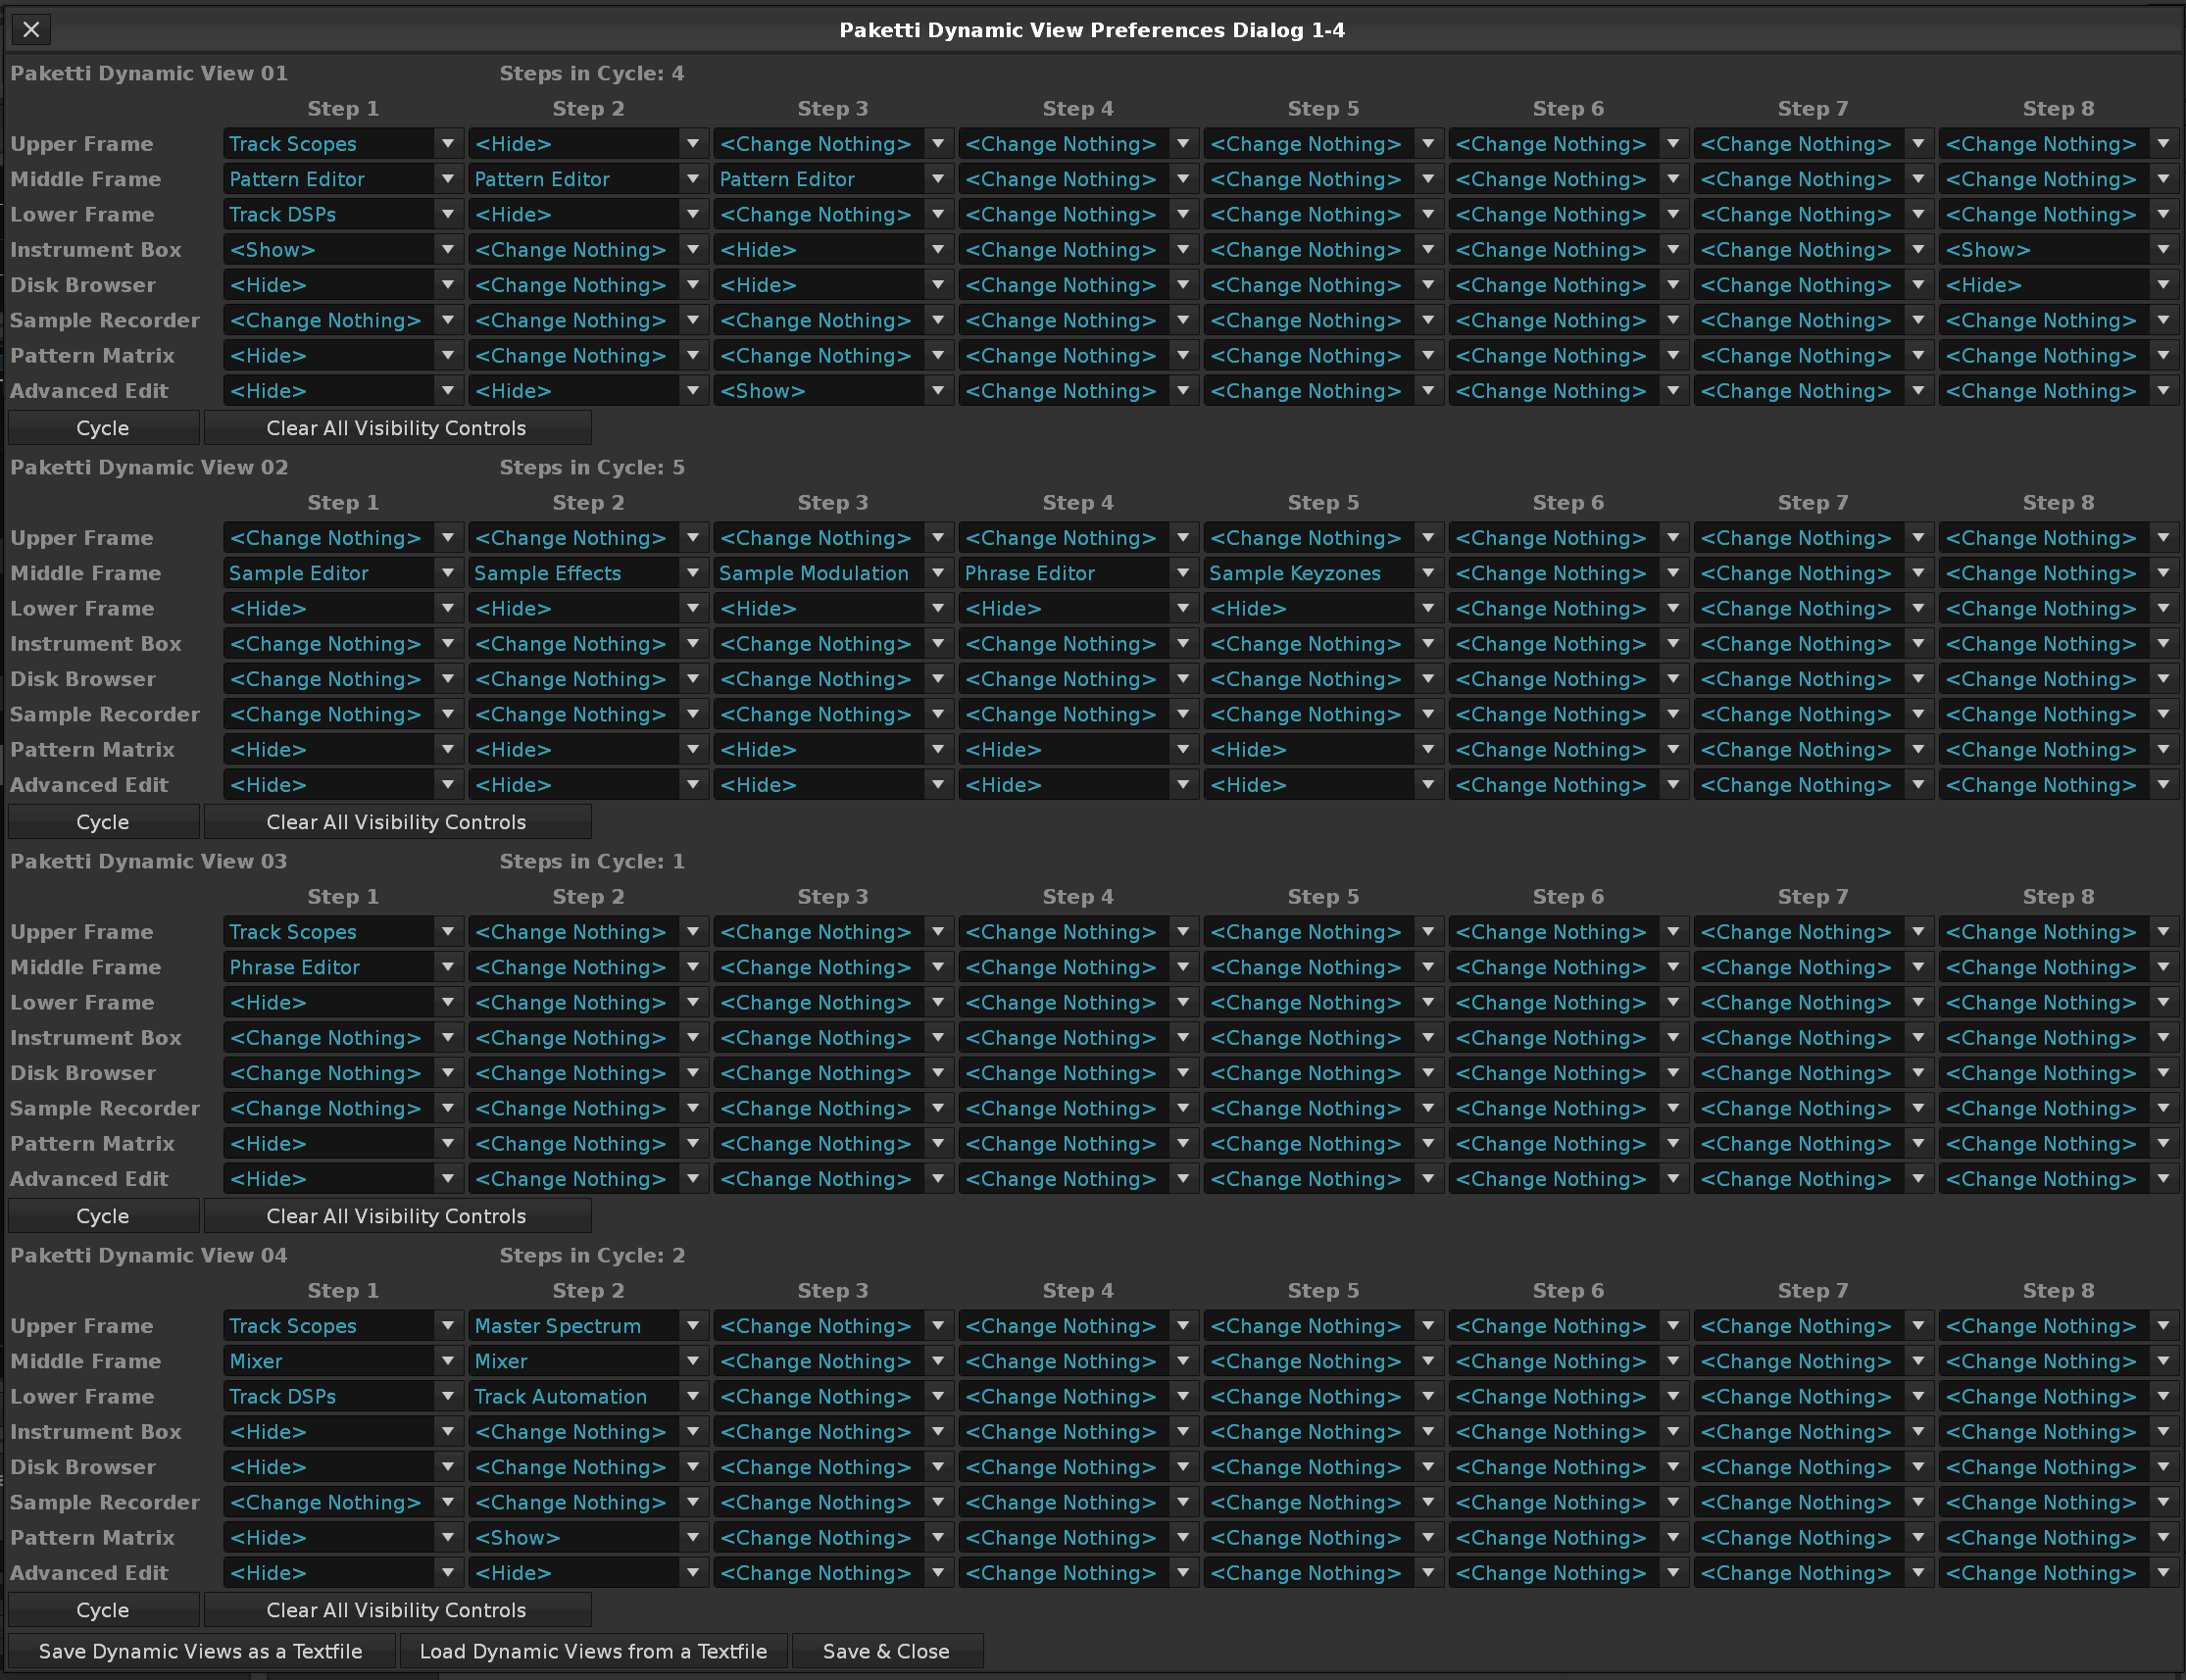
so you have maximum control over "view presets" but they're much more powerful than the 8 that renoise allows you to have, because they remember their state. You could, for instance, cycle, with one shortcut, from Pattern Editor to Sample Editor + show Sample Recorder, then press the same shortcut to hit Mixer, show Disk Browser + Pattern Matrix + Instrument Box, then again to only show Pattern Editor and Automation.
there's a method of creating 16 new tracks with 16 midi input channels and 16 midi output channels and 16 plugin devices, automatic send generation and line input generation, for those who want to use renoise with an external sequencer with a multi-out soundcard, or those who want to use renoise as a sequencer for external synthesizers and want to map the midioutput channels themselves. all of the generated samples will have midi control devices set up directly, and automation ready to go.
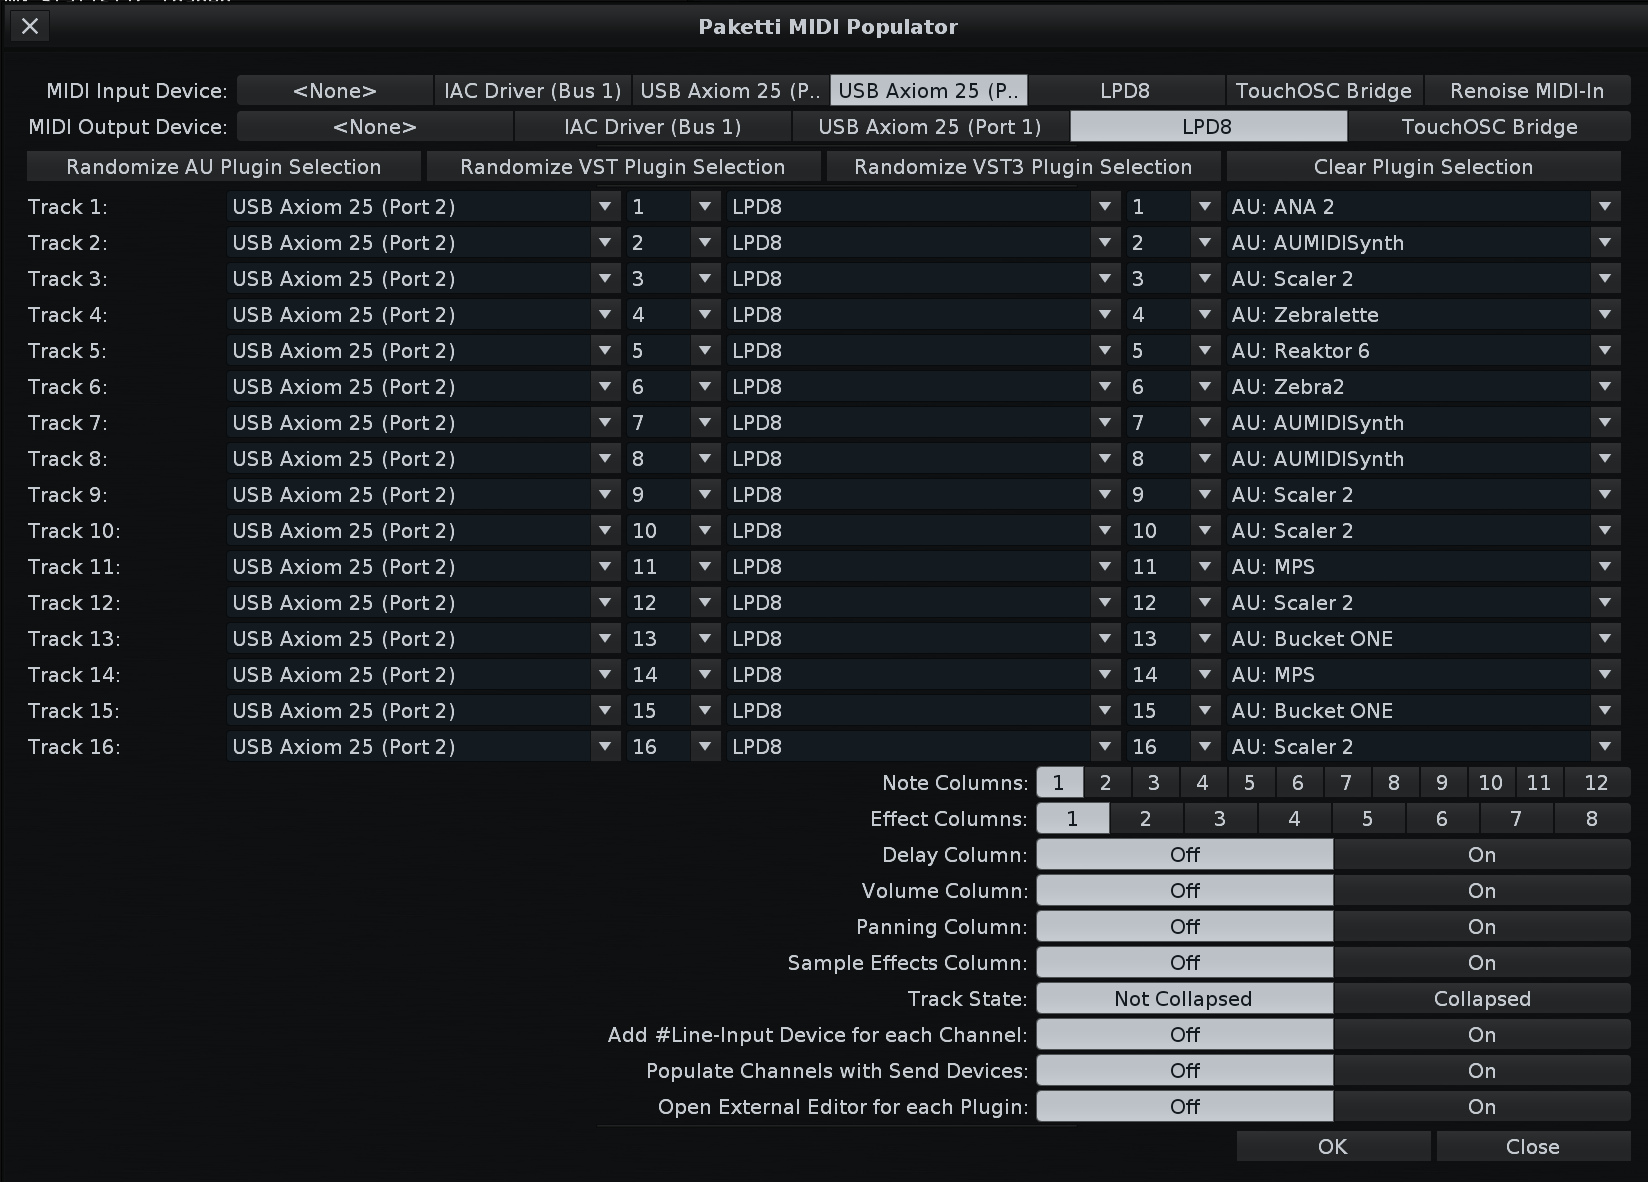
This allows you to set your Phrase Preferences - i.e., when you use the Paketti -specific shortcut for creating or modifying current Phrase, the settings will be added.
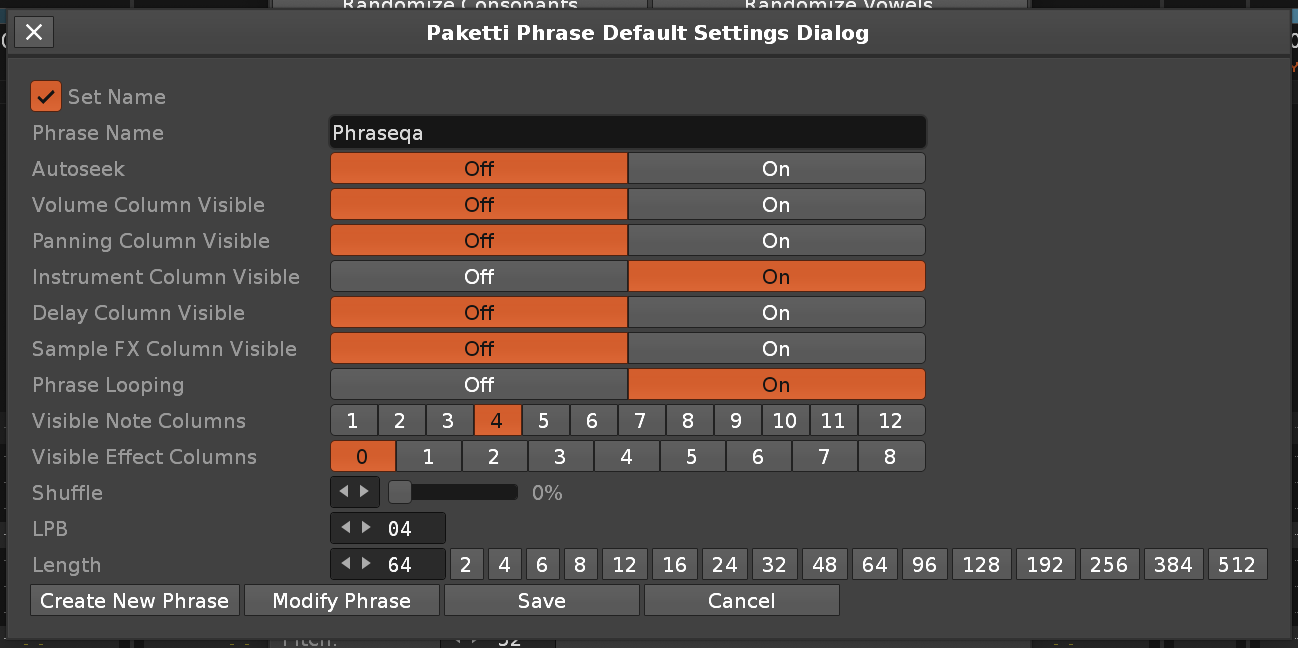
An Advanced-Edit style panel for the currently selected phrase, reached from Main Menu:Tools:Paketti:Phrases:Paketti Phrase Value Processor Dialog... (also on Phrase Editor:Paketti:Paketti Phrase Value Processor Dialog... and the keybinding Global:Paketti:Paketti Phrase Value Processor Dialog...). It works on either the selection in the phrase or the whole phrase (the "Selection only" toggle), and a Content Mask decides which note/effect columns each operation touches.
Standalone menu entries and keybindings exist for Flip, Shrink, Expand, Mirror and Quantize (e.g. Phrase Editor:Paketti:Phrase Value Processor Flip Notes) plus Cut/Copy/Paste Region, using full-mask, selection-first defaults; open the dialog when you need to set the mirror centre, quantize strength or a partial mask.
This uses espeak-ng for creating spoken word samples using text-to-speech synthesis.
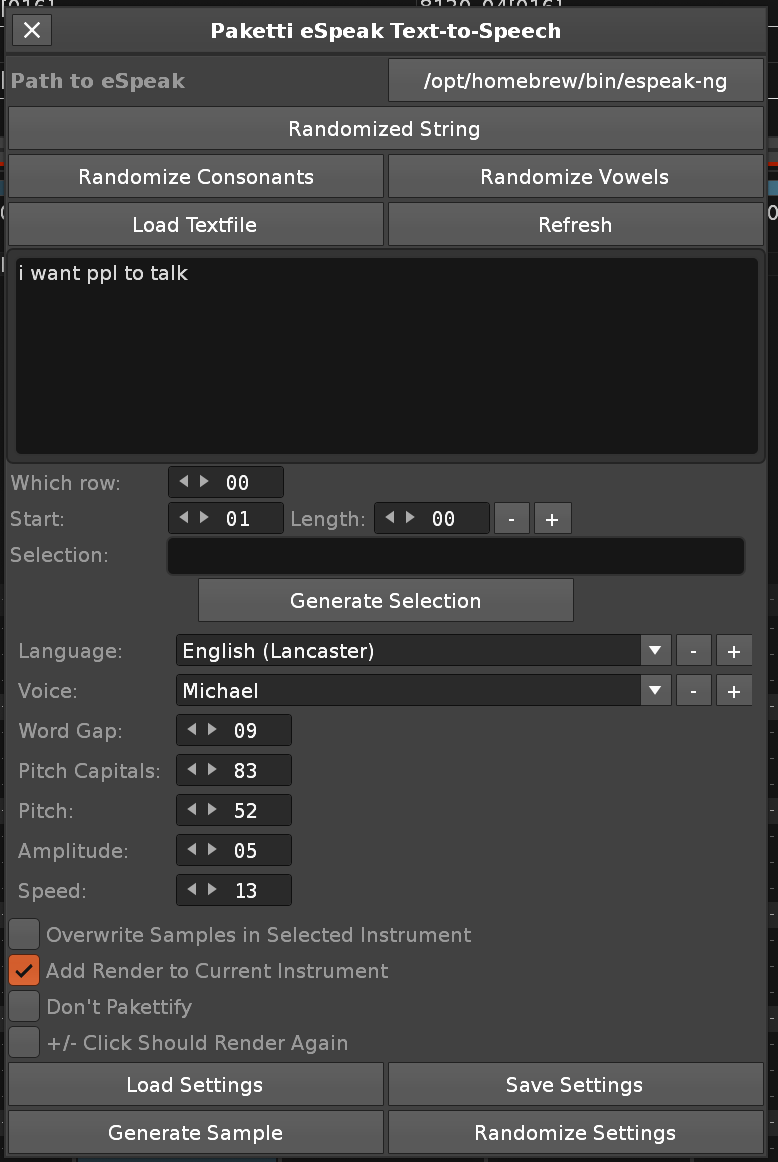
there's randomizers for parameters of selected device, a mono-device which can be added or toggled on/off from the channel for quickly monoing
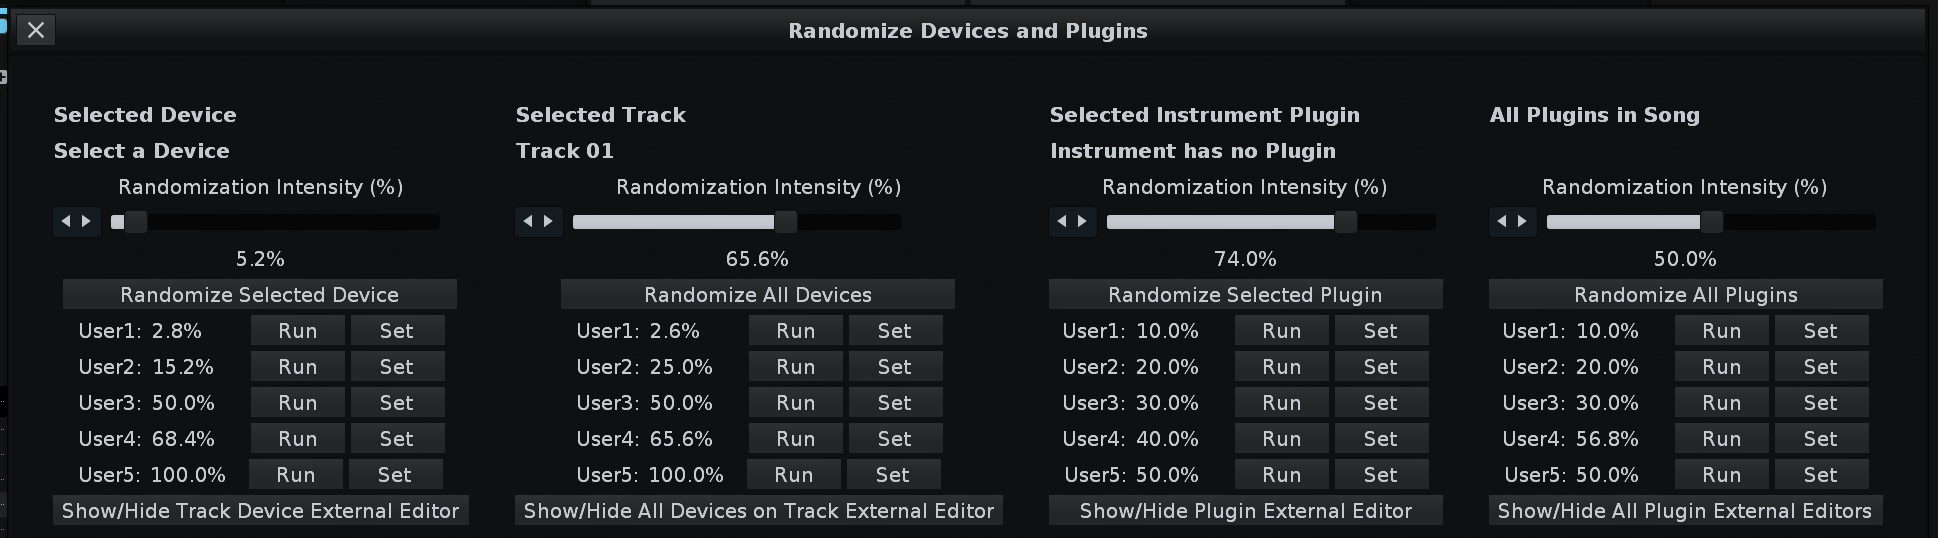
the same shortcut + midimapping loader for devices, is also available for plugins, so vst,vst3,audiounit,ladspa,dssi softsynths can be shot to the instrument box with shortcuts + midimappings
there's an inverter device which inverts the audio - using the Gainer device. This can be added to both the Sample FX Chain and the Track DSP Chains.
The send and multiband send shortcuts load the native devices "correctly" aka "Keep Source and volume at zero" as opposed to "mute source and volume at max"..

I have written midimappings for directly inputting automation points to the currently selected automation parameter And also a shortcut for opening a dialog for writing automation points to exactly which pattern row you are on And also randomize selected automation parameter And randomize all automation parameters of selected device And multipattern automation curve drawing And midimapping for select start and end of automation and also mapping for changing selection curve up down exp Linear etc And also flood fill of selection in automation parameter to end of pattern And a shortcut for cycling through all automation parameters that have been defined by user (written to)
There are also value-axis transforms (Flip Automation Horizontally/Vertically, Scale Automation to 50/90/110/200%) and, on the time axis, Quantize Automation Times to Grid (snap each point to the nearest line), Shrink Automation Time (Halve) and Expand Automation Time (Double) (scale point times around the selection start). These work on the automation selection range, or the whole pattern if nothing is selected, and are on Track Automation:Paketti: menu entries plus Global:Paketti: keybindings and MIDI mappings.
The note transforms from the Phrase Value Processor are also available directly on the Pattern Editor selection, across multiple tracks and note columns, from Main Menu:Tools:Paketti:Pattern Editor:Pattern Note Transforms Dialog... (also Pattern Editor:Paketti:Pattern Note Transforms Dialog...). Mirror inverts note pitch around a centre note; Flip reverses note-event timing around the selection centre (delay-aware); Quantize pulls notes toward the nearest line with an adjustable strength and an optional Preserve Lengths. Safe mode aborts any move that would push a note out of range instead of clamping or dropping it. Standalone entries exist too: Pattern Editor:Paketti:Pattern Mirror Notes in Selection, ...Pattern Flip Notes in Selection, ...Pattern Quantize Notes in Selection (with matching MIDI mappings).
This uses the G01 (Glide to note) trick to allow for playing really long samples, even if the pattern would be shorter than the length of the sample. The sample will play until the end, and then replay again at the start of the next replay. This means you can have a 4 second drumloop but play 20 minutes of pads on top of it.
there's a midimapping + shortcut that 1) shows sample recorder 2) starts recording 3) press the shortcut again, it stops the recording, throws in the 8 macros so you can quickly start recording anything by just pressing the shortcut or holding down a midi button, let go of the midibutton, sampling stops
there's a pattern cheatsheet which lets you input pattern commands to either selected row or selection in pattern:
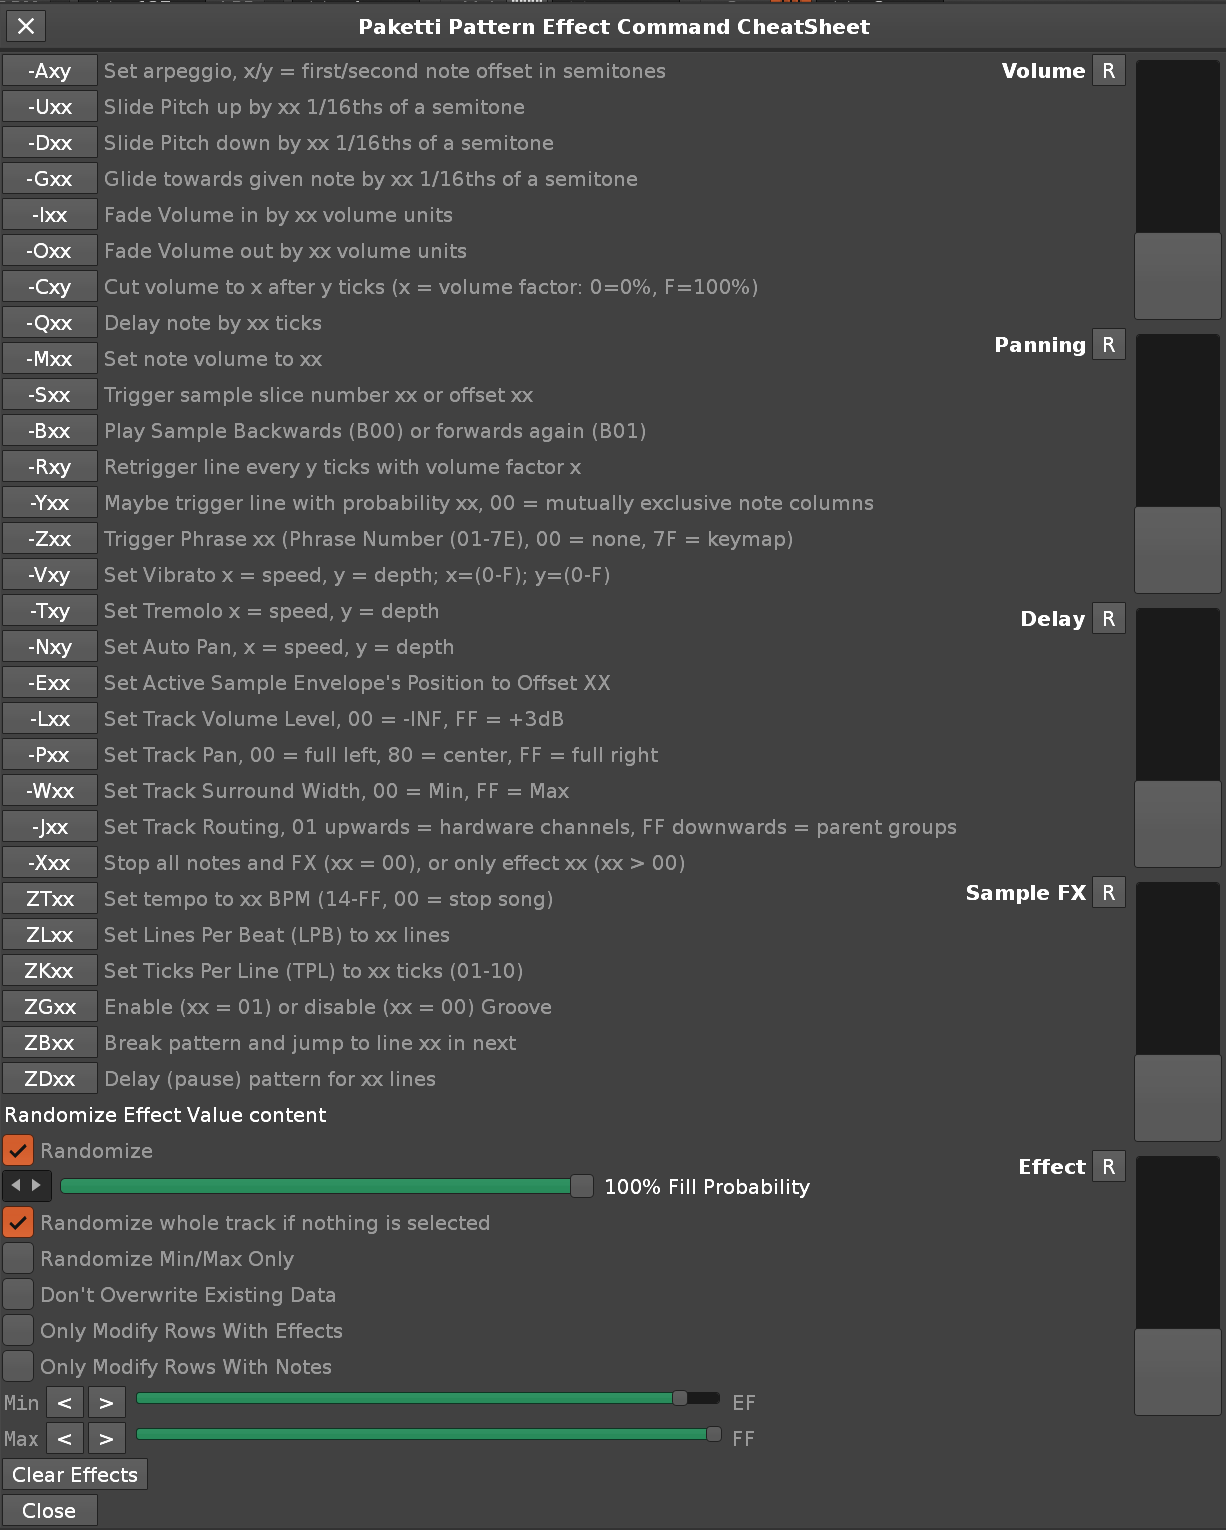
there's shortcuts + midimappings for inputting volume, panning, delay, samplefx effect commands and effect parameters to the selection in pattern
there's "flood fill by editstep" shortcuts which let you take what's under your cursor and repeat it every 6th row or 8th row etc, or every row.
there's a replicate at cursor shortcut, which enables this kind of stuff:
https://www.loom.com/share/a437d74618934e9db634ceb41b1c5b9a?sid=ead6a274-1a6a-4ea1-a068-344fed4aef23
there's a "Set Repeater Value" Knob midimapping which will either 1) add Repeater and activate it 2) detect Repeater exists and modify the parameters, allowing for stuff like this:
https://www.loom.com/share/f4f94d05045a4df49896d52202d3adf7?sid=9c7c6c79-005d-48f4-ba21-ac06475b5bfc
there's shortcuts for changing pattern length to 4, 8, 16, 24, 32, 48, 64, 96, 128, 256, 512 - methods for duplicating content with 1-256 row patterns to double it, then LPB*2 diskwriting aka rendering a new sample, but making a clone of the pattern and setting it's LPB to current LPB, then the clone of the pattern has LPB times two, and the audio playing there. there's seamless rendering, aka if you have anything below 257 rows of pattern, it will duplicate it, render it, select the beginning 256 rows (so you can delete them if you like) and add a loop to the other 256 rows so you can have a reliably looping (mostly) long pad with tail mixed in.. mono to stereo converters for sample data (mono to left, right blank, mono to right, left blank, mono to stereo with both).. there's a yt-dlp downloader that downloads the full audio from a youtube video, instagram, facebook, twitter posts, and it already has the macros loaded in.. and there's multiple missing shortcuts for sample pitch finetune panning loop etc controls, same for midi.. i could go on. i've done max 4 hour demos of going through all the features, normally around 45minutes to 1,5hours depending on what i remember to show
there's "Duplicate Instrument and Reverse" - which both makes a copy of the currently selected instrument, and then reverses the sample, and selects the sample. Duplicate Track and Instrument - will take the notes that are there in the current track. + track dsps, and make a new track, select the track, and duplicate the instrument. and if you have a plugin open in the original instrument, and duplicate the instrument with this script, then it closes the plugin external editor, and duplicates the instrument, jumps to the newly created track, and opens the plugin's external editor for it. there's a dialog that lets you randomize a selected device, or all devices in a selected track, or selected plugin, or all selected plugins, -- there's 5 different flavors of all four of those, with percentages you can set for them. there's a "duplicate track with selected instrument", meaning you can keep copying the note content, but it'll be branded with your current instrument, instead of it being a duplicated instrument.
the randomize with percentage was from ModPlugTracker. there's also a bunch of features from PlayerPro, such as this note inputting dialog, which lets you input notes, with editstep, to selection, or current row, meaning you can do stuff like this. there's also a method of hovering the mouse to write effect columns to the selection in pattern.. i've also replicated the OctaMED Pick/Put Note technique, which lets you pick any note column + effect column content, and put it down. think of it like macros for note column + effect column content. you can do them with shortcuts (both picking up and putting down) but also with midi. so you could for instance have chords grabbed and keep slamming them down - there's also controls for printing the information with a specific instrument.
one thing i keep forgetting is the Launch App Selection. you can define 6 apps, and when you run the shortcut, or menu entry, or click on "Send selected sample" in the dialog, it saves a temporary file and loads it in the app. such as audacity, apple music, ableton live (straight to session view). there's also a backup folder (3 places) where it saves to one of the three places depending on the shortcut
I've also built two dialogs for showing keybindings - with fuzzy search. one shows Paketti shortcuts only, the other shows all Renoise KeyBindings but can be filtered with tools or without tools, etc.
then there's tiny audio tools such as "strip silence", "move beginning silence to the end".. shortcuts for invert left channel, invert right channel (or invert both channels). audio rotators, so moving the beginning to the left until it crosses over to the end, i.e. "nudge audio left / right", then there's rotation for moving the audio waveform up and down for extreme dcoffset and clippy distortion. then there's a DC Offset kick generator, "Selection in pattern to group" (turn selected tracks into one group)..
midimappings for toggling effects on and off. midimappings + shortcuts for displaying the external editor on Master or selected track, of a specific track. i.e. if you use renoise for mastering and always have certain types of effects on master, you can show/hide that specifically named effect, no matter where it is in the effect chain. and if it's not in the track dsp chain, then it will be loaded and added in.
uncollapse/collapse all tracks for clearing up visual clutter
Convolver IR export and IR import - when you export the selected IR, it opens up in the sample editor, so you can modify it, then import it back in.
Switch Plugin Auto-Suspend On/Off
"Save All Samples to Backup Folder 1...3" - all samples in the song will be saved to your preferred folder
Unison Generator, takes a chipsound and makes 8 identical copies of it, shifts each of them left by 1/8 to 7/8 - modifies the volume, randomizes finetune, randomizes panning, and drops the overall volume (and includes the instrument macros in the copy) - for a nicer chipsound
there's hundreds of Section/Sequence/Selection shortcuts for queueing what plays next, or skipping to the next section or previous section or "what's next in the queue" and wiping the queue
A Global shortcut for Clone Current Sequence
Resize all non-empty patterns to 96 rows.. and Resize all non-empty patterns to current pattern rows
Create Identical Track - takes the Note Columns / Effect Columns & Visible Columns&copies
Find Missing Plugins... / Remove Missing Plugins (Main Menu:Tools:Paketti:Plugins/Devices:, also Mixer and DSP Chain right-click) - finds VST/VST3/AU/LADSPA/DSSI effects a song refers to that aren't installed any more and left dead placeholders in the chains. Checks track DSP chains and sample FX chains (both cleanable) and instrument plugins (reported only, since removing one would throw away the instrument's settings). Native, routing and meta devices are never considered. Find shows a report grouped by track with a Remove These N button; Remove does it straight away. One undo step.
Find Multi-Instrument Columns (Main Menu:Tools:Paketti:Pattern Editor:) - finds note columns playing more than one instrument and jumps to them, scanning the pattern sequence in playback order so hits arrive in the order you'd hear them. Next/Previous/Rescan all have their own shortcuts that work without the dialog open and wrap around at the ends; the dialog itself has a button to split the track you just landed on. Pairs with Split Track by Instrument.
Spread Round Robins by Velocity (Main Menu:Tools:Paketti:Instruments:, Sample Mappings and Instrument Box right-click, and a button in the Keyzone Distributor) - when several samples sit on the SAME key, that's a round robin, and this splits each such group into its own velocity bands independently of the other groups. Four snares on C-4 and three hats on F#4 each get their own spread in one pass. Eight or fewer uses the fixed 71-7F / 61-70 / ... layout with the lowest stretched to 00; more than eight divides 0-127 evenly. Turns VEL->VOL off, because in a round robin velocity picks which sample plays rather than how loud it is. Keys with a single sample are untouched, and read-only slice mappings are skipped.
Split Selected Track by Instrument (Main Menu:Tools:Paketti:Pattern Editor:, also in the Pattern Editor Tracks and Mixer right-click menus) - a track with instruments 00, 03 and 07 jumbled together becomes three tracks, one per instrument, inserted right after it. Different from Explode Notes to New Tracks, which splits on pitch (one track per note, for drum kits) - this splits on instrument. New tracks inherit the source's DSP chain, colour and column visibility so nothing changes how it sounds, and volume/panning/delay/sample-effects travel with each note. Notes with no instrument number follow the last instrument in that column, and track effect commands follow the leftmost instrument on their line. Works across every pattern in the song. The plain version is non-destructive - it keeps the source track untouched and just mutes its note columns, so nothing double-triggers and unmuting gets you the original back; (Delete Source Track) removes it instead. There's a Split All Tracks by Instrument for the whole song.
Compact Columns to the Left (Main Menu:Tools:Paketti:Pattern Editor:Compact Columns to the Left, also in the Pattern Editor and Pattern Matrix right-click menus, with (Selected Track) variants) - Paketti's Hide All Unused Columns only ever trims from the right, so a track with notes in note columns 1 and 4 keeps four columns visible with two empty ones stranded in the middle. This closes the gaps: every note and effect column that holds data anywhere in the song slides left in its original order, and the visible column count drops to what's left. Note column names and mutes move with their columns. A column with data that you'd hidden gets revealed rather than buried, and one effect column is always kept visible so there's somewhere to type a command. One undo step for the whole song.
For a selection in sample editor, you can press a shortcut to "create new instrument & loop". there's "mute or solo selection in pattern", expand/shrink selection content shortcuts, set selection to selected instrument.. bypass all effects in track, or enable.. show all parameters of all devices in track
Oblique Strategies Dialog / Loader - it will randomly pick one Oblique Strategy from a list on the status whenever you save or load a song or restart Renoise
Paketti Midi Mappings - it shows some of the Paketti MidiMappings and if you have Midi Mapping "Learn" mode on, you can actually pick them yourself and assign them easily. for better discoverability
Output Routings dialog that shows all the tracks and lets you set the Output Routings in case you have a multi-out soundcard
Shortcuts for setting each track, or the Master, to a specific output routing channel (01-64) for those with multi-out soundcards
Track Renamer - select a bunch of tracks with selection-in-pattern and rename them all in one go, one track at a time
Phrase Doubler / Halver (takes the content of the Phrase and increases the size or decreases the size
Set Phrase Length to 001-004-006-008-012-016-024-032-048-064-096-128-192-256-384-512
Set Pattern LPB 1-256 Set Phrase LPB 1-256
Print current BPM & LPB to Master track of Pattern - so can modify the tempo in another pattern -good for LPB*2 i.e. increasing resolution
Keep Sequence Sorted True/False/Toggle
15 frame fade in fade out for reducing clicks
Duplicate sample, maximize audio, turn to 16bit, save as wav or flac (in case you want to deliver them or post them somewhere)
Flip Sample - this allows for 1/2 1/4 1/8 1/16 flipping/rotating of a sample, good for beats if you wanna flip it or any other type of sample
Select first half of sample buffer shortcut - and second half too. midimappings for select sample buffer start and end, so you can just use two knobs to select the length and modify
Set loop mode off, forward, pingpong, backwards
Copy note-on sample to note-off at transpose 0, +12, +24, -12, -24 meaning when you hit a note off on a bassnote, the same basenote can play an octave higher or lower - good for octave basses
Jump to first track in next group / jump to first track in previous group
Midimappings for select instrument, select track, keyboard octave, editstep 0-64 and 1-64, double editstep halve editstep, beatsync line control / double beatsync / halve beatsync 8 midimappings for controlling the macros of the current instrument. meaning, you use the 8 midimappings on any track and you can control macro knobs without having to assign them to a specific instrument. i.e. they're "free" / "dynamic" for lack of a better word
Interval generator. shortcuts for adding +1 to +12 to the current note - adds a new note column, moves to it and adds a note that is +x or -x higher/lower than the original basenote. also midimappings for selecting multiple chord intervals - good for experimenting with basenotes and writing intervals in and seeing what happens. couple that with the Paketti Gater and you can go wherever you please really.
Wipe Effects from Selection in Pattern
Shortcuts for showing a specific number of note columns, or effect columns
Expose / hide note columns or effect columns - this replaces the Renoise "add new note column" by actually exposing it AND selecting it. much more intuitive
Direct shortcuts for writing Axx to Zxx effects and their content (+1 -1 +10 -10) to selection or row
Match delay column to current row (or panning, or volume).. means you have a row you've
Selected, run the shortcut, every row in the pattern gets the same delay, or panning, or volume setting
Note Interpolation (entering notes from beginning to end of selection so c-1 at 00 and c-5 at 64? every step has an interpolated value based on math
Randomize delay, panning and volume value for selected tracks and their columns
Flood fill with selection - takes your selection and fills the pattern with it in a loop
Shortcuts for setting visible columns (vol,pan,delay,samplefx) for all tracks globally clear/delete track dsp effects from current track
BPM increase +0.1 -0.1 +0.5 -0.5 +1 -1 +5 -5
Bypass all devices on all tracks
Bypass all devices on selected track
Set master output volume in dB to -INF or 0 or -0.1 +0.1 -1 +1 for better control
Midi mappings for setting global groove control 1,2,3,4
Midi Mappings for setting Global Groove 2 & 4 (downbeat?)
Multi-combos like "shortcut for toggling play, record, follow pattern, metronome on/off" or "toggle play,record,followpattern on/off, or record+followpattern on/off
Hide open track dsp device + sample fx device external editors
Shortcuts + menu entries for adding sample modulation devices (all available for volume, pan, cutoff, resonance, overdrive, pitch)
Shortcut for adding and opening formula device
Direct shortcut for exposing the pitchstep device external editor, which is included in all Paketti-loaded samples so you can immediately start pitching it up and around for extra randomness
Visual editmode for highlighting which track is selected, for those with aged eyes and who have grown tired of trying to figure out which track they've selected
Volume, panning, delay dialog with 16 sliders - basically another step control for setting specific settings, again 16 steps but can be reduced to 1-16 steps for each, so they can be offset
Shortcuts for starting playback at a specific row (000-512)..
Shortcuts for starting playback at a random line of the pattern, or random 2nd or 4th or 8th row (in order to be able to step across it in a stair/stepped way)
Play current line and step forwards, play current line and step backwards, for those who want to use renoise as a.. musical box?
Shortcuts for selecting a specific track i.e. 1-32, you set the shortcut and it jumps you there
Sample fx group + mod group shortcuts for modifying them, same with mute groups
Show/hide selected track's device 1 to 64, another external editor shower/hider
A mode to enter where if you're in effect column, it'll jump you to the next row in that track that has a note. so you can enter effects to where the notes are
okay.. just realized i completely neglected to talk about the "Paketti Automation" setup.
This brings Master track automation of Global Groove, LPB (1-32), BPM (20-300), EditStep, Octave, EditMode, Recorder, Pattern Length, Instrument Pitch, Instrument LoopStart, Instrument LoopEnd, and 3 other things that remain to be figured out and configured.
this means you can actually automate when the recording is on or off, when sample is being recorded (!), what the selected instrument pitch ir or selected instrument loopstart+loopend, and there's 3 more additional things that could be automated, if i could just figure out what they are. any ideas?
the reason why there's LPB + BPM control is that the BPM in Renoise Master track automation is 20-999 (!) and LPB is 1-256, so just a bit too much, i asked around a lot and 20-300 and 1-32 seemed to be the agreed upon, anything more, just let me know (64?). but to maintain automation resolution and "keeping it making sense", for most uses, these artifiical limitations are alright
i think the reason why i forgot to mention this was that i have had a tough time finding anyone to tell me what else could be done. i did experiments of using automation to change lower frame, middle frame, upper frame views, for instance. basically any script can be run like this. but i couldn't get anyone to talk to me about what they wanted and gave up and forgot about it
📝 View the complete changelog: CHANGESLOG.html
I've decided to move the full changelog with all the improvements, features and plumbing updates to a separate file, so that it is easier to maintain this fledgling document.